
Faux Oil Painting Hack: How To Create Vintage Canvas Art For Your Halloween Gallery Wall
Are you looking to create a vintage-inspired gallery wall that gives off those spooky Halloween vibes without breaking the bank? Look no further! Today, I’m sharing my simple DIY hack to transform printed pictures into stunning faux oil paintings using Mod Podge. This budget-friendly method is perfect for creating a timeless, antique look that will elevate your home decor, especially during the Halloween season.
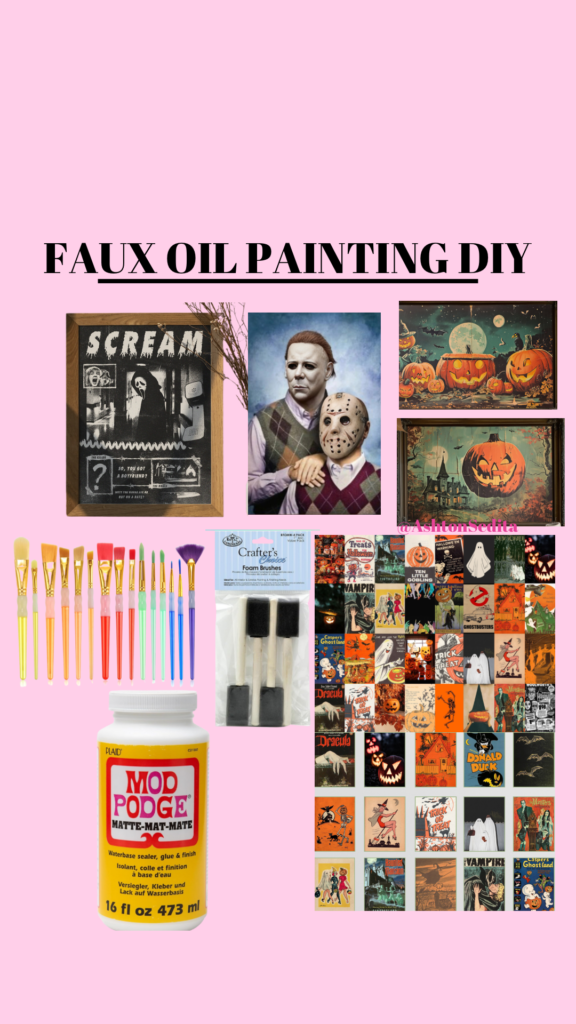
What You’ll Need for This Faux Oil Painting Hack
Before we dive into the process, here’s a quick rundown of the materials you’ll need:
– Printed pictures (I found mine on Etsy [LINK] and printed them at Walgreens)
– Matte Mod Podge [LINK] (THIS IS KEY- MATTE)
– Foam or bristle brushes [LINK]
– A clean, flat surface for working
– Optional: Sandpaper for distressing the frame or artwork edges
– Frames for your gallery wall (found mine at thrift store)
– Drop cloth to protect your workspace [LINK]
The beauty of this DIY project is its simplicity. You don’t need to be an expert crafter to achieve an authentic vintage look—just some patience and creativity!
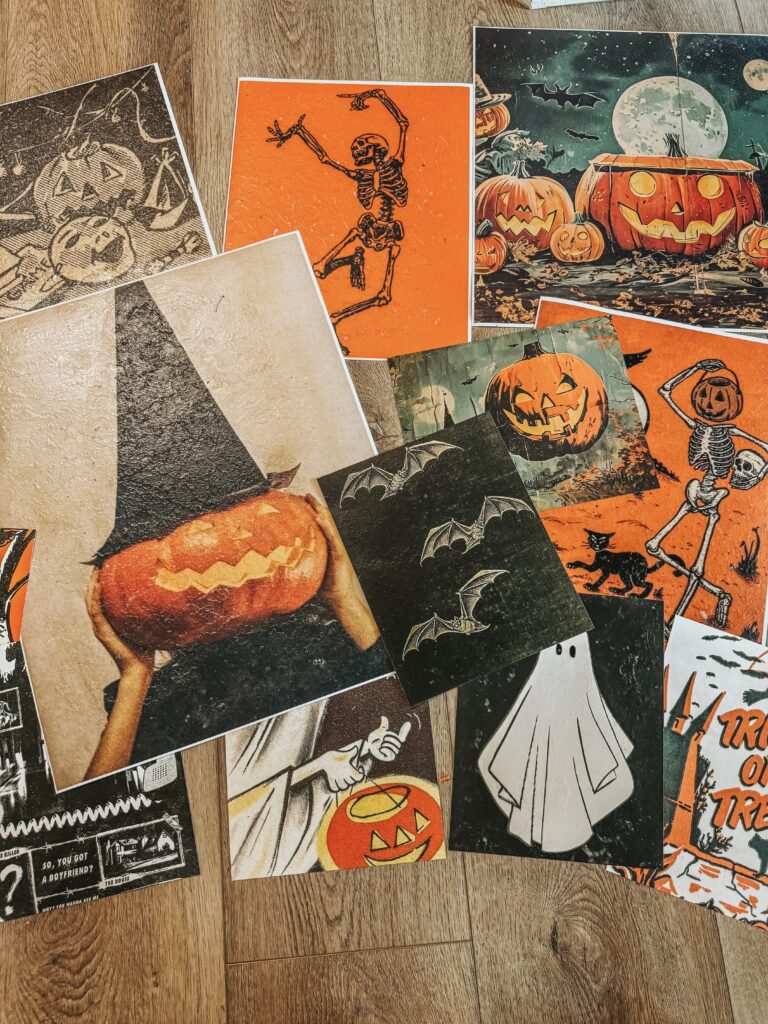
**Step 1: Choose and Print Your Artwork**
Start by selecting the pictures you want to turn into vintage-looking oil paintings. Etsy has a wide variety of printable images, especially if you’re looking for something that fits the Halloween theme. From eerie portraits to gothic landscapes, you can find designs that perfectly capture the spooky season. Honestly this would be perfect year round for any picture.
Once you’ve selected your designs, you can send them to your local Walgreens (or any print shop) for quick and affordable printing. I recommend printing on photo paper with a matte finish for the best results(I did regular shine so no worries if that is the only options). The texture of the photo paper will help the Mod Podge adhere and create that faux oil painting texture.
**Step 2: Apply Your First Layer of Mod Podge**
Now that you have your printed images, it’s time to work some magic. Lay your prints on a clean surface and grab your Mod Podge and a foam or bristle brush. I like using matte Mod Podge for this project, as it helps enhance the vintage feel.
Dip your brush into the Mod Podge and apply a thin layer over the entire surface of your printed image. Make sure to use even strokes and work in one direction (horizontal or vertical). This first coat serves as a base and prepares the surface for adding texture in the next steps.
Allow the first layer to dry completely before moving on to the next step. This usually takes about 15-20 minutes.
**Step 3: Dabbing and Texturing the Surface**
Here’s where the faux oil painting effect really comes to life. Once the base layer is dry, you’re going to apply a second layer of Mod Podge. But this time, instead of using smooth strokes, you’ll want to dab and blot the Mod Podge to create texture. Use a stippling motion with your brush to mimic the look of oil paintbrush strokes.
Be intentional with the texture, especially around areas with more detail or shading in the artwork. The more variation you add, the more convincing the final piece will look. Don’t worry if it seems messy or uneven—this is what will give the print its vintage charm!
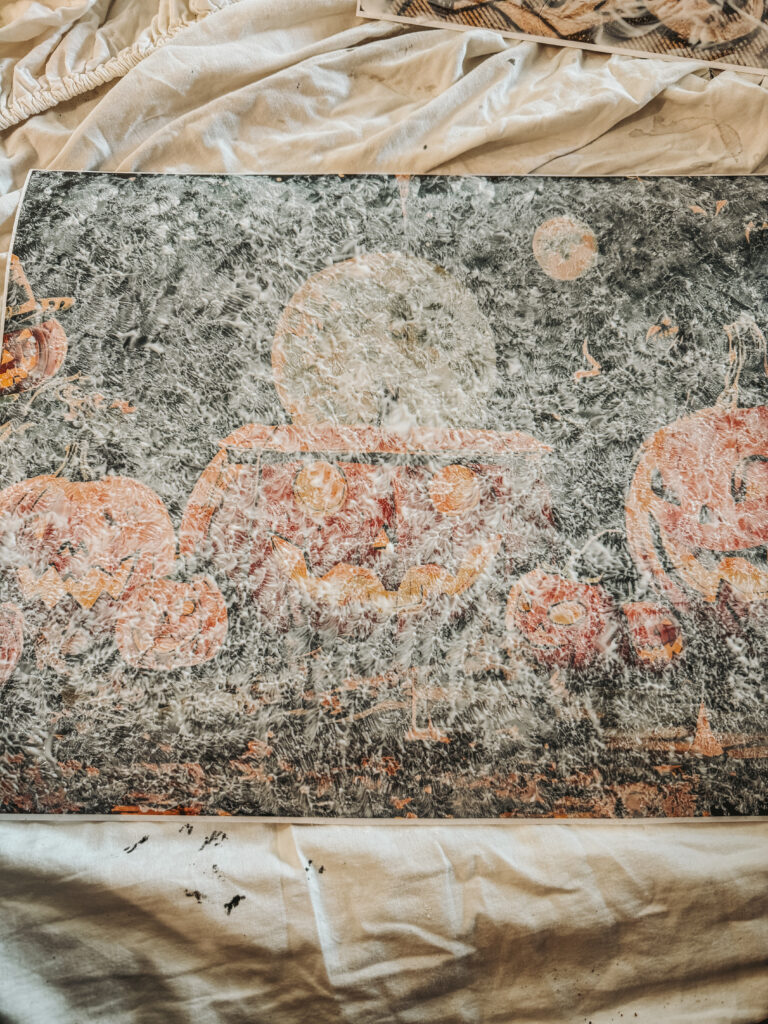
**Step 4: Let It Dry and Assess**
After texturing the Mod Podge, let your print dry for at least 1-2 hours. Once dry, you’ll see the brush strokes and stippling have created a subtle texture that makes the print look like an old canvas painting.
At this point, assess the texture. If you want to add more depth or texture, feel free to apply a third coat, again using the dabbing technique. The key to making it look like an authentic oil painting is layering!
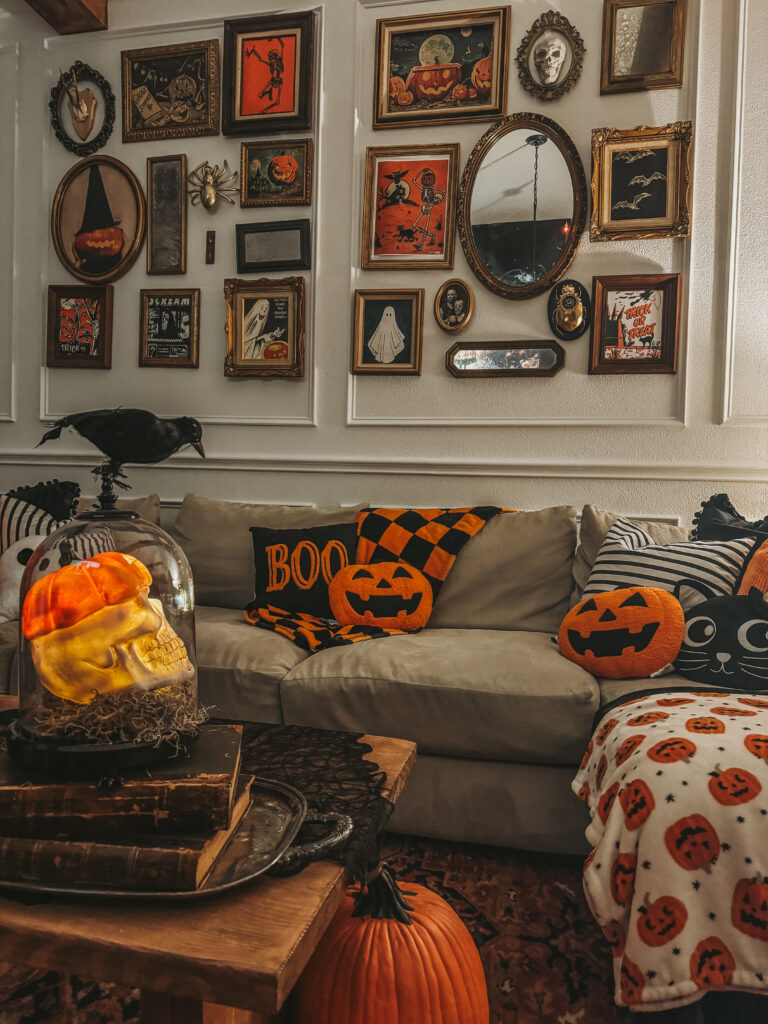
**Step 5: Frame and Display Your Art**
Once you’re happy with the final texture, it’s time to frame your artwork. I love using thrifted or distressed frames for that extra vintage feel. If you want to distress your frames even further, you can lightly sand the edges or add a coat of antiquing wax for a truly aged look.
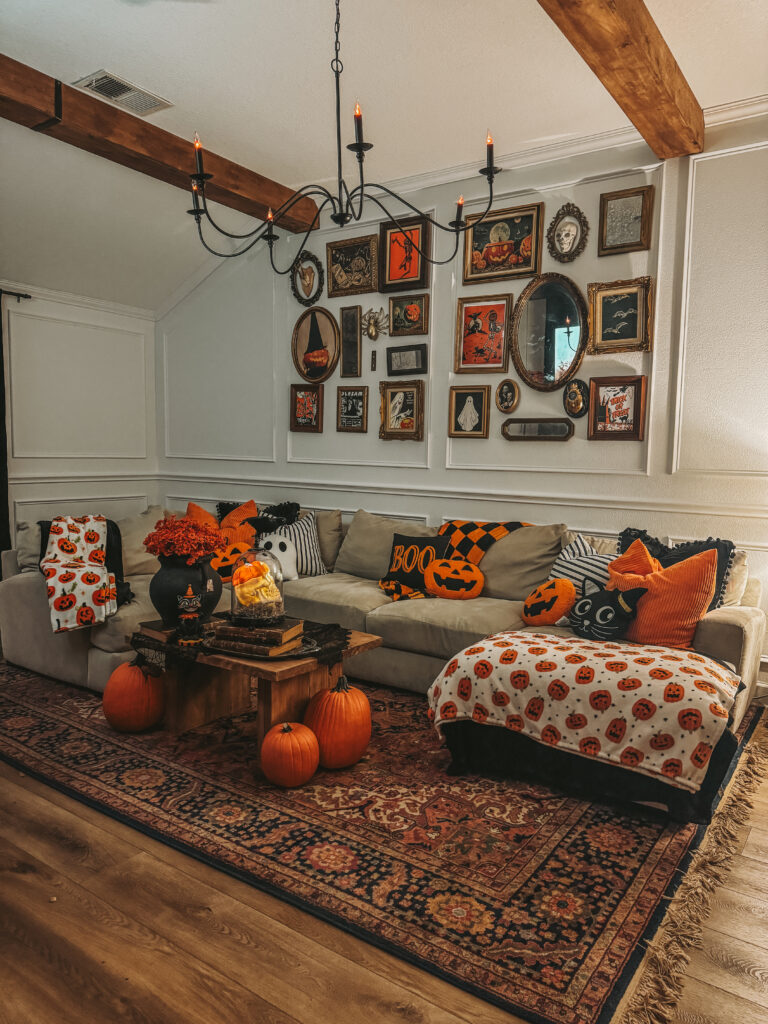
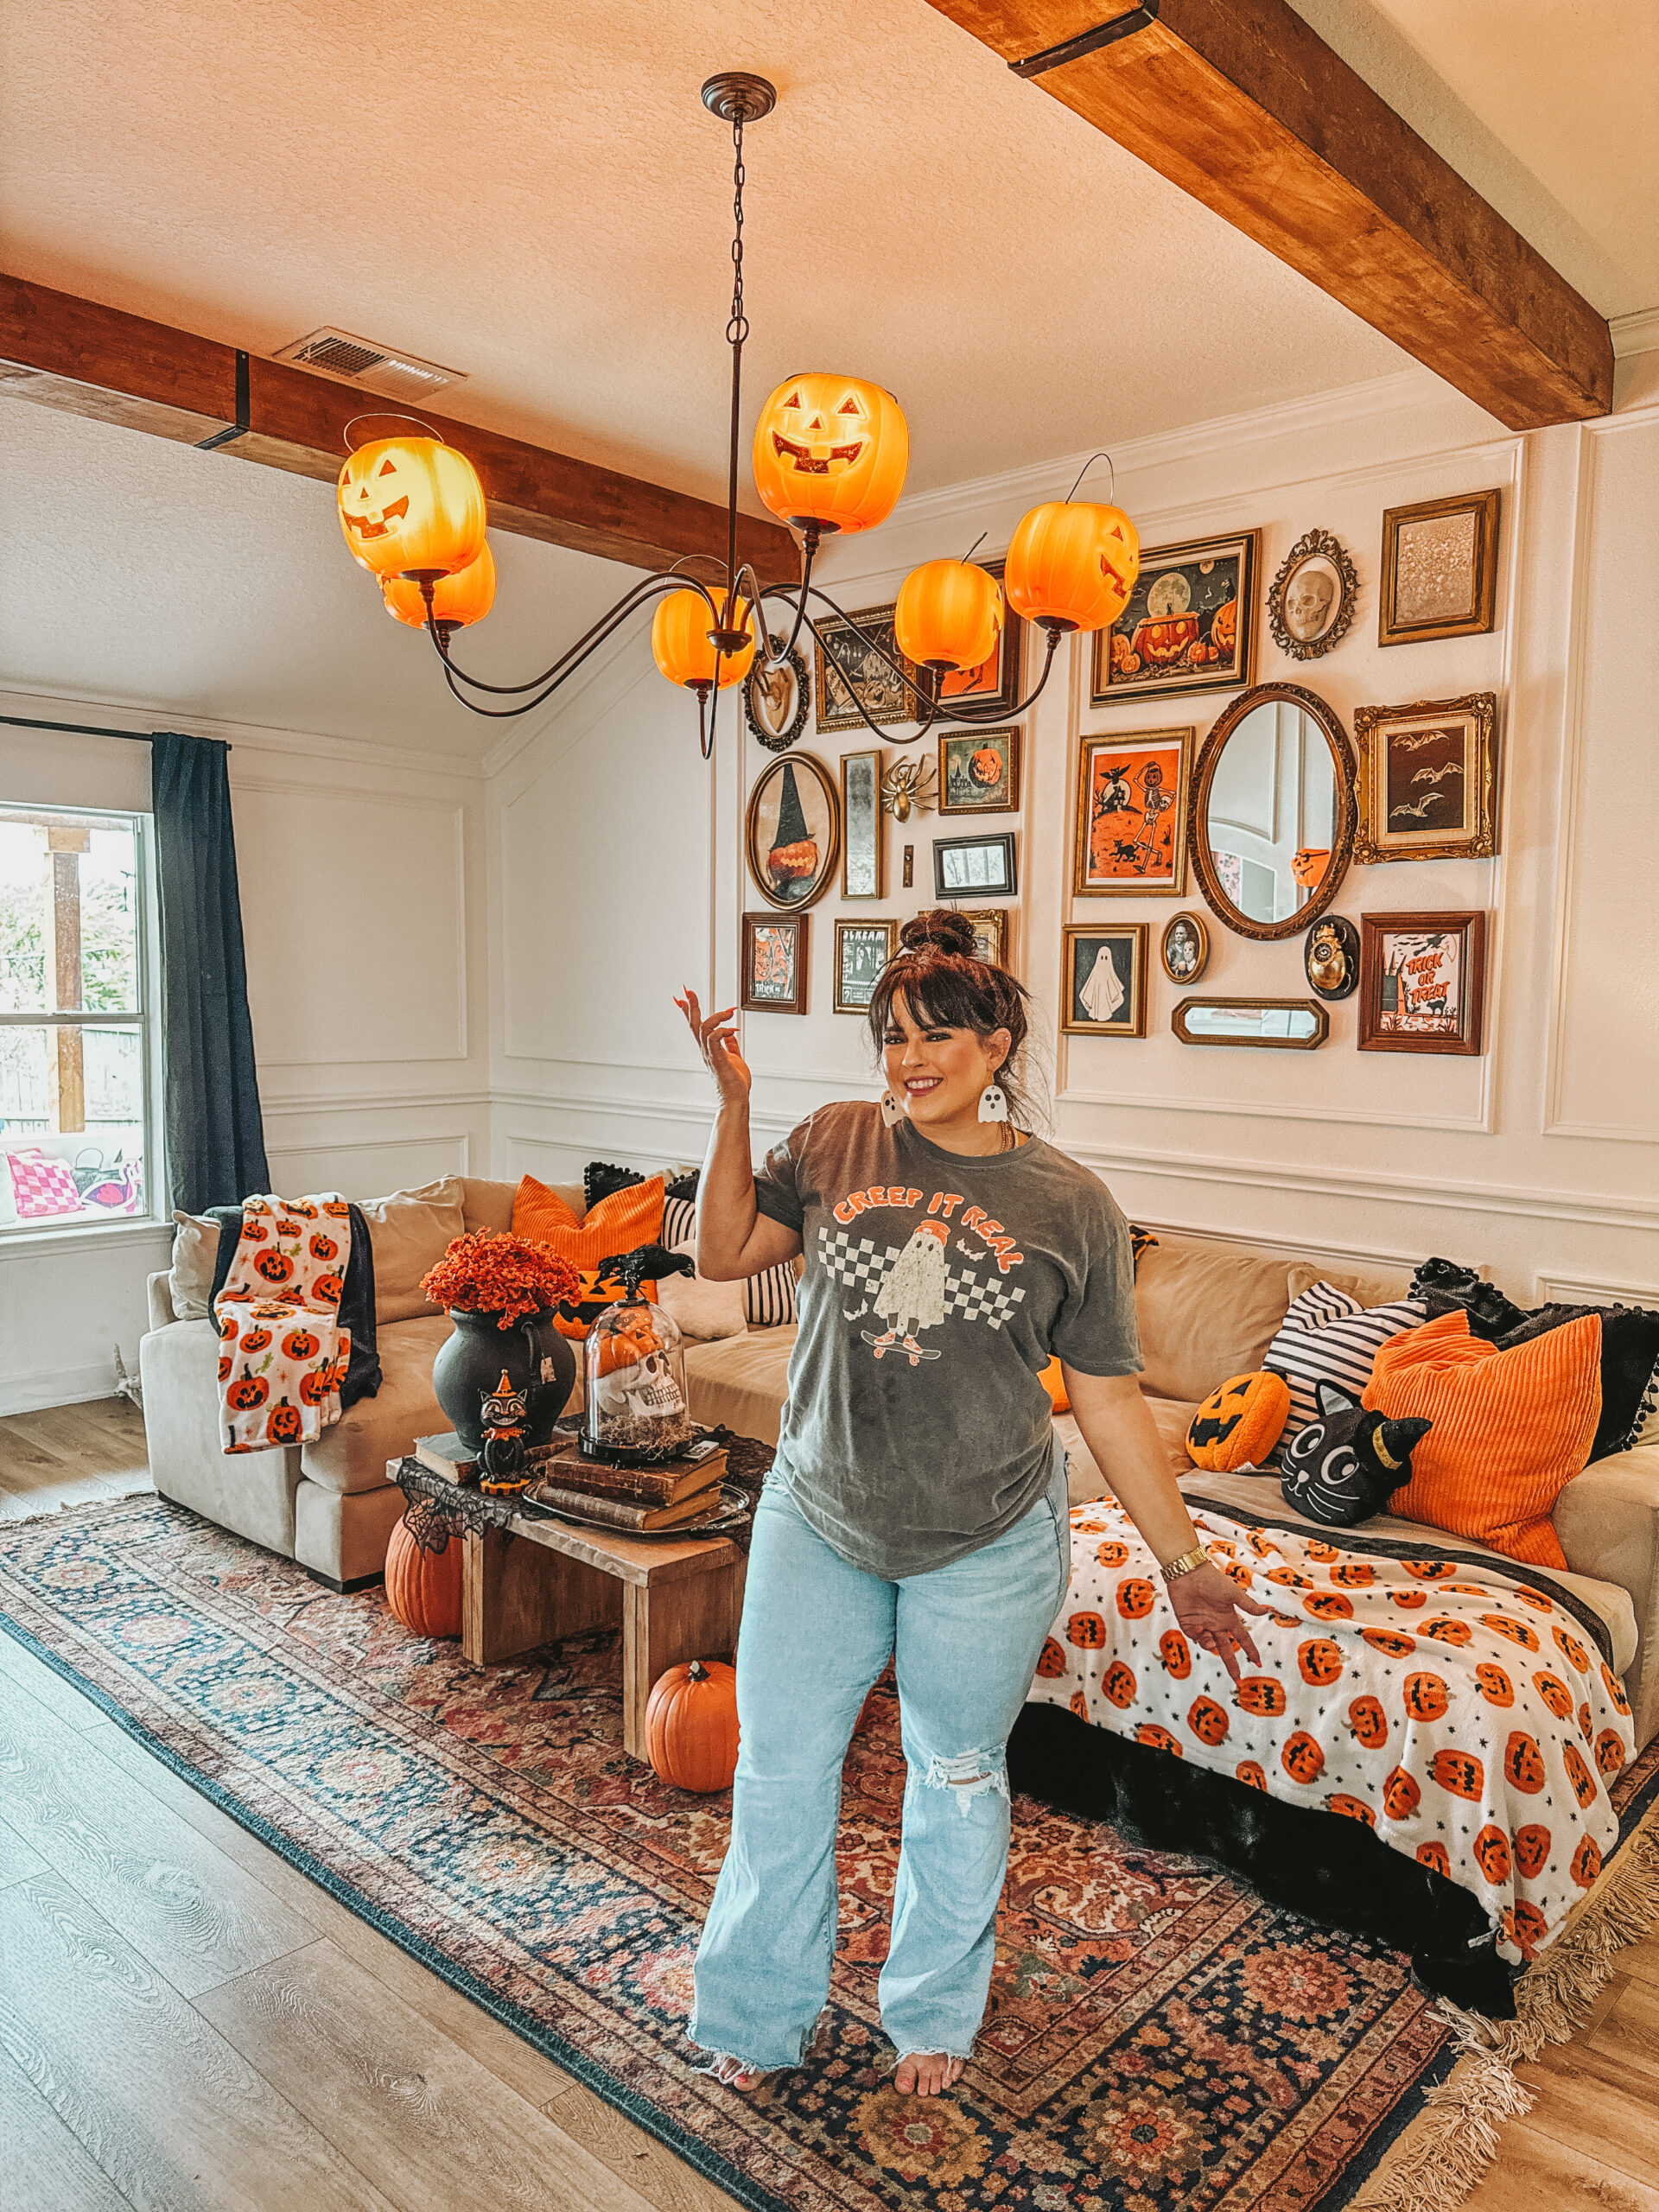
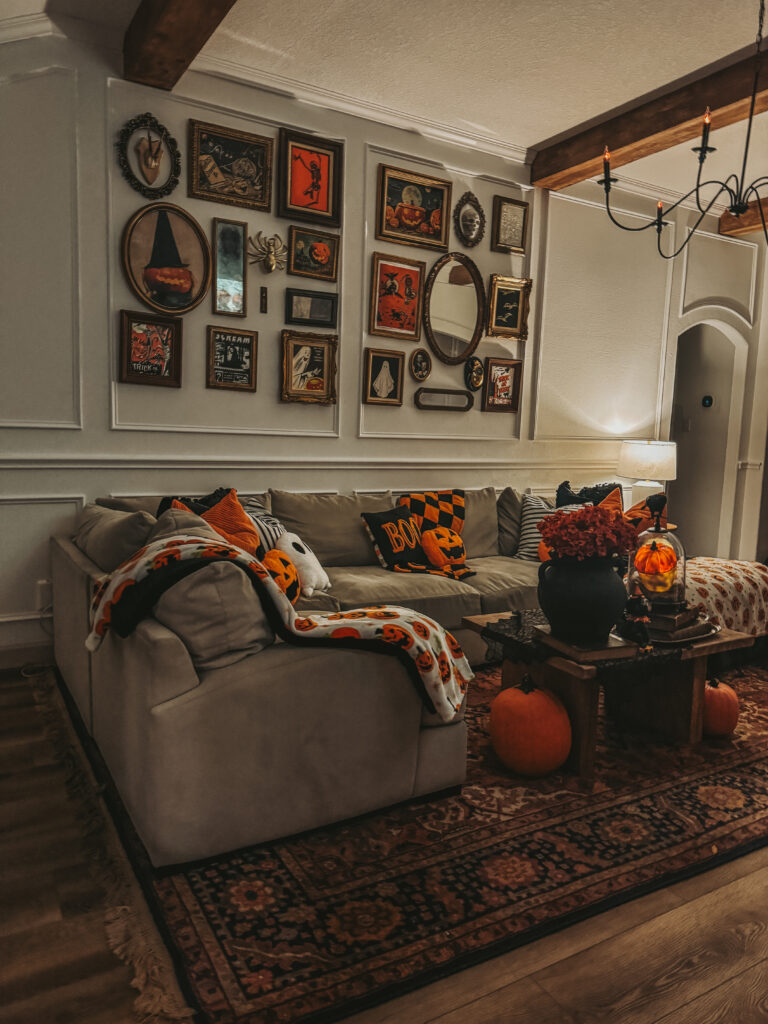
Now you can hang your framed faux oil paintings on your gallery wall. For Halloween, consider adding spooky portraits, eerie landscapes, or gothic architectural pieces. This is the perfect way to add a vintage, haunted vibe to your home decor.
**Tips for Creating the Ultimate Halloween Gallery Wall**
Now that your faux oil paintings are ready to display, it’s time to curate your Halloween gallery wall. Here are a few tips to make sure your display feels cohesive and spooky:
1. **Stick to a Theme**: Whether you’re going for gothic, eerie, or classic Halloween vibes, stick to one consistent theme. This will help your gallery wall look curated and intentional.
2. **Vary Your Frame Sizes**: Mix different frame sizes and shapes to create visual interest. You can find plenty of vintage-looking frames at thrift stores or repurpose frames you already have.
3. **Add Dimensional Elements**: Want to take your gallery wall to the next level? Add some dimensional elements like faux cobwebs, vintage mirrors, or Halloween-themed ornaments around your frames for extra spooky charm.
4. **Layer Textures**: Play with texture by adding velvet, dark wood, or metal accents to your wall. These elements will complement your faux oil paintings and enhance the vintage aesthetic.
5. **Lighting is Key**: Use soft, ambient lighting to illuminate your gallery wall. String lights or flickering candles add a mysterious atmosphere, perfect for Halloween. ORRRR- you could do a FUN Pumpkin chandelier DIY [blog post].
Why Faux Oil Paintings Are Perfect for Halloween Decor
Faux oil paintings offer a timeless and eerie quality that fits perfectly with Halloween decor. The textured brushstrokes, the vintage frames, and the aged look of the artwork give off a haunted, mysterious vibe—ideal for the season.
Plus, this DIY project is budget-friendly and allows you to customize your art exactly how you want it. Whether you want spooky Victorian portraits or ghostly landscapes, you can easily tailor your gallery wall to match your Halloween aesthetic.
Creating faux oil paintings with Mod Podge is a simple and fun way to add a touch of vintage flair to your Halloween decor. The stippling and dabbing technique mimics the look of aged oil paintings, giving your printed art an authentic, gallery-worthy feel. Plus, with thrifted frames and eerie designs, your gallery wall will become the centerpiece of your Halloween home setup.
So, grab your Mod Podge, find your favorite spooky prints, and get crafting! Not only will you love the results, but your Halloween guests will be impressed by your creative and sophisticated decor. Make sure you tag me in your creations on social media I would love to see them! @AshtonSedita on all social media platforms.
xoxo,
Ashton Sedita
This blog post contains affiliate links which means I May earn a small commission at no extra costs to you if you make a purchase through these links. THANK YOU for shopping my links- it allows me to continue to do these fun festive DIYS for you!


3 Comments
Comments are closed.