
Stitched Pumpkins: An Alternative to Halloween Carving
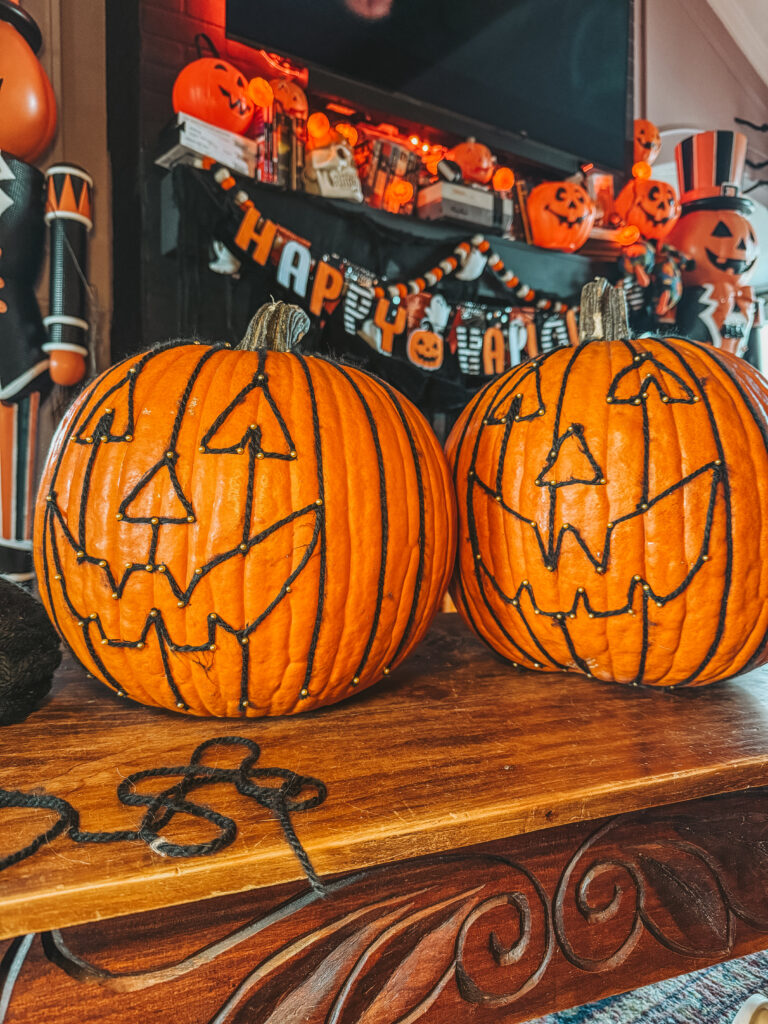
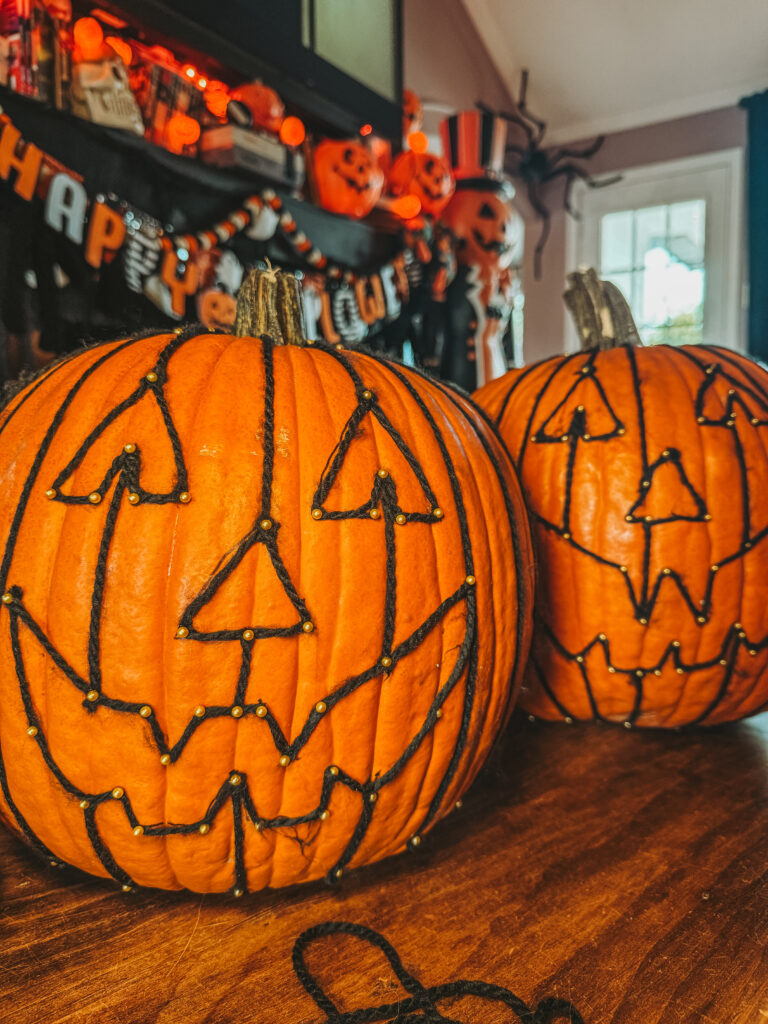
Move over messy pumpkin guts — stitched pumpkins are a creative and easy alternative to traditional carving.This stitched pumpkins DIY gives you all the spooky charm of a carved jack-o’-lantern without ever picking up a knife. These stitched pumpkins are the perfect no-carve Halloween idea if you love decorating but hate the cleanup. Plus, stitched pumpkins make a unique conversation piece that looks like something straight out of a Tim Burton movie (but way cuter).
How to Make Stitched Pumpkins
Whether you’re hosting a Halloween movie night, decorating your front porch, or crafting with friends, this easy stitched pumpkins yarn-and-pin project will have everyone asking, “Wait… how did you do that?”
What are Stitched Pumpkins?
Stitched pumpkins are a creative no-carve Halloween decoration made by threading yarn or twine through a real pumpkin. Instead of cutting the pumpkin open, stitched pumpkins use simple stitching patterns to create spooky or decorative designs. Because stitched pumpkins stay intact, they usually last longer than carved pumpkins and make less mess.
Why Stitched Pumpkins are better than carving
Many people love the look of carved pumpkins, but stitched pumpkins offer several advantages. First, there is no messy pumpkin pulp to clean up. Second, stitched pumpkins last longer because the pumpkin stays sealed. Finally, stitched pumpkins are safer for kids because no sharp carving tools are required.
- No messy pumpkin guts
- Longer lasting decoration
- Kid friendly
- Unique Halloween decor
🧵 What You’ll Need to make Stitched Pumpkins
You can find everything for this DIY at Hobby Lobby (and you probably already have some of it in your craft drawer).
Supplies:
• 🎃 1 large pumpkin (real or faux — real pumpkins work beautifully!)
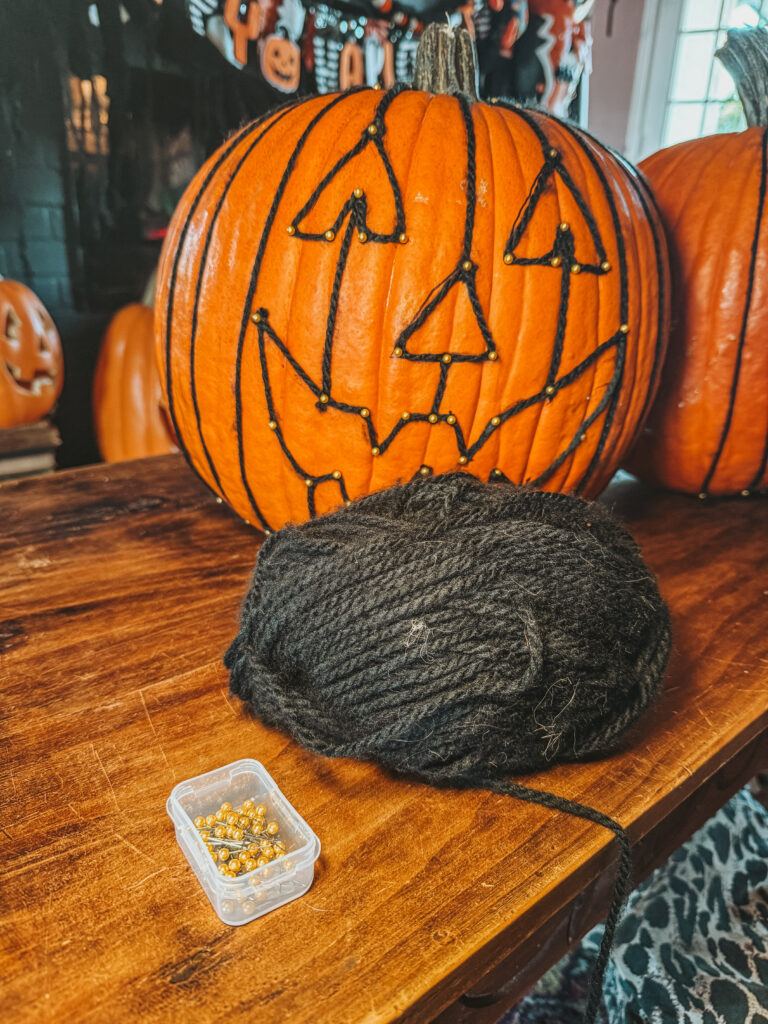
• 🪡 Yarn Bee “Tender Touch” yarn in Shadow — soft, thick, and perfect for a bold stitched look
• 📍 Small pearlized pins (¾ inch / 19 mm, 150 pack — mine are from Hobby Lobby’s sewing section)
• ✂️ Scissors
• 🖊 A fine-tip marker or pencil for sketching your jack-o’-lantern face ( I used a sharpie and then a magic eraser to remove the markings that were visible)
💡 Tip: This yarn color “Shadow” has just the right touch of black-charcoal depth, which makes your stitches pop against that bright orange pumpkin skin.
👻 Step-by-Step: How to Make Stitched Pumpkins
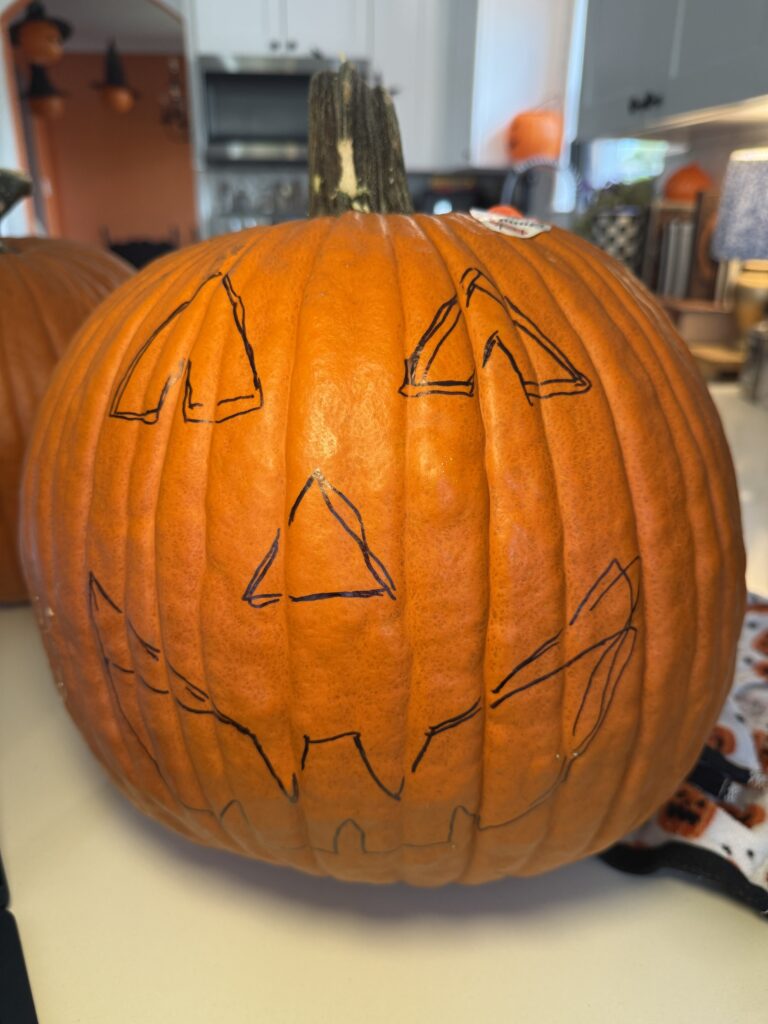
Step 1 — Sketch Your Design
Before you start poking holes, sketch your jack-o’-lantern face directly onto your pumpkin with a fine-tip pen- I used a sharpie. Think classic triangle eyes, a crooked smile, or even something whimsical like a heart-eyed pumpkin. Don’t stress about perfection — the stitches give it charm.
Festive Tip: Try sketching your design with a white pencil first if you’re using a faux pumpkin so it’s easier to erase or adjust.
Step 2 — Add Your Pins and Thread the yard
Using your pearlized pins, take your Yarn Bee Tender Touch Shadow yarn and secure it under the pin.
For curves and corners, add extra pins to keep your lines smooth.
Bonus Festive Flair: I love the gold-tipped pins — they add just the right touch of vintage glam, like something you’d see in an old-school Halloween card.
Step 3 — Thread the Yarn
Take your Yarn Bee Tender Touch Shadow yarn and tie a small knot at the first pin. Begin wrapping the yarn from pin to pin, following the outline of your design. It’s like connect-the-dots — but make it spooky.
Keep the yarn pulled tight enough to stay in place but loose enough that it sits neatly on the surface.
Step 4 — Outline and Fill
Once your main shapes (eyes, nose, mouth) are outlined, you can go back and double-wrap for a thicker, bolder look. Also… I went down the seams of the pumpkin to give it some depth. Also… this is your opportunity to clean up any lines.
Optional: For extra texture, weave the yarn in a criss-cross “X” stitch pattern across larger shapes. It gives an authentic Frankenstein vibe!
Step 5 — Secure and Display
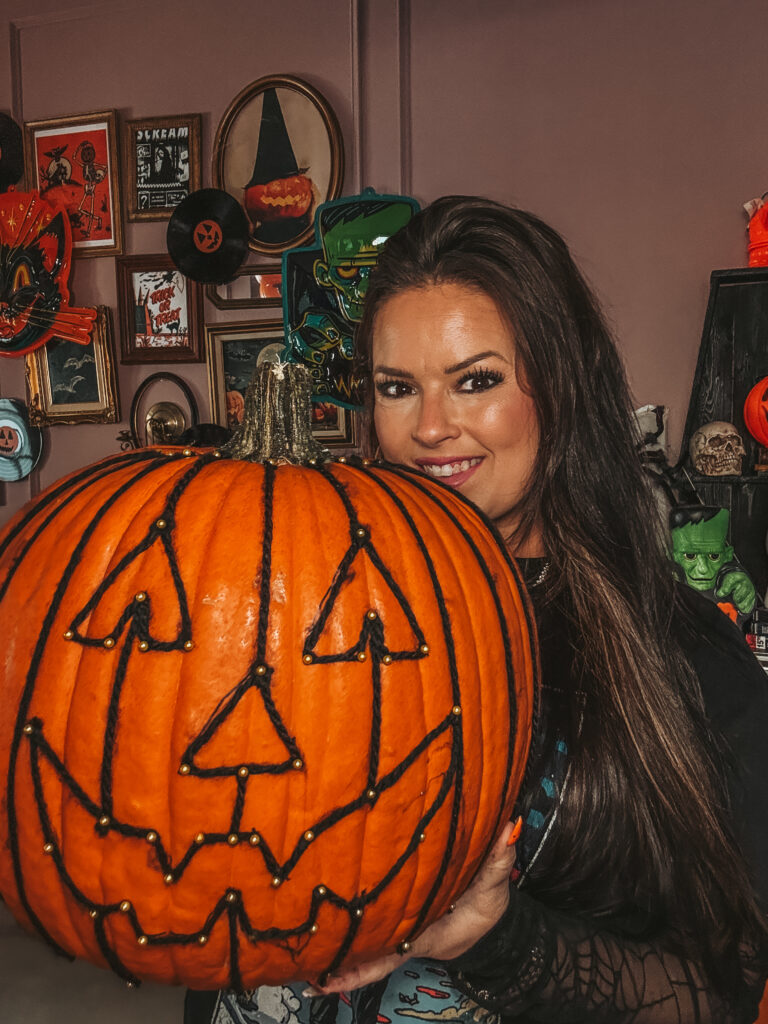
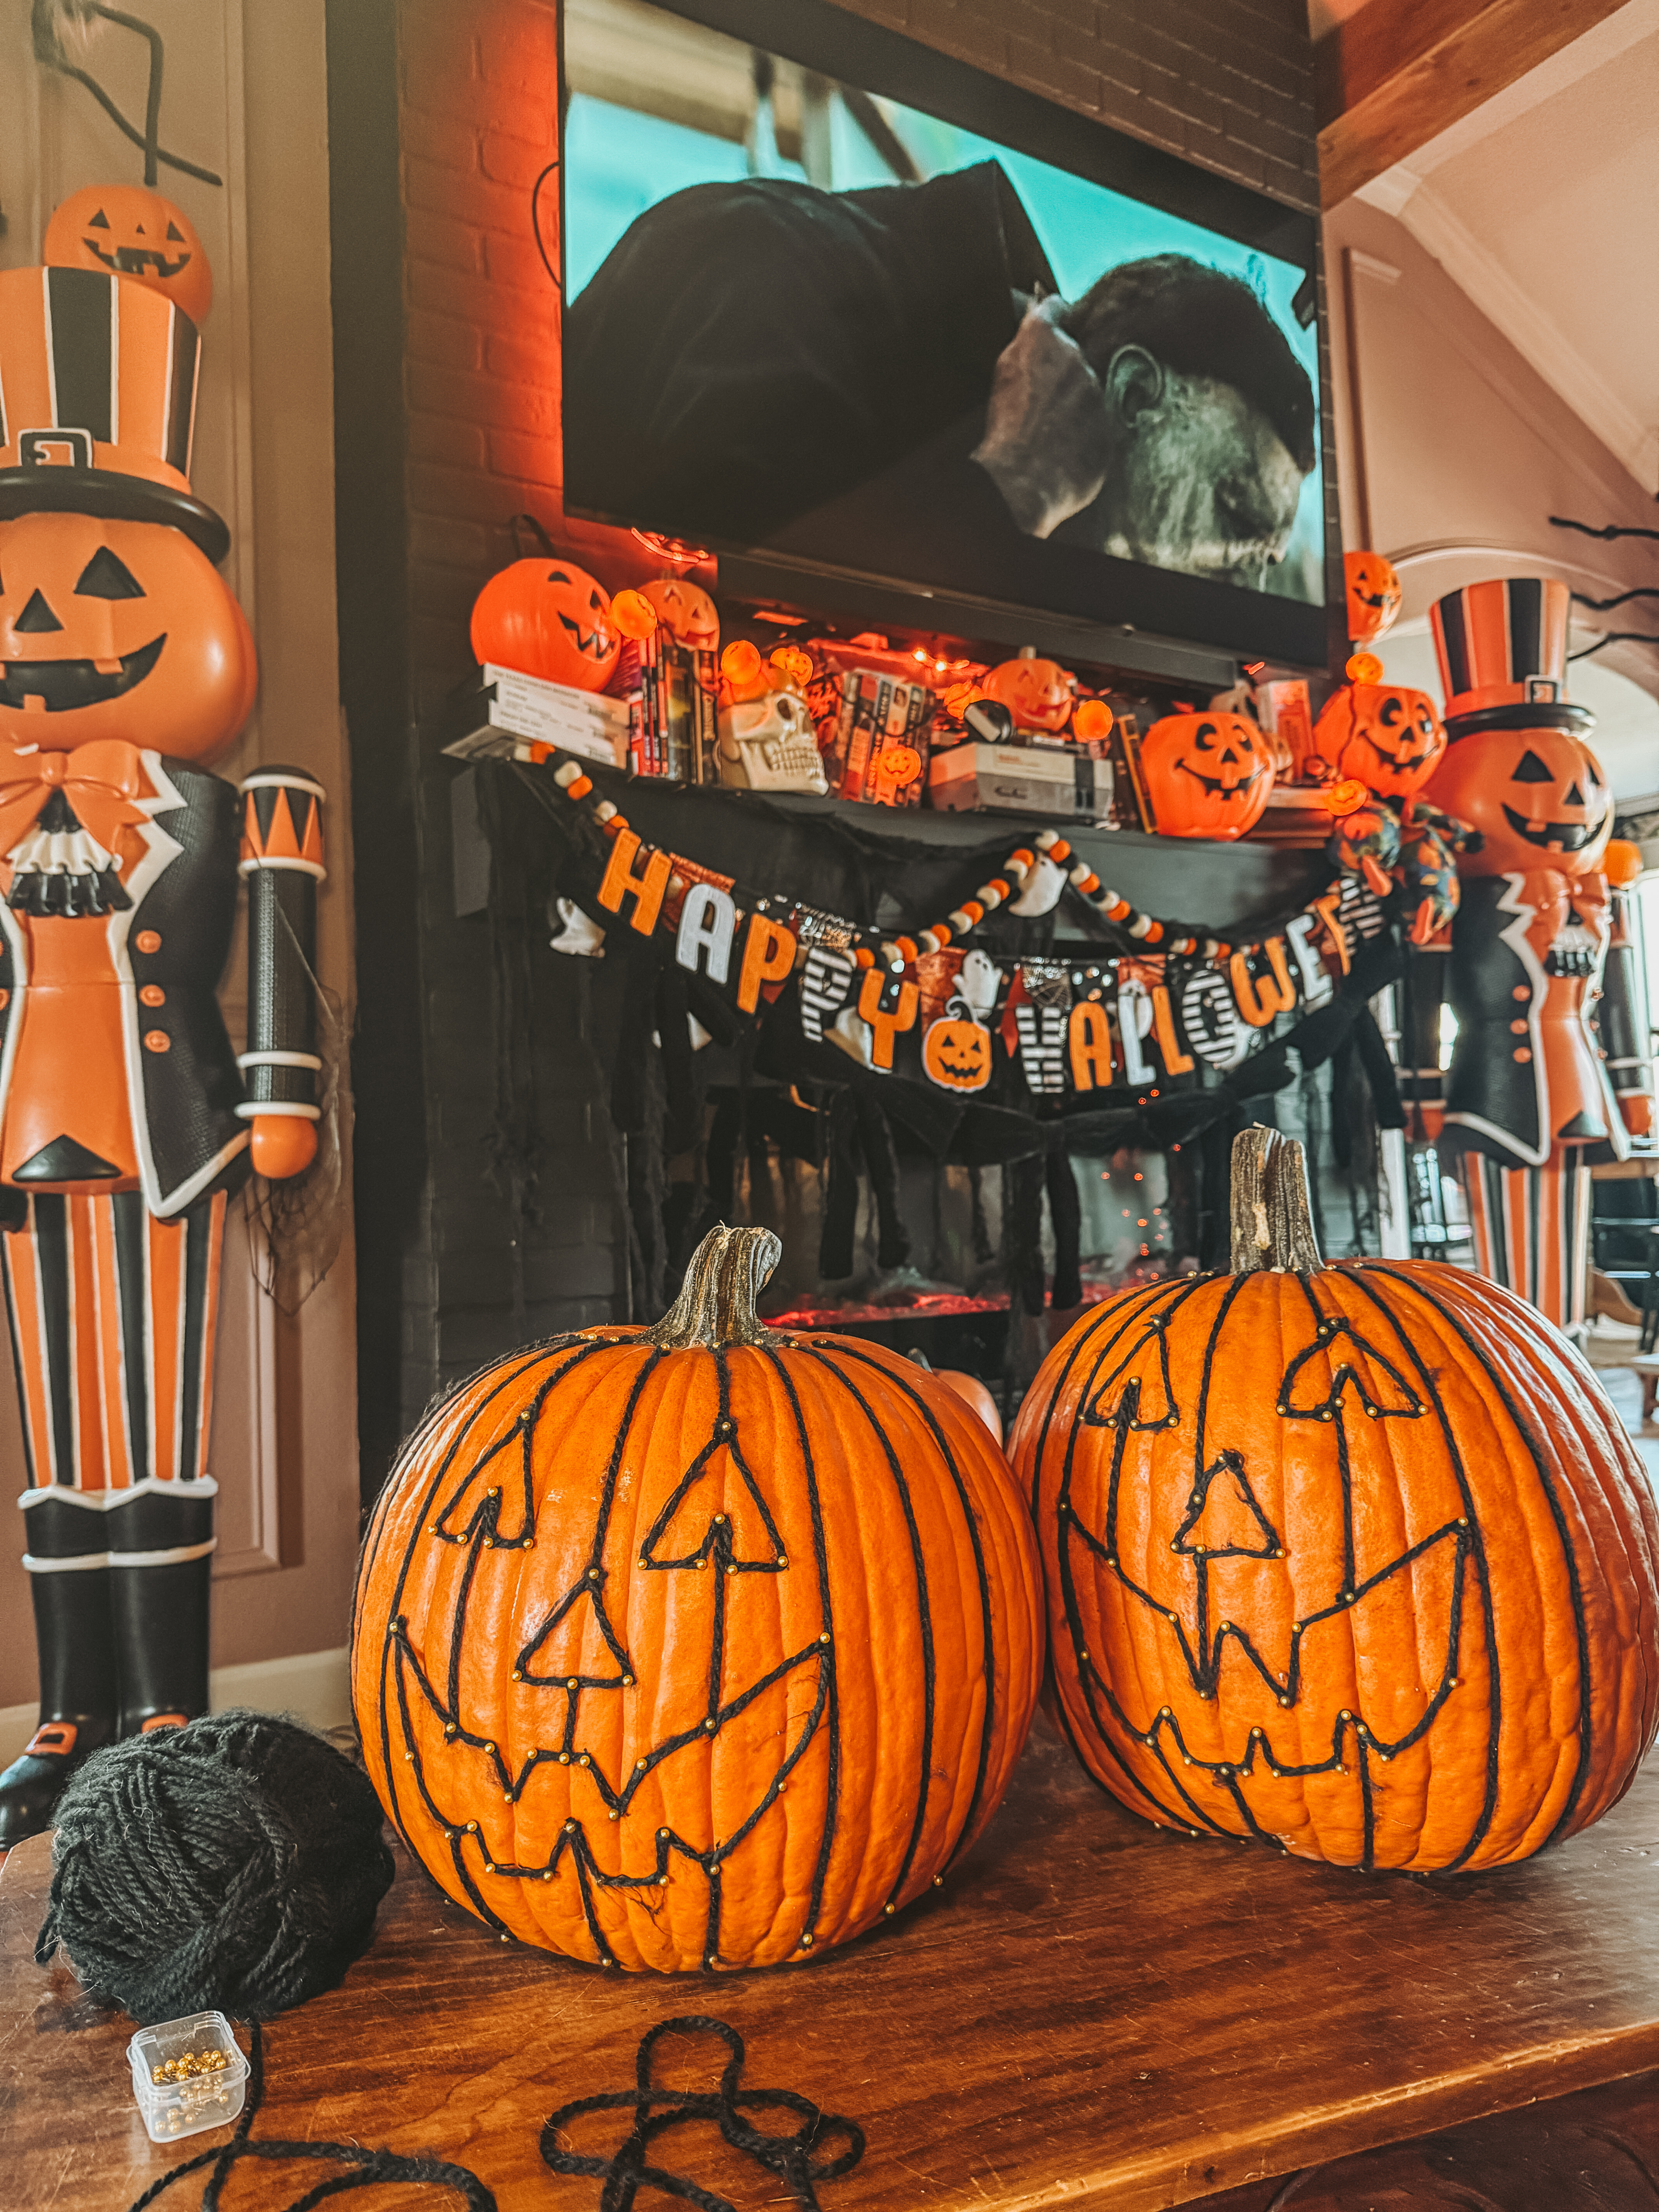
Step back, admire your masterpiece, and say hello to your new favorite Halloween decoration!
Place it on your porch, your mantel, or as a centerpiece for your spooky soirée. Add twinkle lights or candles around it for that eerie glow.
🧡 Why You’ll Love This No-Carve Pumpkin Idea
• Mess-free: No scooping, scraping, or rotting pumpkin smell.
• Kid-friendly: Safe for little hands — they can help place pins or choose the design.
• Reusable: If you use a faux pumpkin, you can bring it out year after year.
• Customizable: Choose yarn in orange, white, neon green, or metallic for different Halloween moods.
And the best part? You can make a whole stitched pumpkin family! Mix happy, spooky, and silly faces for a full-on Halloween display.
🍁 Make It a Whole Fall Night In
Why stop at crafting? Pair this DIY with a cozy evening at home full of festive fun:
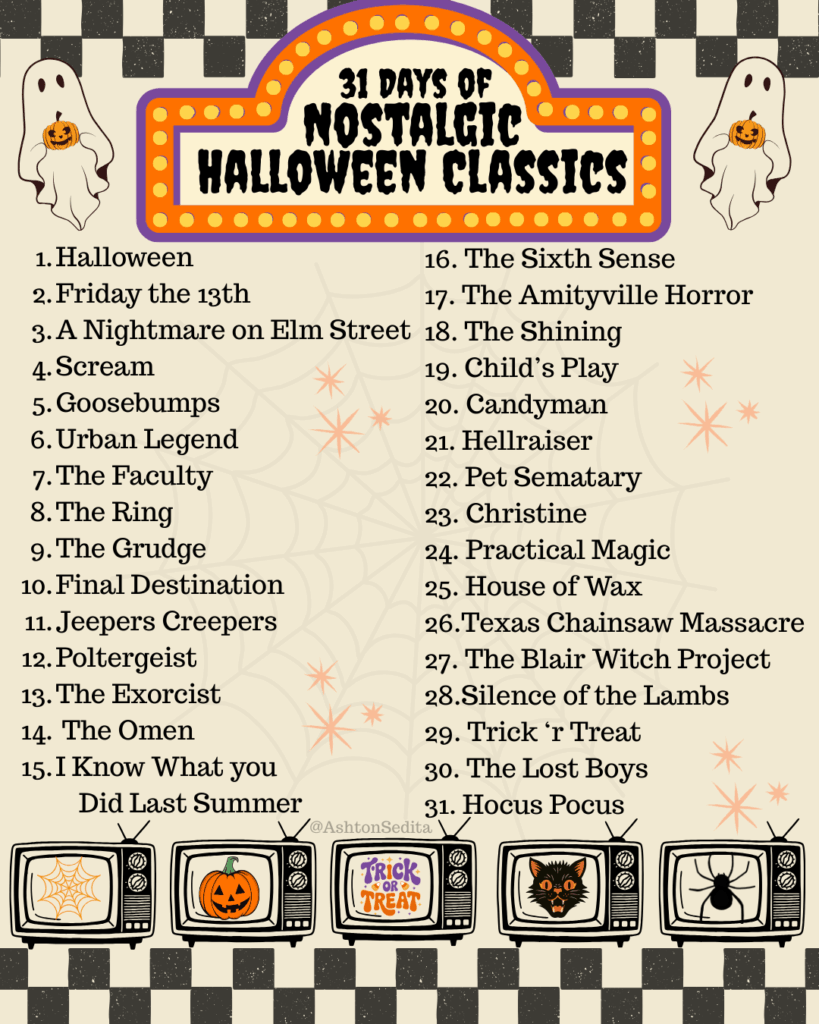
🎬 Watch: 31 Nights of Halloween Movies
Light a candle, dim the lights, and turn on one of your nostalgic Halloween favorites. My list of 31 nights includes everything from Hocus Pocus to Casper to Halloween Town.
Perfect Pairing: Work on your pumpkins while watching The Addams Family. The stitched aesthetic fits right in!
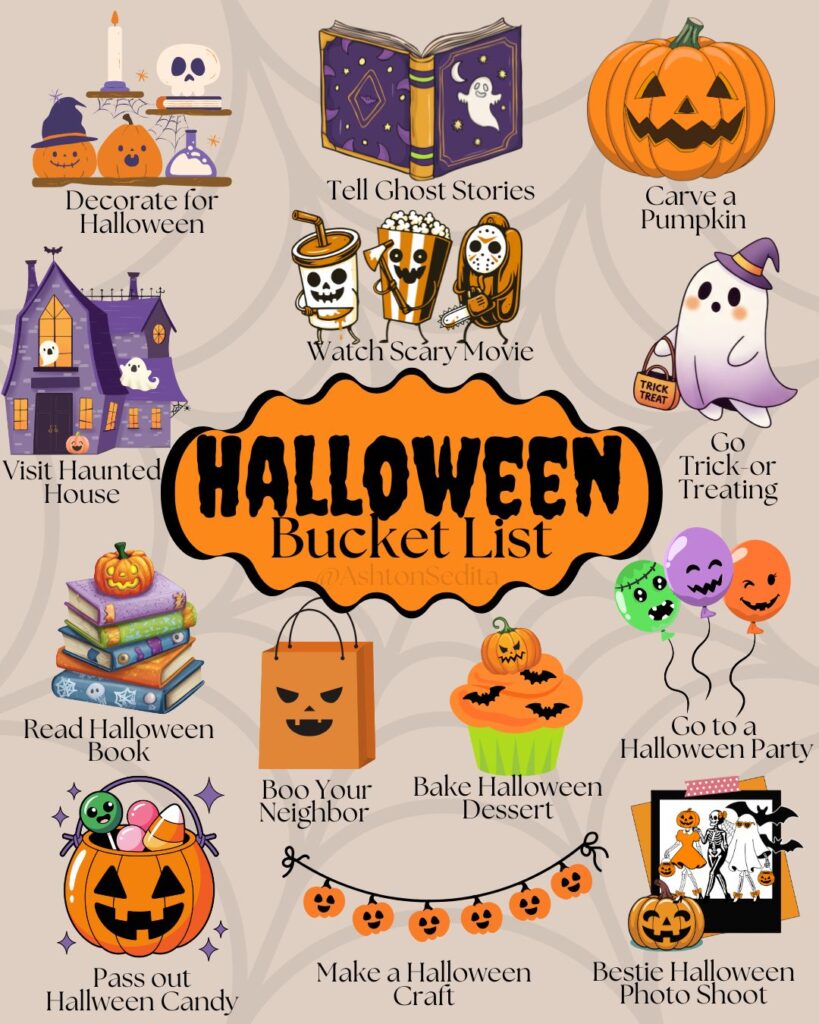
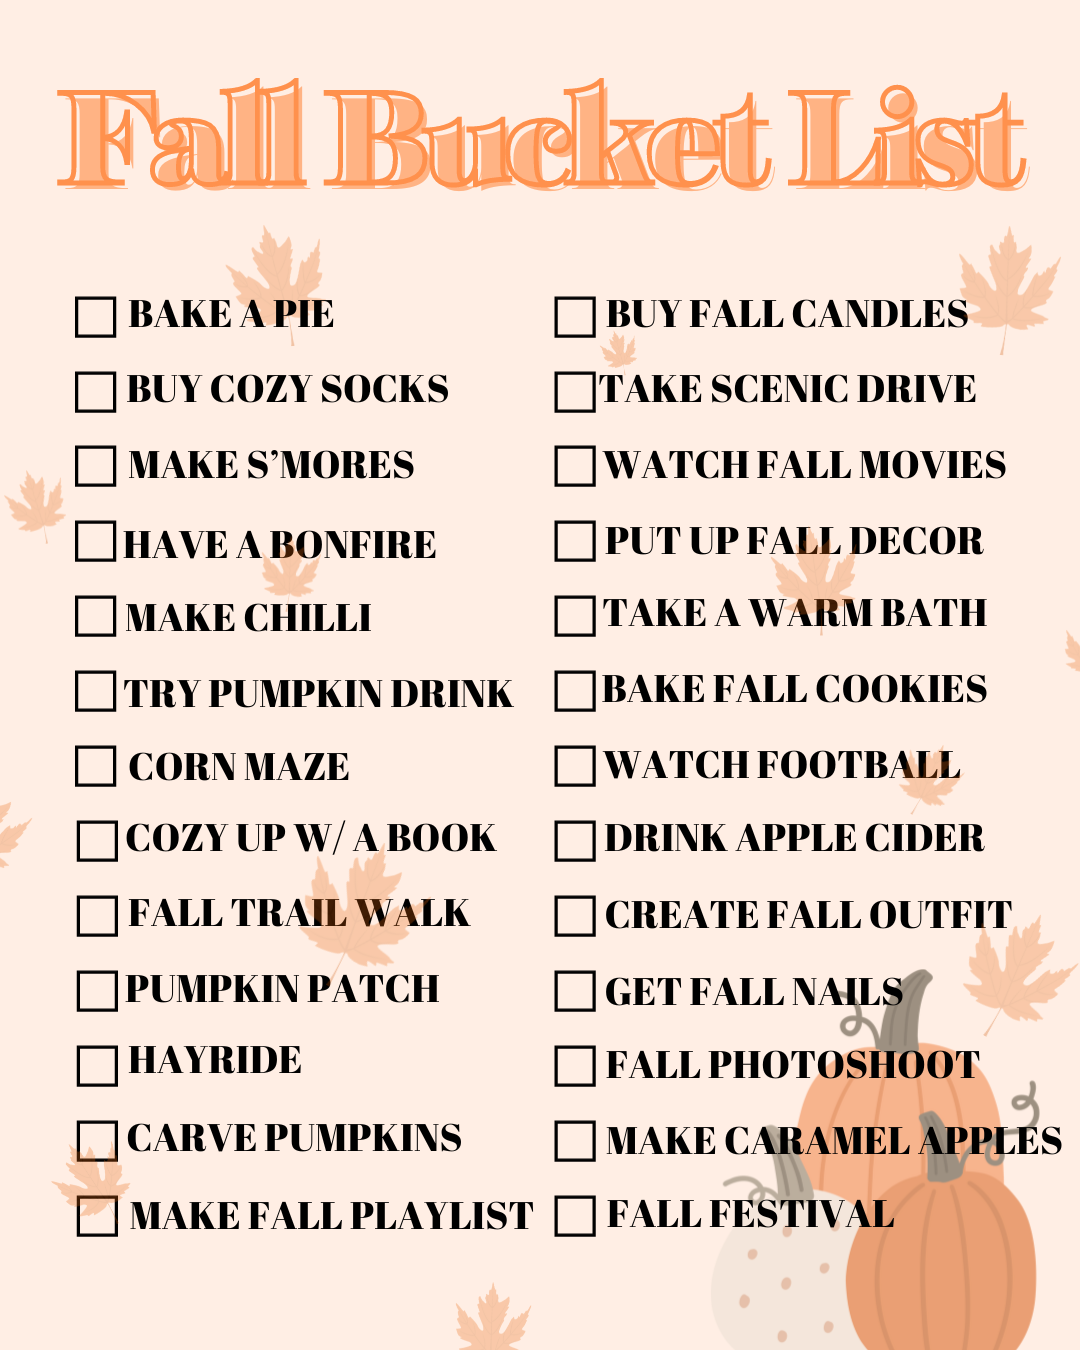
🧺 Do: Halloween Bucket List Ideas
If you’re looking to fill your October weekends with magic, check out my full Halloween Bucket List for 2025 — think ghost stories, haunted hayrides, pumpkin-patch photo ops, and caramel-apple nights.
Crafting these pumpkins totally counts as checking one off that list! ✅
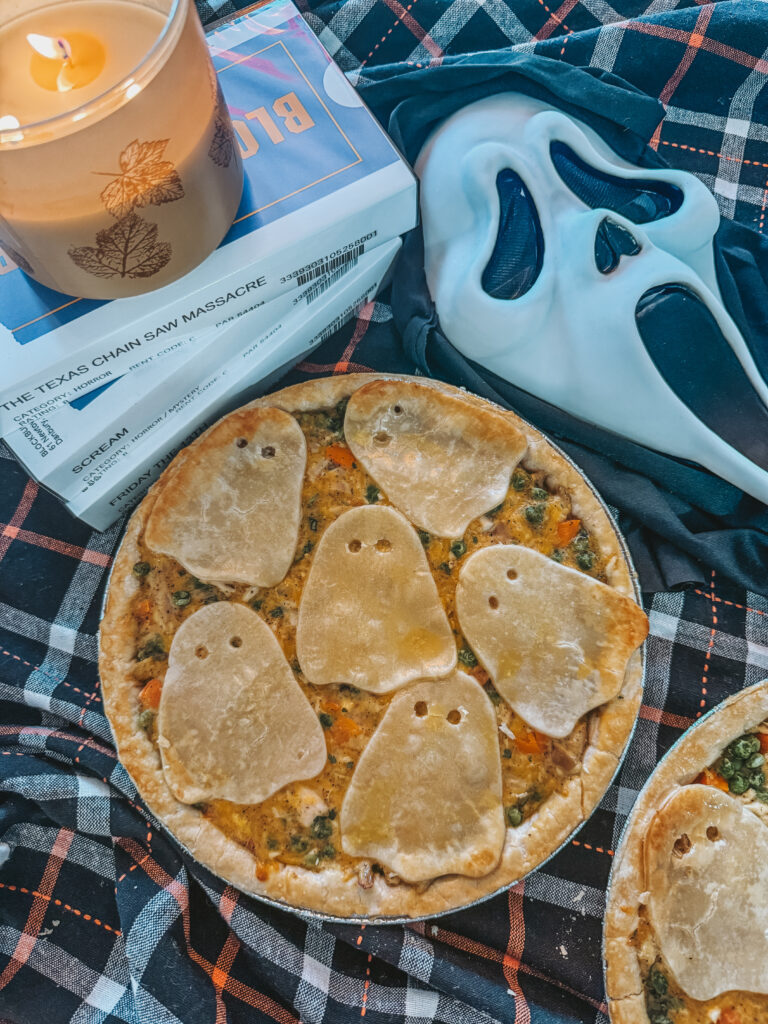
🍲 Eat: Easy Chicken Pot Pie
Because crafting requires fuel, right? This recipe is the ultimate cozy dinner — flaky crust, creamy filling, and it comes together fast. Perfect for a chilly October night while your pumpkins dry or you’re catching your next movie marathon flick.
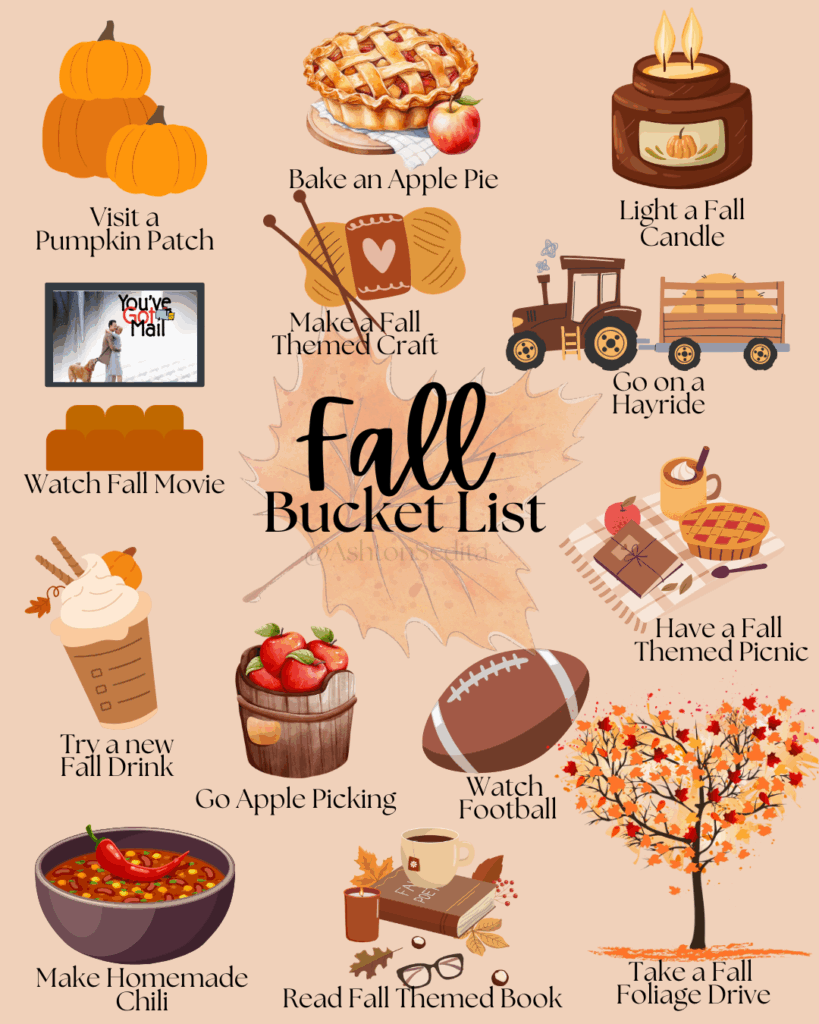
🍂 Try: Fall Bucket List for the Whole Season
If Halloween’s just the kickoff for you (same here!), save my Fall Bucket List for the rest of the season — apple picking, sweater thrifting, soup-making, and everything pumpkin-spiced.
💬 Festive FAQ
Q: Will this work on faux pumpkins?
A: Absolutely! Faux craft pumpkins from Hobby Lobby or Michaels are perfect — and they’ll last year after year.
Q: How do I keep the yarn from slipping?
A: Wrap tightly and double-wrap around key pins. If needed, add a dab of hot glue on the back side of your starting and ending points.
Q: Can I use different yarn colors?
A: Totally. Black gives a bold, traditional look, but white, orange, or even neon green yarns look amazing too — think Frankenstein vibes!
📸 Capture the Festive Fun
When you finish, snap a photo of your stitched pumpkin and tag me on Instagram so I can feature your spooky creation! I love seeing how everyone puts their own spin on it — from bold faces to minimalist designs.
And don’t forget to save this tutorial on Pinterest for later! You know you’ll want to make more next year.
🕸 Final Thoughts
This stitched pumpkin DIY perfectly captures that mix of vintage Halloween charm and modern craft-night ease. It’s creative, kid-friendly, and chic — ideal for anyone who loves getting festive without the hassle of carving.
Every pin and thread adds a little personality to your pumpkin — and when the night’s over, you’ll have a decoration that’s uniquely yours.
So grab your yarn, pour yourself a mug of cider, put on a spooky playlist, and get ready to make the cutest no-carve pumpkin on the block.
✨ Stay spooky, stay crafty, and as always — stay Festive. ✨
And don’t forget — if you make stitched pumpkins, I’d love to see them! Tag me @AshtonSedita so I can share your creations.


One Comment
Comments are closed.