
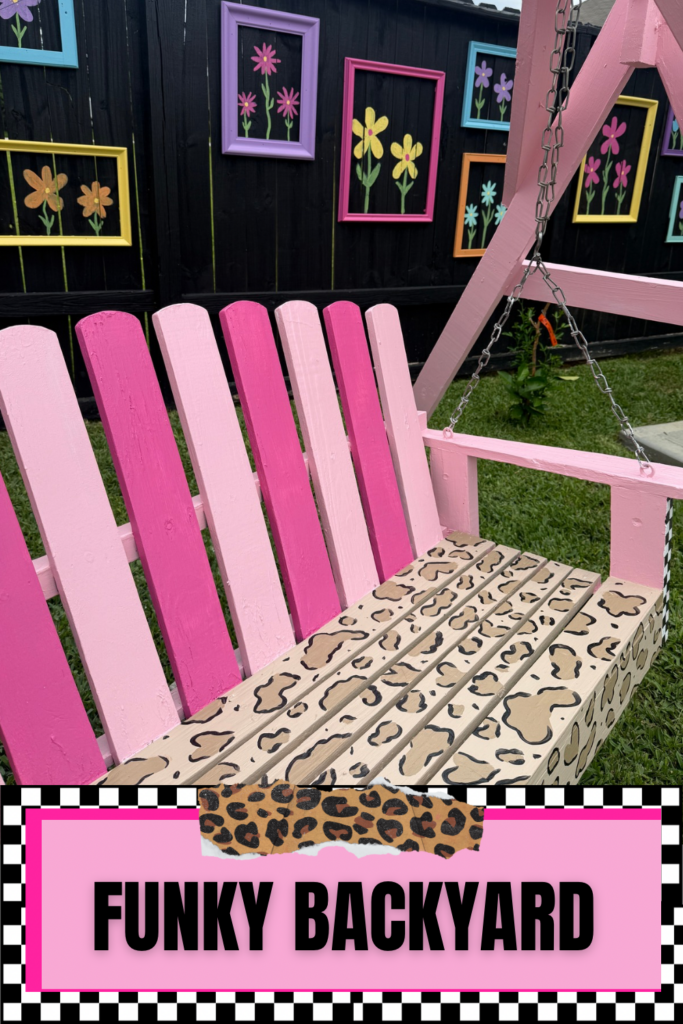
Funky and Fun: The Ultimate Budget Backyard Makeover


I always knew that I wanted a pool but I didn’t just want to put a pool in the backyard and throw some outdoor furniture back there. It had to be the most vibrant, funky and fun backyard that you would never want to leave, a space that made you smile. I never wanted my backyard to look like it was the kind of backyard you see in every suburban development…functional, sure, but it had no soul, no color, and definitely no leopard print.
But that’s the thing about creating a Funky and Fun home…it doesn’t happen overnight. It’s a marathon, not a sprint. It happens in layers, in weekend projects, and in those moments when you decide to ignore the “rules” of home decor. This weekend, I finally finished the “crowning jewel” of my backyard makeover, and I’m taking you through the entire journey. We’re talking about everything from the hidden pool equipment to the estate sale steal of the century.
The Spark: It Started with a Checkered Wall
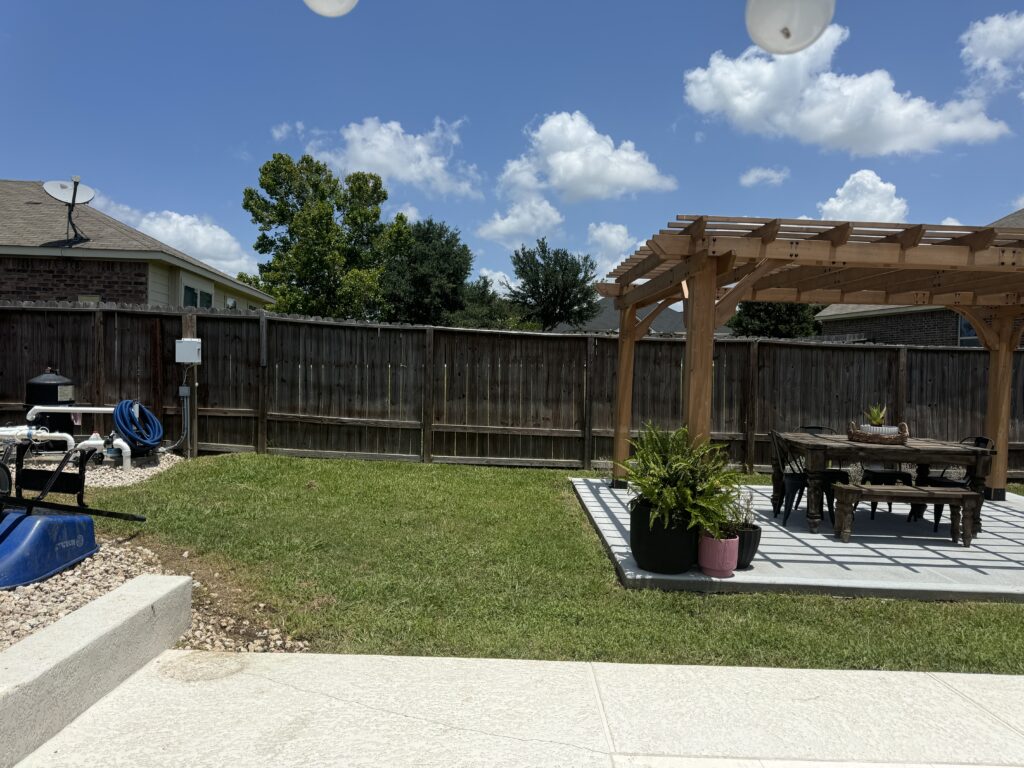
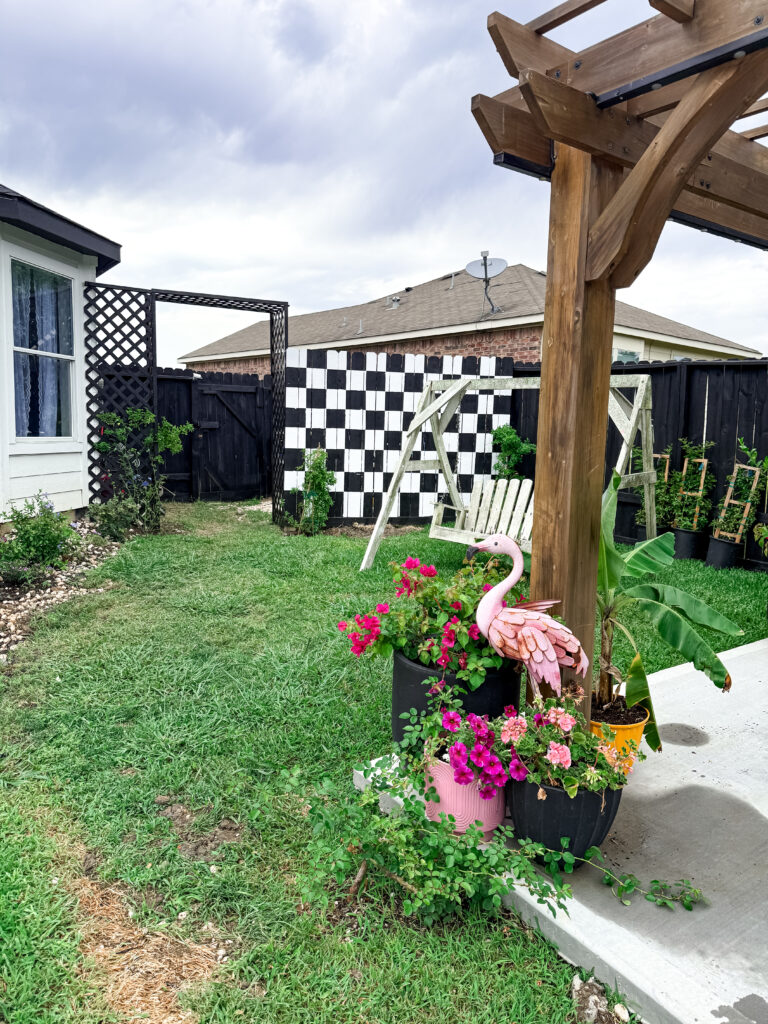
Every great makeover has a starting point. For me, the catalyst for this entire transformation was a problem that needed solving. After we finished building our pool, while the water looked sparkling and blue, the view was completely ruined by bulky, industrial pool equipment sitting right in our line of sight as well as the noise.
It’s all about the aesthetics baby!!! But the thing was, I was very picky on what I wanted you put around the equipment. I didn’t want a boring brown lattice screen or a row of generic bushes. I wanted something that screamed “me.” So I convinced my loving husband to build a custom half-fence to hide the equipment.
Once the structure was up, I had to take it a step further. I had him build a lattice DIY arch that I wanted flowers to just grow all over. Right passed the pool equipment is our garden, so I thought it would the perfect addition. And… of course, I decided to paint the fence a bold black-and-white checkered print and then we planted Peggy Martin climbing roses at the base. Those roses are famous for their vibrant pink blooms and their ability to climb almost anything. Seeing those pink flowers pop against the graphic checkers was a “lightbulb” moment. I realized that pink and checkers were going to be the foundation for my entire backyard aesthetic.. If you didn’t know those are my favorite colors. I will tell you it’s been a domino effect ever since.
If you’re struggling with ugly utility areas or AC units, you have to see my step-by-step on [How I Built My Checkered Pool Equipment Screen]. It was the project that launched this entire backyard vibe!
The Big Black Canvas: Painting the Fence
Once the checkered wall was up, the rest of my old, weathered wooden fence started looking… well, sad. It was a sea of faded, muddy brown that did absolutely nothing for the vibrant energy I was trying to build. I realized that if I wanted my colors to truly sing, I needed a dark, dramatic backdrop.
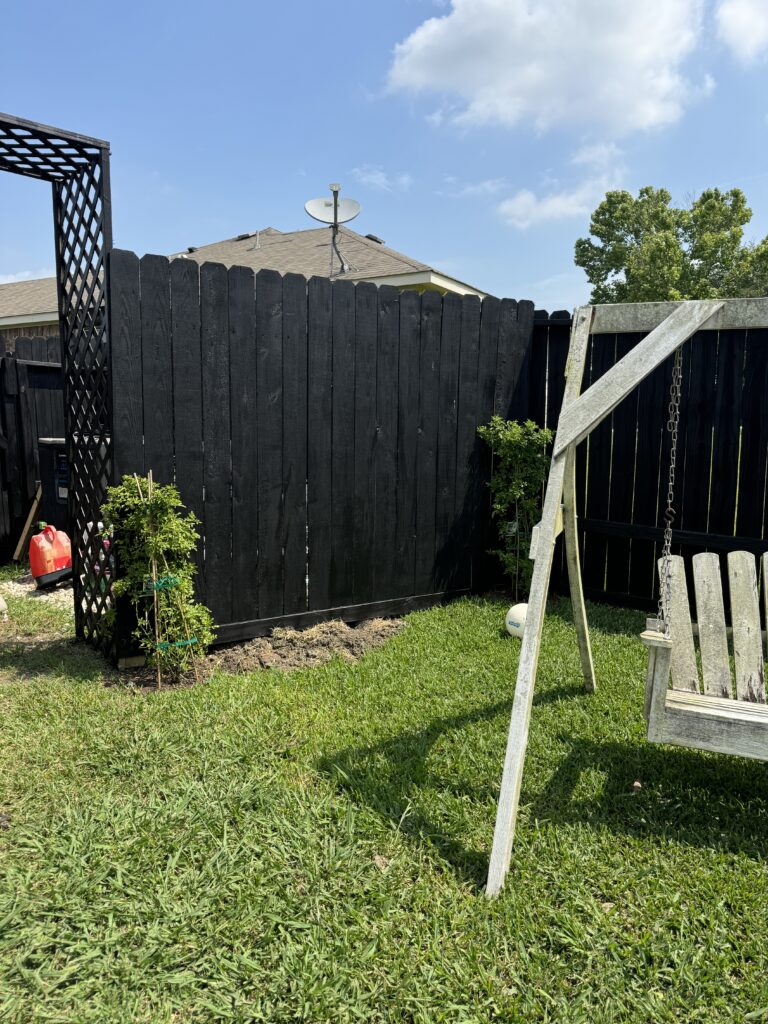
I made the “scary” decision to paint the entire perimeter fence black. If you’re nervous about painting a fence black, let me tell you: Do it. When you paint a fence black, you aren’t just changing the color; you’re creating a silhouette. The black fence makes the boundaries of the yard “disappear” into the shadows, which actually makes a small yard feel much larger. Plus, as a backdrop for a pool, it makes the water look like a bright turquoise gem.
I used a high-quality exterior matte black. It took some major elbow grease and several long afternoons of work, but suddenly, the backyard felt like a sophisticated stage waiting for the main act. The green of the grass looked greener, the blue of the pool looked bluer, and I was ready for the next layer. But… of course that was a domino effect… so then I painted a section of the fence checkered… FULL TUTORIAL HERE!
The $20 Estate Sale Miracle
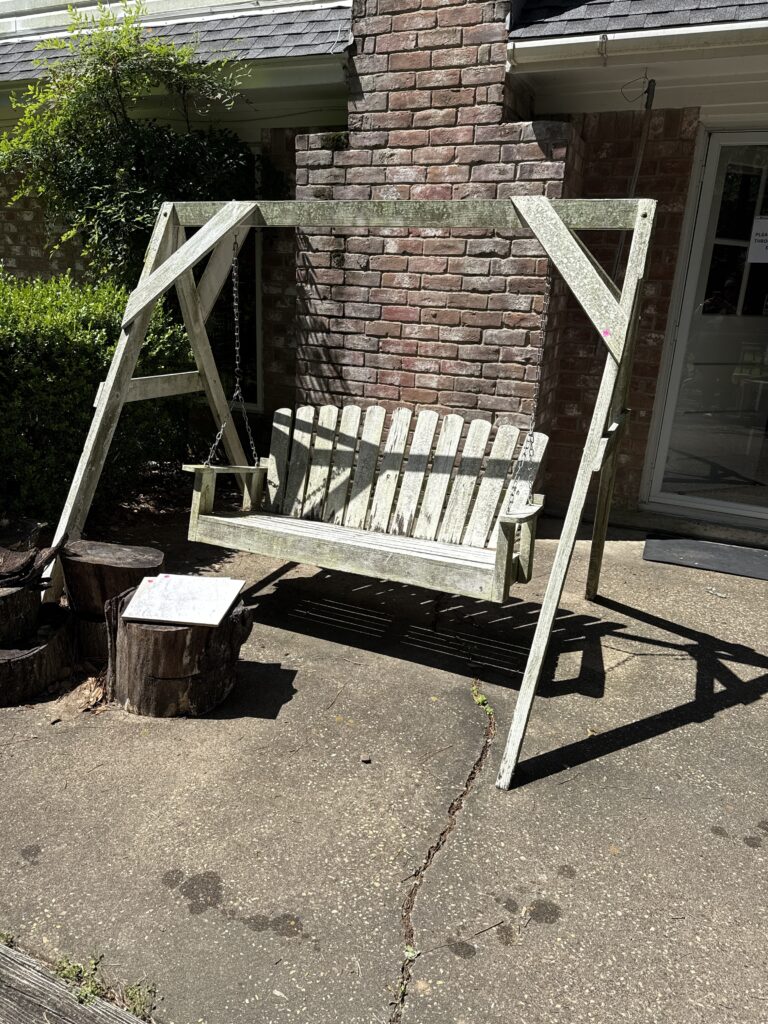
I am a firm believer that the best pieces in your home should have a story. I don’t want a backyard that looks like it was bought in one click from a big-box store. About a year ago, I was at an estate sale…one of those Saturday mornings where you’re just hunting for a “vibe” and I spotted a wooden A-frame swing. It was dirty, it was forgotten, and it was marked for $20.
I dragged it home, and it sat in my yard for twelve months. Yes, a whole year! I knew I wanted to “flip” it, but I was waiting for the right inspiration to strike. I didn’t want a standard porch swing; I wanted a piece of furniture that looked like it belonged in a funky boutique hotel in Palm Springs.
After the fence went black, I finally saw it: The swing needed to be the “pop” of color that tied the checkered wall and the black fence together. It was time to turn this $20 find into a Funky and Fun masterpiece.
The Budget Secret: The $5.98 DIY Hack
Before we get into the “how-to,” let’s talk about the budget. People see these colors and assume I’m spending hundreds of dollars at the paint counter getting custom gallons mixed. Nope.
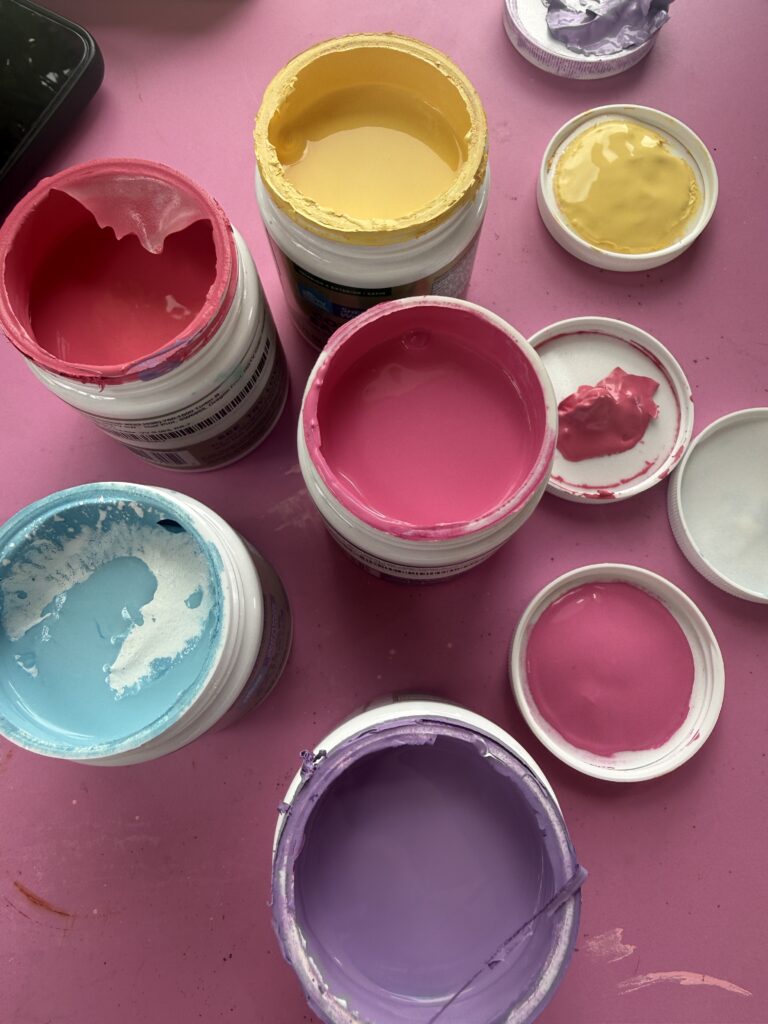
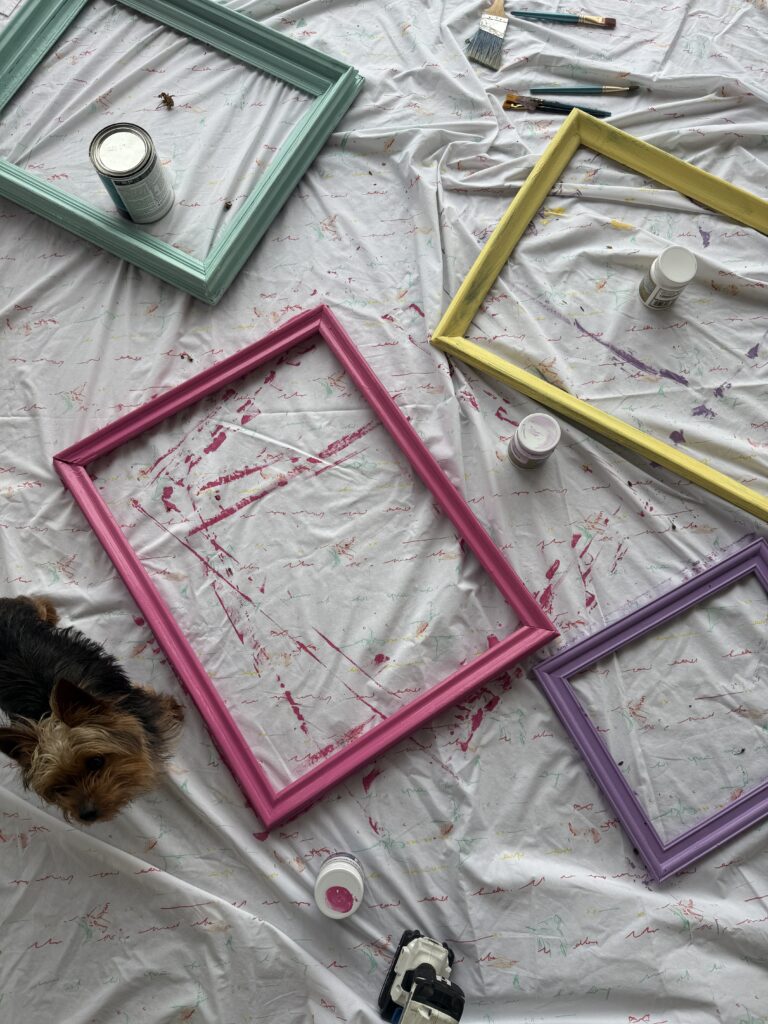
My absolute favorite way to DIY on a budget is using Lowe’s Mini Paint Samples. * The Price: For just $5.98, you get a sample jar that is the perfect amount of paint for projects like frames, furniture slats, or accent details.
- The Palette: For this makeover, I chose a mix of Hot Pink, Light Bubblegum Pink, Yellow, Lavender, and Teal.
- The Quality: Don’t let the “sample” label fool you. This paint is surprisingly durable for outdoor use. I’ve used these samples for everything from matchboxes to outdoor furniture and they hold up beautifully against the Texas humidity and sun.
When you’re doing a Funky and Fun project, you want variety. Buying five $6 jars is much better than buying one $50 gallon!
Phase 1: The Fence Gallery & “Living Art”
With the fence painted black and the pool sparkling in the foreground, the space still felt a little “flat.” It needed height. It needed texture. It needed art.
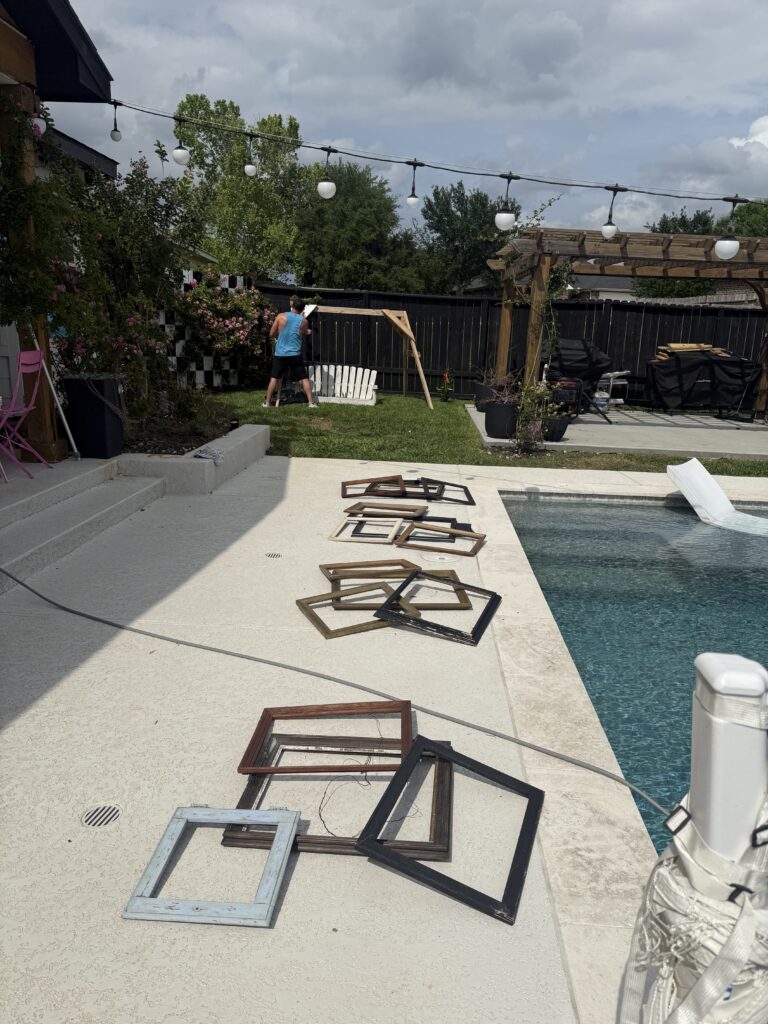
I’ve been collecting vintage wood frames from thrift stores and garage sales for months. Some were ornate and gold, some were simple wood, and some were literally falling apart. My vision was to create a “Gallery Wall” but for the outdoors. I realized that if I painted these in my signature palette and hung them on the black fence, it would look like a literal art gallery.
How to Create Your Own Fence Gallery:
- Source Your Frames: Look for wood frames with interesting textures. Don’t worry about the original color! If you aren’t a regular at the thrift bins, you can even buy Paintable Picture Frames online to get your gallery started.
- Prep for the Elements: Give your frames a quick sand and a wipe down. Since they’ll be outside, you want the paint to really grab onto the surface.
- Paint the Frames: I used my $6 Lowe’s samples and my favorite Paintbrushes I Love to give each frame a bold, solid color. I love how the lavender looks next to the teal!
- Hang with Intention: We spaced them out along the black fence to create a curated, intentional look.
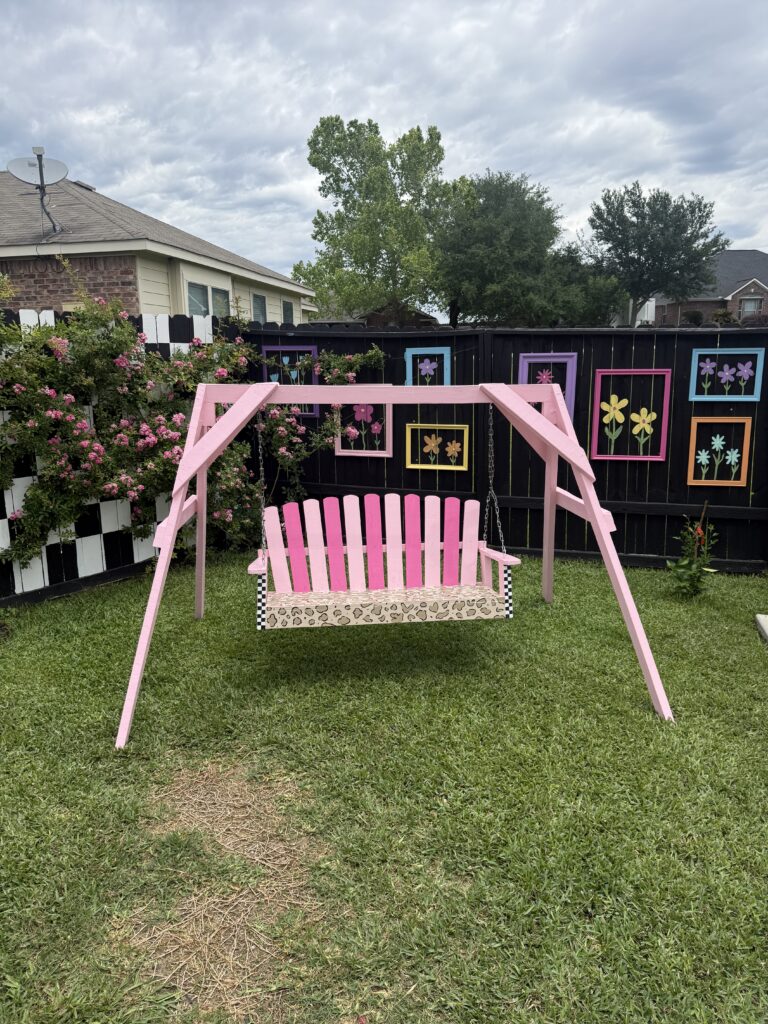
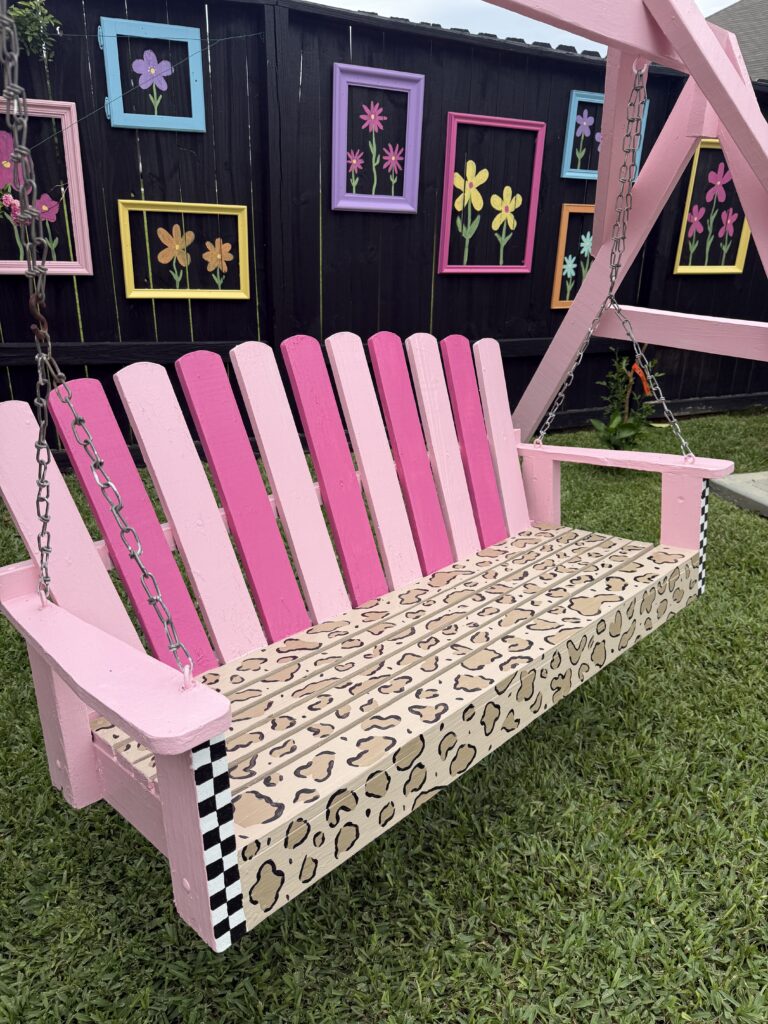
- The “Living” Art: Once the frames were up, the fence looked great, but it felt a little empty. That’s when I decided to paint simple, graphic flowers directly onto the fence inside the frames.
This is my favorite part of the makeover. It turns a flat fence into a three-dimensional conversation piece. When you’re sitting in the pool, you aren’t just looking at wood slats; you’re looking at a gallery. It’s unexpected, it’s colorful, and it’s pure fun.
Phase 2: Flipping the $20 Swing
Now, let’s talk about the swing flip. This was the most labor-intensive part of the weekend, but the results are 100% worth it. This swing went from “estate sale scrap” to a total statement piece.
Step 1: The Foundation
We started by cleaning the swing thoroughly with the water hose and dish soap. Years of sitting in the yard had left it pretty dirty. Once it was dry, I went in with a solid Hot Pink for the A-frame. I wanted the structure to be bold and visible from across the yard.
Step 2: The Color Blocked Slats
I didn’t want the seat to be just one color. To get that Funky and Fun look, I decided to alternate the vertical slats between Light Bubblegum Pink and Hot Pink. This creates a “gradient” effect that feels playful and keeps the eye moving.
Step 3: The Graphic Details
To tie back to the pool equipment wall, I added black-and-white checkered details to the side supports and the edges of the swing. Checkers are such a great way to add a “designer” feel to a DIY project.
Step 4: The Leopard Print Flourish
For that final “funky” touch, I hand-painted a leopard print pattern across the base seat. Why it works: In my design world, leopard print is a neutral! When you pair it with the graphic checkers and the soft pinks, it creates a look that is totally unique.
If you want this look but don’t have a $20 estate sale find nearby, I highly recommend starting with a sturdy Wood A-Frame Swing like this one. It’s a solid blank canvas that will take paint beautifully and last for years.
Reflections: How Far My Backyard Has Come
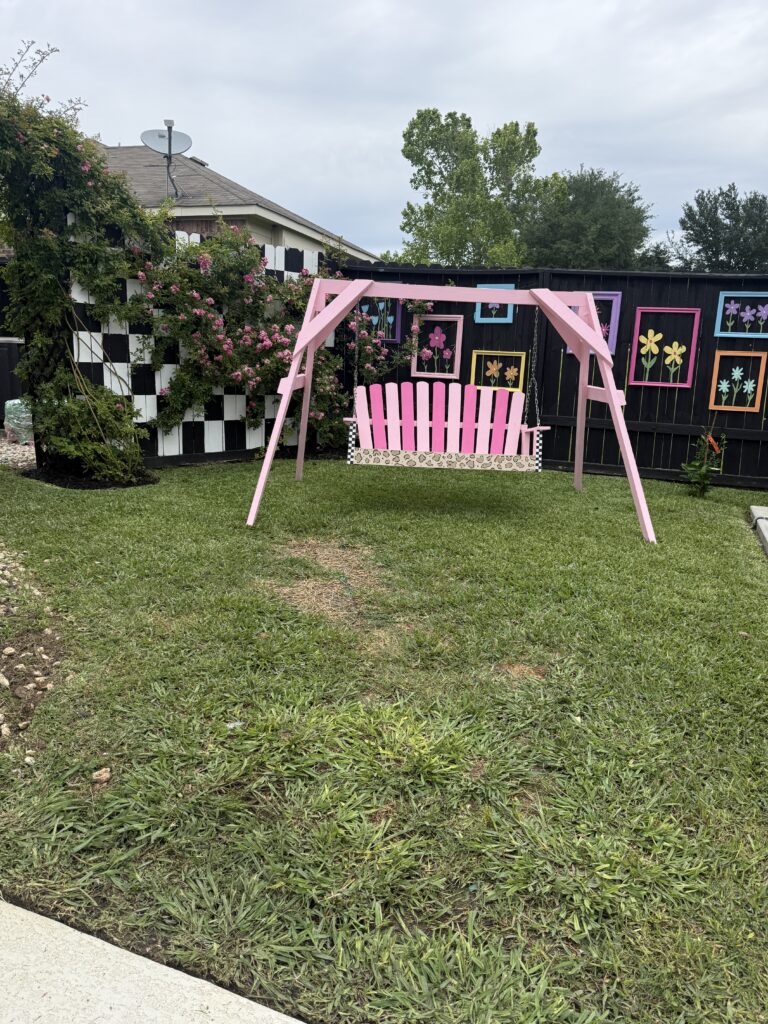
Standing back and looking at the yard now, it’s hard to remember the “before.” This backyard has become my sanctuary. It’s where I go to relax and where my family hangs out after a long day.
It looks so good over the pool the reflection of the pink swing and the colorful frames in the water is just magical. It feels like a boutique resort right in my own backyard. This project proves that you don’t need a massive budget to create a space that feels high-end; you just need a vision and the courage to use a little bit of pink paint.
The “Pool Drama”: What I Haven’t Told You
Now, I know what you’re thinking. “The yard looks great, but what about the pool itself?”
Let me tell you, getting to this point wasn’t all sunshine and leopard print. We went through some major drama during the pool installation process. From contractor issues to tile delays that nearly broke my spirit, it was a rollercoaster. If you are thinking about putting in a pool or are currently in the middle of a “backyard nightmare,” you need to read my tell-all post. I’m sharing everything I wish I had known before we broke ground.
Get all the tea on the construction, the costs, and the chaos in The Pool Drama: What They Don’t Tell You About Building an Oasis.
Final Thoughts & Shopping List
A Funky and Fun life doesn’t require a million dollars. It just requires a little bit of “what if?” What if I painted the fence black? What if I put leopard print on a swing? What if I treated my backyard like an art gallery?
When you stop following the “rules” of outdoor decor and start following what actually makes you smile, you create a home that is truly your own.
Ready to start your own makeover? Here are the supplies I used and love:
- The Brushes: These work perfect.(You’ll want a variety of sizes for the detail work!)
- The Swing: Found mine at an estate sale, but here is a Similar Wood Swing if you want to start your own flip.
- The Paint: Lowe’s Mini Samples in your favorite bright shades!
I want to hear from you! What’s the boldest thing you’ve ever painted in your yard? Are you team Leopard Print or team Checkers? Drop a comment below and let’s chat!
Let’s Stay Connected!
I can’t wait to see how you take these ideas and make them your own. Whether you’re painting a $20 find or turning your fence into a masterpiece, I want to see the magic you’re creating!
Follow me on Instagram|Pinterest|TikTok | YouTube | Facebook
I’m always sharing more behind-the-scenes DIYs, my “Thrifting Thursday” hauls, and the latest on the pool reveal. If you try any of these projects, please tag me in your funky and fun creations so I can see them and share them with our amazing community!
PS. If you local and you love to craft… You should come to one of my FESTIVE FUN events that I host!!! The next one is in May and we are going to Flip a vintage suitcase.
Until next time, keep it colorful and keep it fun.

One Comment