
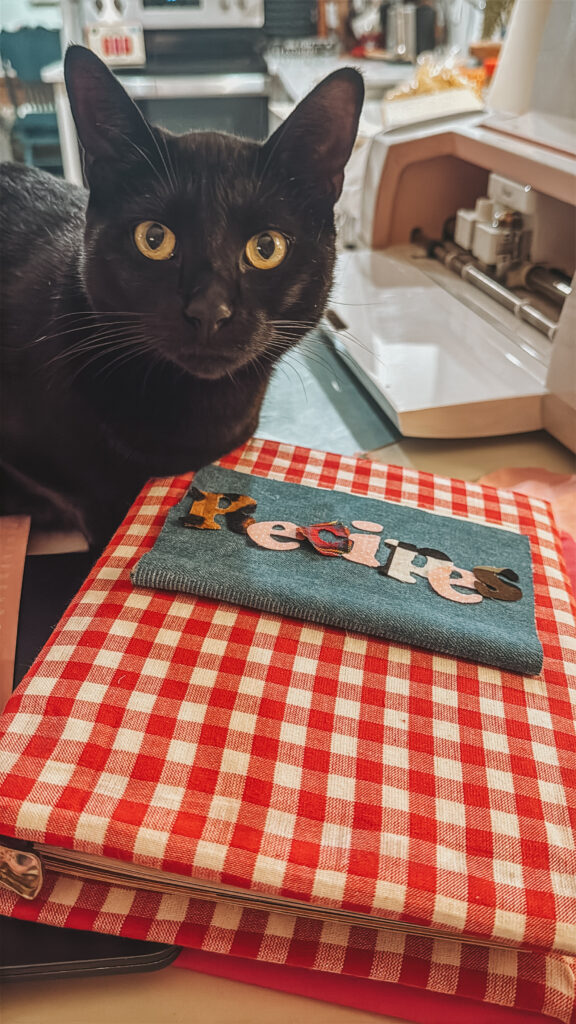
How to Make a DIY Cook Book Junk Journal: A Retro Upcycled Cookbook Tutorial
Are you tired of losing your favorite handwritten family recipes or having your printed internet recipes stuffed randomly into a kitchen drawer? It’s time to upgrade your recipe storage with a fun, creative, and highly personalized project: the DIY Cook Book Junk Journal! [FULL VIDEO TUTORIAL BELOW]
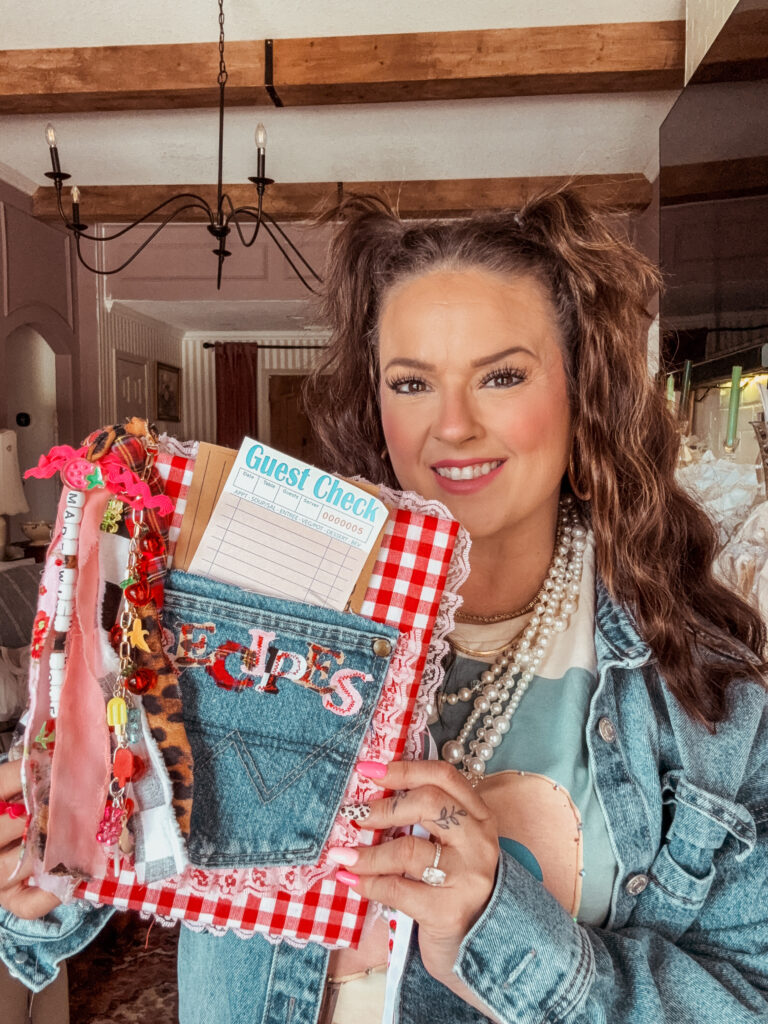
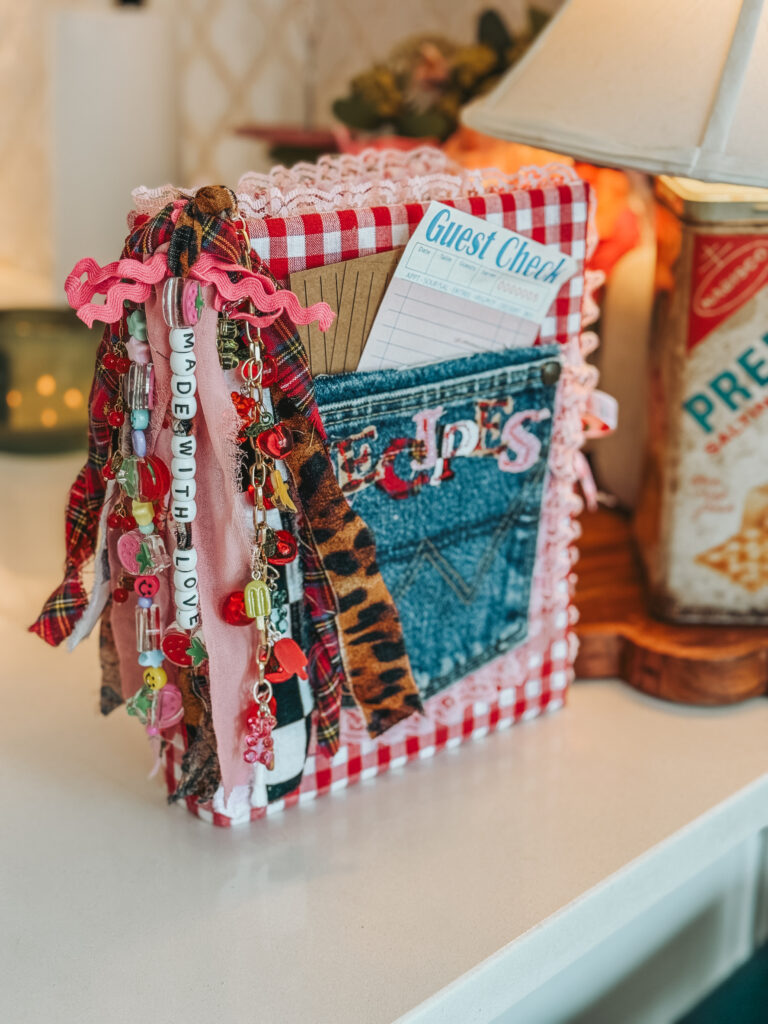
Combining the aesthetic of a vintage scrapbook with the functionality of a recipe binder, a recipe junk journal is the perfect way to document your culinary adventures. Today, I’m walking you through exactly how to create a retro-inspired, puffy-cover junk journal cookbook featuring a functional upcycled denim pocket, custom fabric lettering, and layers of beautiful lace.
Whether you are a seasoned crafter or a beginner looking for a weekend project, this step-by-step guide will show you how to turn a basic binder into a gorgeous, heirloom-quality recipe book. Let’s get crafting!
✂️ The Ultimate Supply List
Before we dive into the steps, you’ll need to gather your supplies. One of the best things about junk journaling is that you can use scraps you already have on hand! Everything I used for the fabric elements of this project came from my local Hobby Lobby.
Here is exactly what you need (along with some links to my favorite tools):
The Base & Structure:
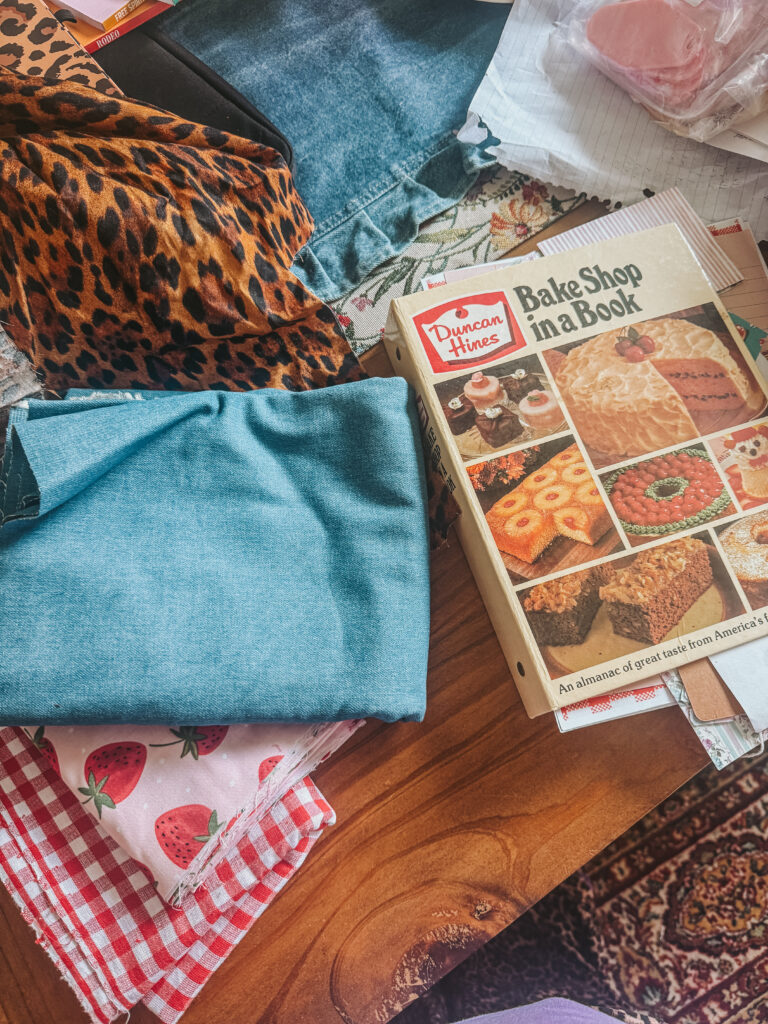
- A 1-Inch 3-Ring Binder OR a Vintage Cookbook (Look for one with a flat back that mimics the look of a binder. I used an old Duncan Hines cookbook as my base!).
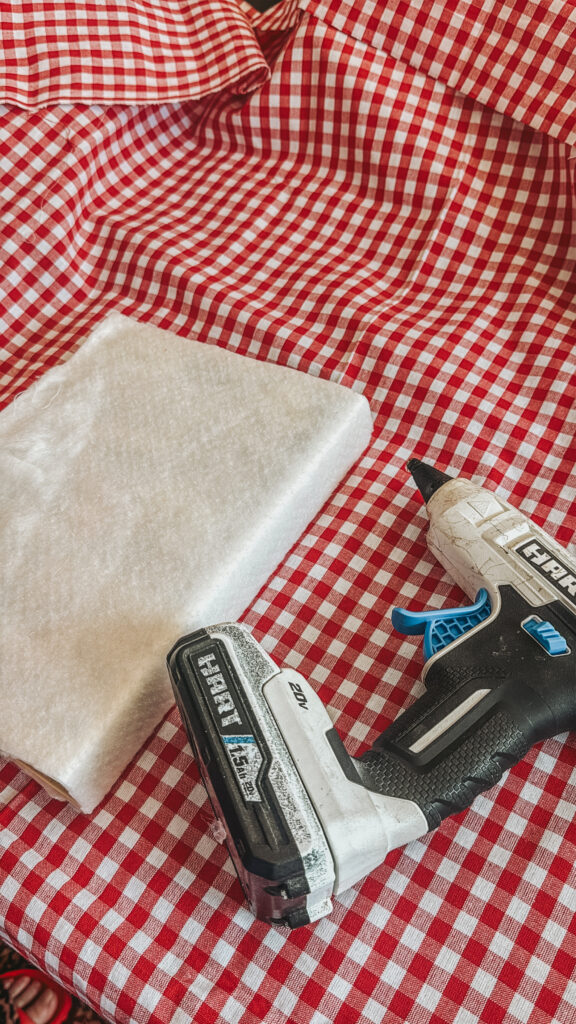
- Quilt Batting: This is the secret to getting that puffy, retro, soft-cover look!
- Posterboard: For creating clean, perfectly measured inside covers.
Fabrics & Trims:
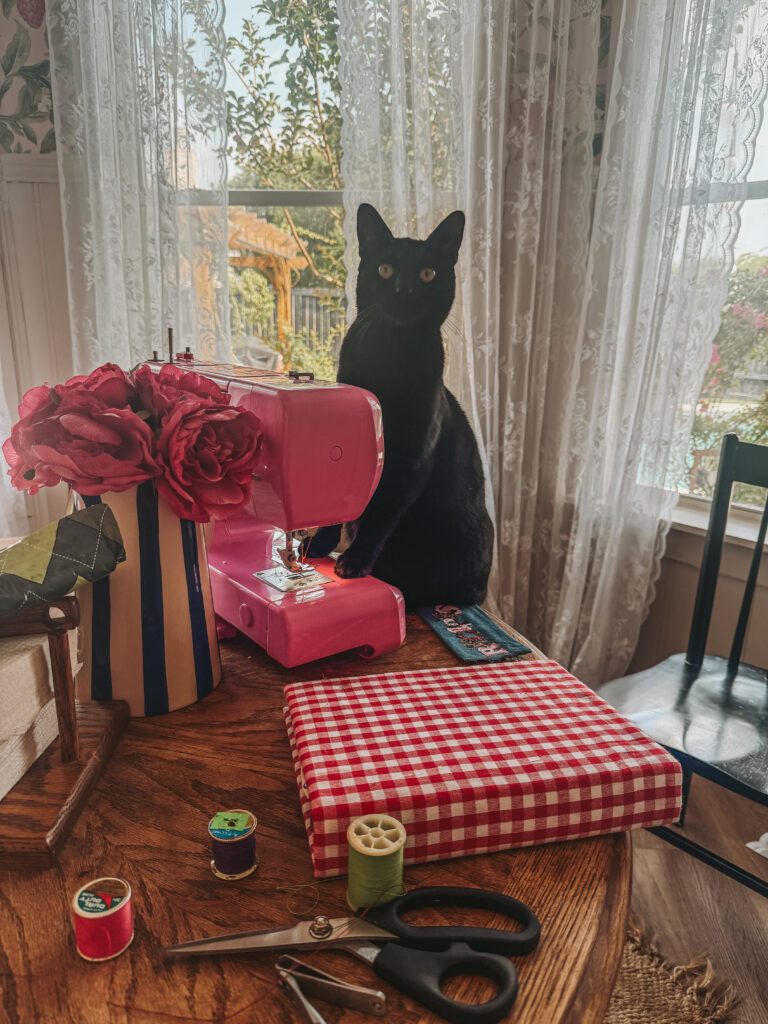
- Exterior Fabric of Choice: I went with a classic red and white gingham for that quintessential picnic/kitchen vibe.
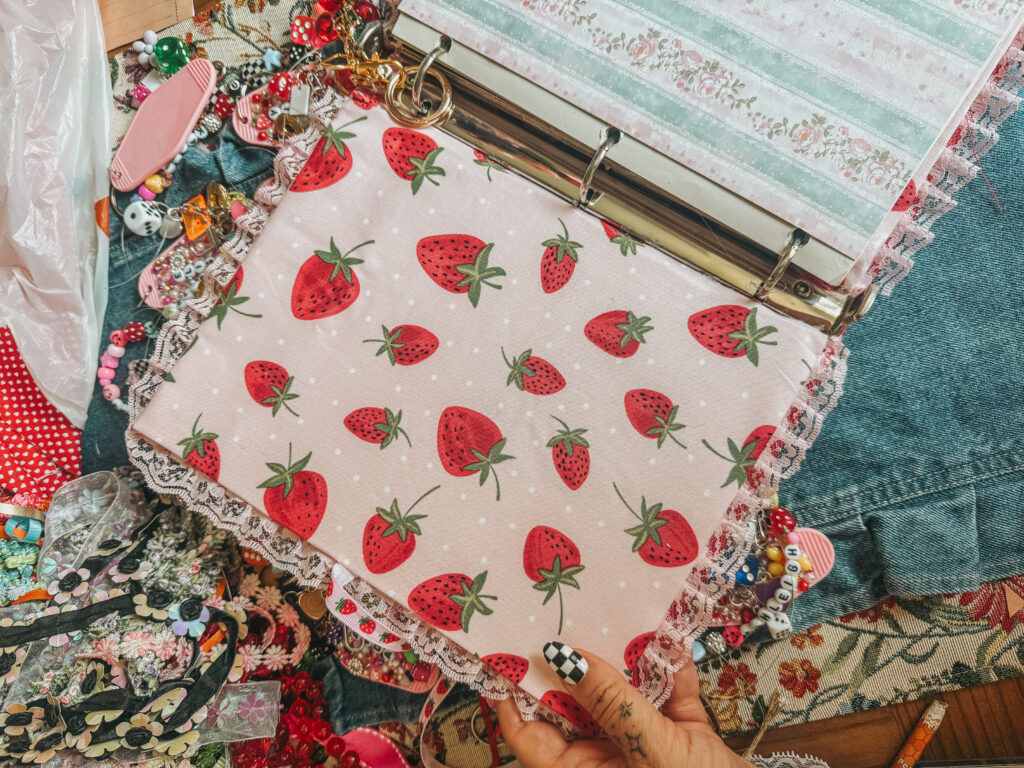
- Interior Fabric of Choice: A contrasting pattern (like the adorable pink strawberry fabric I used).
- Scrap Denim Jeans: I cut the back pocket off an old pair of Wranglers.
- Fabric Scraps for Lettering: Plaid, checkerboard, leopard print, and solid pink.
- Lace Trim: To frame the book and the pocket.
- Ribbon: To create a beautiful tie-closure.
- Fun Charms: For adding personality to the spine or pocket!
Tools of the Trade:
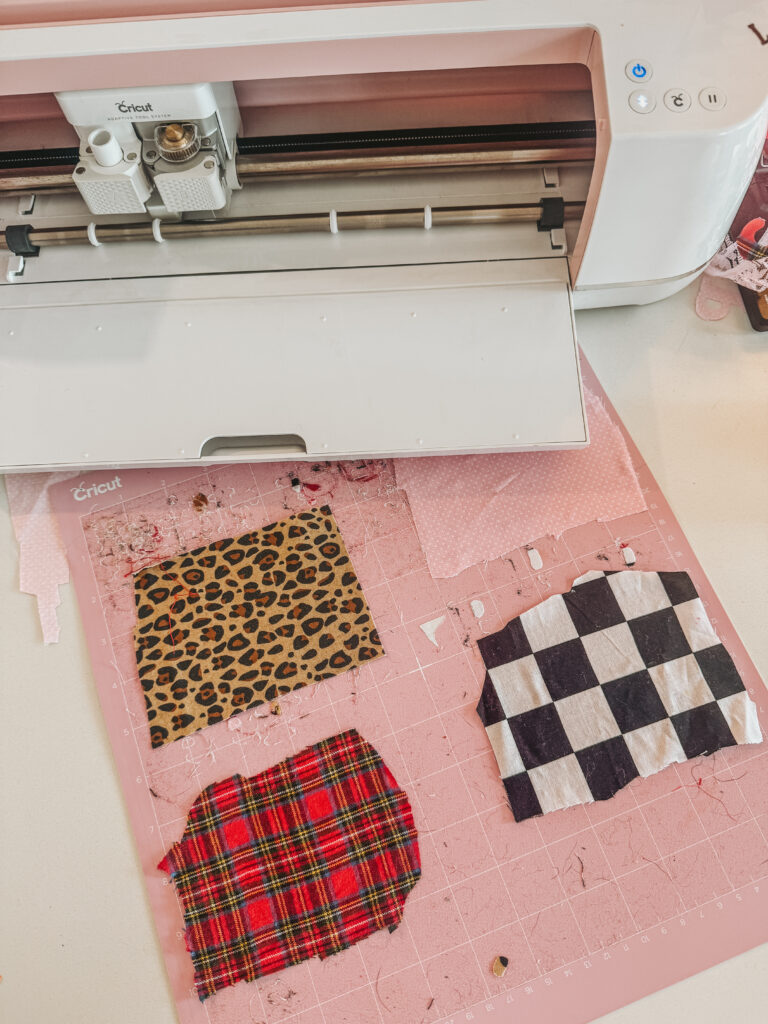
- Cricut Maker: For cutting out the perfect fabric letters.
- Pink JANOME Sewing machine: For stitching the letters onto our denim pocket. ( I feel like this machine was so perfect for beginners)
- Glue Sticks: You will use a lot of hot glue for this project!
- Fabric Scissors
- Hot Glue Gun
🧵 Step-by-Step DIY Recipe Junk Journal
Step 1: Prep Your Base for that “Puffy” Retro Look
To give your recipe book that nostalgic, pillowy feel, we are going to add a layer of batting.
- Lay your binder or vintage cookbook out flat.
- Cut your batting to the exact size of the exterior of your book. ( you can make the Final Cut once your done glueing it on) Just make sure there isn’t any overhang.
- Using your hot glue gun, carefully secure the batting directly to the outside covers and spine of the book. I would personally focus on one side at a time. So front, spine and then the back.
Step 2: Wrap the Exterior (The “Bend” Trick!)
Now it’s time to cover your book with your primary fabric (hello, gorgeous gingham!).
- Cut your fabric so it has a few inches of overhang on all sides- we will glue on the inside.
- Crucial Tip: Do not just slather hot glue everywhere and slap the fabric down! If the fabric is too tight, your book won’t be able to open and close properly.
- Glue the front cover first, wrapping the edges tightly over the inside lip. (I would only put glue around the border of the book).
- Pause and bend the book. Let the spine vent and naturally curve, then glue the spine fabric down.
- Finally, move to the back cover. Gluing them in distinct stages ensures your fabric has the exact amount of give it needs for the book to function.
- Now, open the book and glue down the excess on the inside of the book. Dont’ worry if it’s not an even amount.. we are going to cover it anyways.
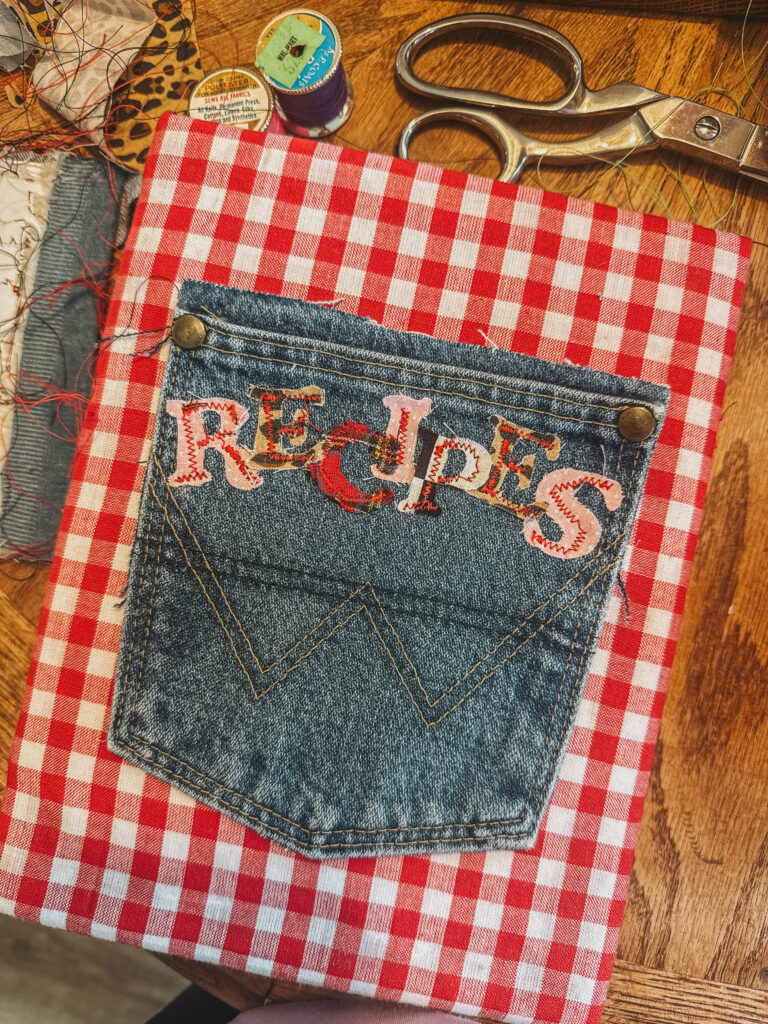
Step 3: Craft the Upcycled Denim “Recipe” Pocket
This is the star of the cover! I wanted to do something incredibly fun, so I upcycled the back pocket of an old pair of Wrangler jeans I found at a thrift store.
- Use your Cricut Maker to cut out the letters R-E-C-I-P-E-S from your various scrap fabrics. I love mixing patterns like leopard print, plaid, and checkerboard!
- Take a standard glue stick and tack your letters down onto the denim pocket. This holds them in place so they don’t shift.
- Take the pocket over to your sewing machine (my hot pink Janome handled this like a dream!) and do a messy, junk-journal-style zigzag stitch around the letters to permanently secure them.
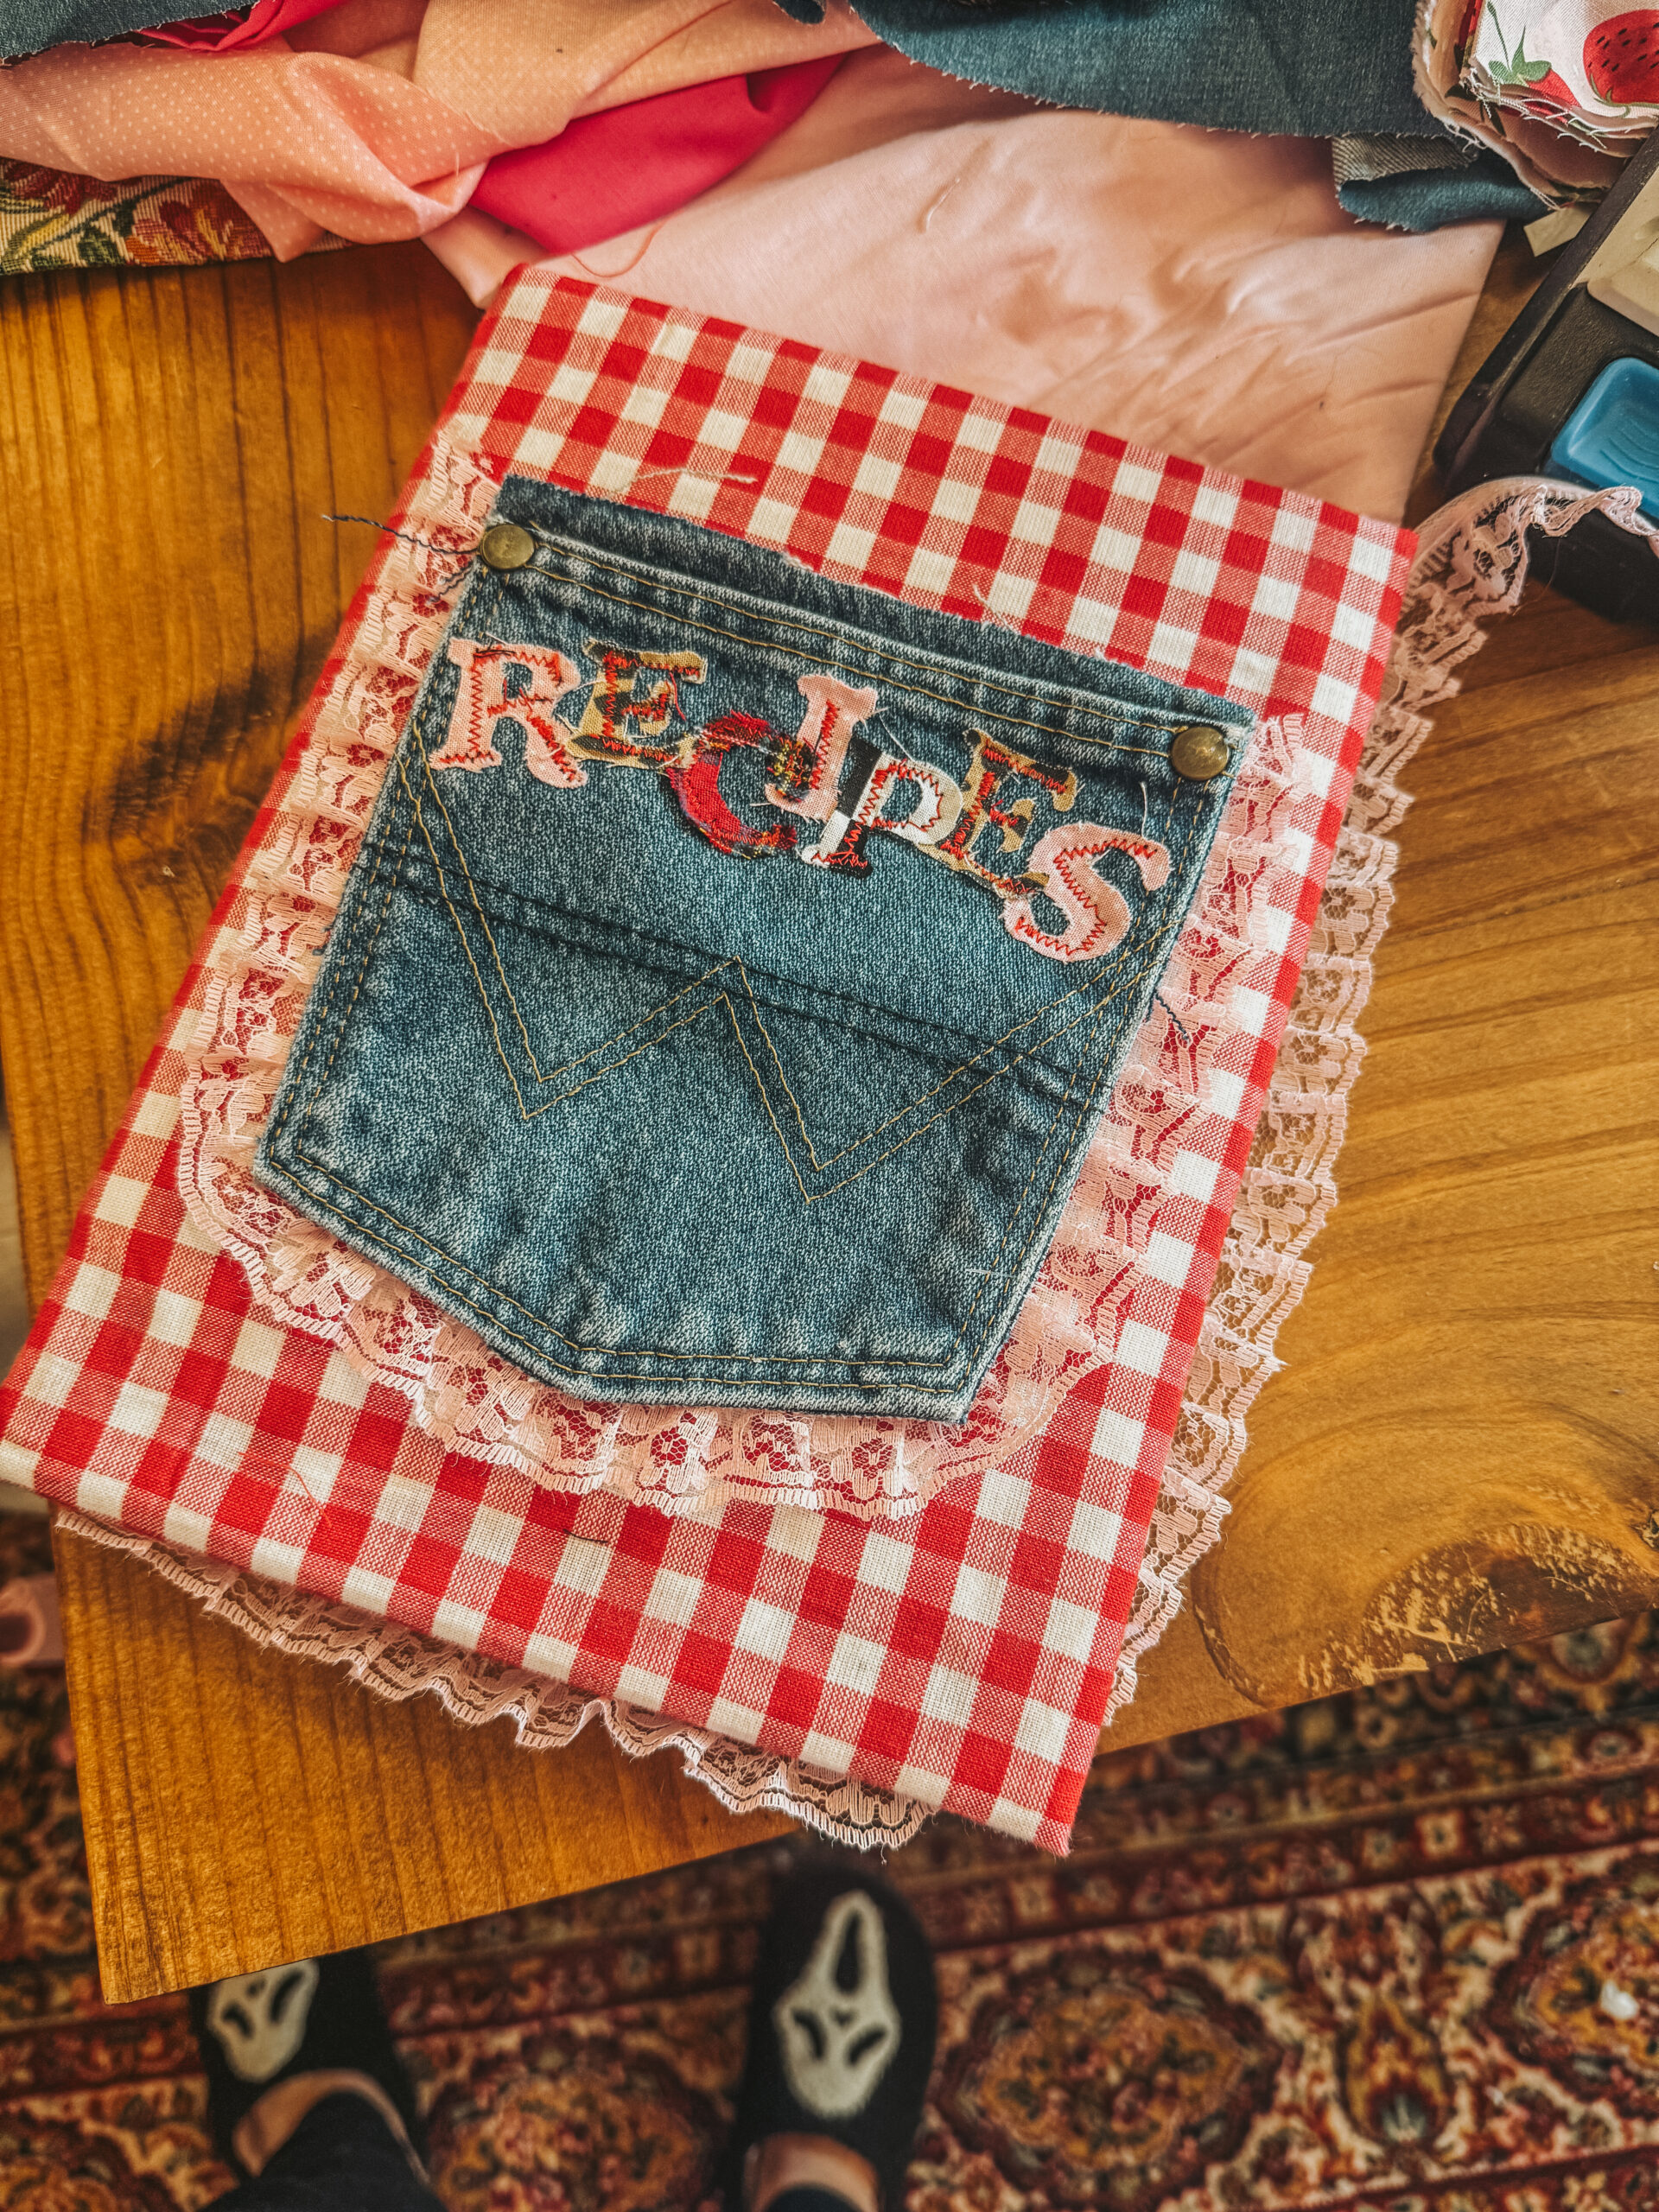
- Next, take your lace trim and hot glue it around the perimeter of the denim pocket. Important: Only glue the lace to the left, right, and bottom edges of the pocket. Leave the top open!
Step 4: Attach the Pocket to the Cover
We want this pocket to be fully functional so you can slide loose recipe cards, grocery lists, or coupons into it.
- Position the denim pocket perfectly centered on your front cover.
- Apply hot glue only to the side and bottom edges of the pocket. Leave the top completely unglued.
- Press firmly. You now have a working front-cover pocket!
Step 5: Add Lace Trim to the Book Edges
To tie the whole look together and add some frilly charm, we are going to frame the book in lace.
- Take your lace trim and run it along the outer edges of the front and back covers.
- To keep the outside looking neat, hot glue the lace to the inside edge of the cover so it peeks out perfectly.
- Note: Skip the spine! Only apply the lace trim to the top, bottom, and outside edges of the front and back covers.
Step 6: Create the Flawless Inside Lining
When you wrap a book, the inside edges where the fabric and lace are glued down can look a little messy. Here is my favorite crafter’s trick to hide all those imperfections!
- Cut two pieces of posterboard slightly smaller than your front and back inside covers.
- Take your second fabric (my cute strawberry print!) and wrap it tightly around the posterboard, hot gluing the fabric to the back of the posterboard. (Basically same method we did on the book covers)
- Apply a generous amount of hot glue to the back of the posterboard panels and press them firmly onto the inside covers of your book.
- This creates a perfectly smooth, flawless interior that hides all your raw edges and glue marks!
Step 7: The Finishing Touches (Ribbons & Charms)
No junk journal is complete without some beautiful dangles and closures.
- The Ribbon Tie: Cut two long lengths of ribbon. Hot glue one to the inside edge of the front cover (before you put the posterboard down, or tuck it slightly under), and one to the back cover. Now you can tie your chunky recipe book closed with a pretty bow!
- The Charms: I added some fun, beaded charms and dangles to the spine hardware and hooked some onto the denim pocket to give it that true, eclectic “junk journal” feel.
💡 How to Use Your Recipe Junk Journal
Now that your DIY recipe book is finished, it’s time to fill it up! Because this is a junk journal, there are no rules.
- Punch holes into family recipe cards and clip them right into the binder rings.
- Create pockets out of vintage scrapbook paper on the inside pages to hold cut-outs from magazines.
- Add tabs to categorize your bakes, dinners, and holiday treats.
- Store extras in your amazing upcycled denim cover pocket!
Making a DIY recipe junk journal is such a rewarding project. Not only are you upcycling old materials like scrap jeans and vintage books, but you are also creating a beautiful heirloom that can be passed down through your family.
Happy Crafting and Happy Cooking! Tag me in your fun creations & make sure you are following me on social media so you never miss a post!
Follow me on Instagram|Pinterest|TikTok | YouTube |Facebook
xoxo Ashton


2 Comments