DIY the Viral Prada Necklace for Under $20
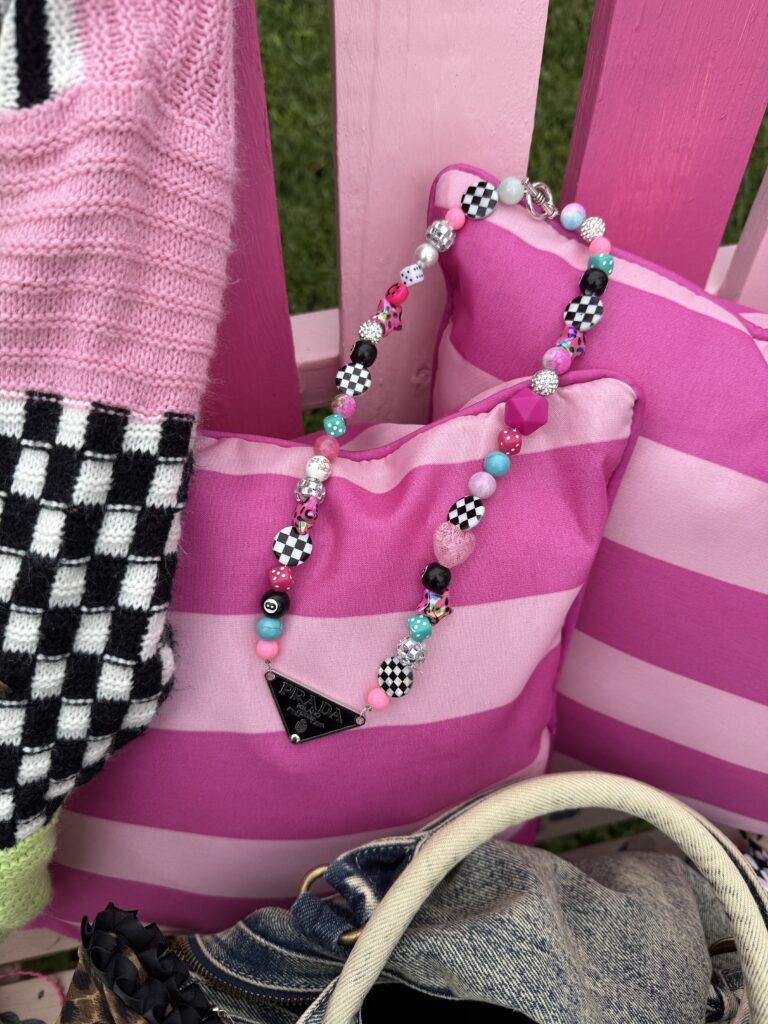
Let’s have a very honest, very sarcastic conversation about the absolute audacity of the internet right now. Lately, if you have been scrolling through your feeds, hanging out on Pinterest, or looking at literally any cool-girl boutique online then surely you have seen the necklace. You know exactly the one I am talking about. It’s that eclectic, chaotic, chunky beaded masterpiece that usually features a very recognizable designer logo smack in the middle. It screams Y2K nostalgia, it aggressively rejects the boring beige minimalist aesthetic, and it is the ultimate “eccentric maximalist” accessory. Because of this hype, I’m going to teach you how you can DIY the Viral Prada Necklace for Under $20.
But here is the part that is making me lose my absolute mind. Believe it or not, people are selling these necklaces and people are actually buying them for over $100. In fact, some boutiques are slapping a $150 price tag on them. Honestly? That is unhinged behavior. Ultimately, gatekeeping dopamine dressing behind a triple-digit price tag is not the vibe we are bringing into this year.
Instead, I’m here to spill the ultimate “if you know you know” secret. Of course, the boutiques don’t want you to know this. However, the truth is you can recreate this exact high-fashion, maximalist look for under $20. Yes, twenty dollars. In reality with a little bit of wire, a sneaky online find, and a trip to the craft aisle, In under ten minutes you can build a piece that looks infinitely cooler and more custom than the mass-produced ones selling for $150.
Since discovering this, I have basically turned into a one-woman jewelry factory because I literally want to make one of these for everyone I know. For example, I just finished one for Miss Nancy Joe (she is the absolute sweetest and always brings the coolest stuff to my Festive Fun events at Granny Camp), and I’m going to surprise her with it this weekend. I’ve already got variations planned for the rest of the year…I am absolutely making a spooky one for Summerween, and you better believe there will be a mega-festive Christmas version.
Grab a giant iced coffee, ignore whatever corporate emails you are supposed to be answering, and let’s dive into the ultimate DIY designer jewelry hack. We are saving money, and we are making it weird.
The Economics of Eccentric Maximalism: The $150 vs. $20 Breakdown
Before we get our hands dirty with pliers and wire, let’s talk about the math. After all, the math is what makes this project so deeply satisfying.
Typically, when you buy one of these trendy necklaces from an online boutique, you are paying for the aesthetic of the curation. Essentially you are paying a premium for someone else stringing a pearl next to a plastic 8-ball.
In contrast, here is what it actually costs to be a maximalist mastermind:
- The Designer-Inspired Logo: ~$8.00 to $10.00
- The Eclectic Bead Mix: ~$5.00 (Always hit the sales!)
- The Hardware (Wire, Clamps, Clasps): ~$5.00
- Total Investment: Under $20.00
That leaves you with over $100 in savings. Do you know what you can do with $100? Go to the Goodwill bins in Greenspoint or maybe buy some leopard print fabric. Do a back porch makeover. Stop paying people $150 to string beads because you can easily do it at home, save money and have it exactly how you want it.

Sourcing the Stash: Where to Find the “Junk”
To pull off this specific aesthetic…what I lovingly call the “junk” aesthetic…you need to source materials that look like they don’t belong together. The beauty of this trend is the absolute friction between a high-end luxury logo and a cheap, playful plastic bead.
Sourcing the Charm: The DHgate Secret
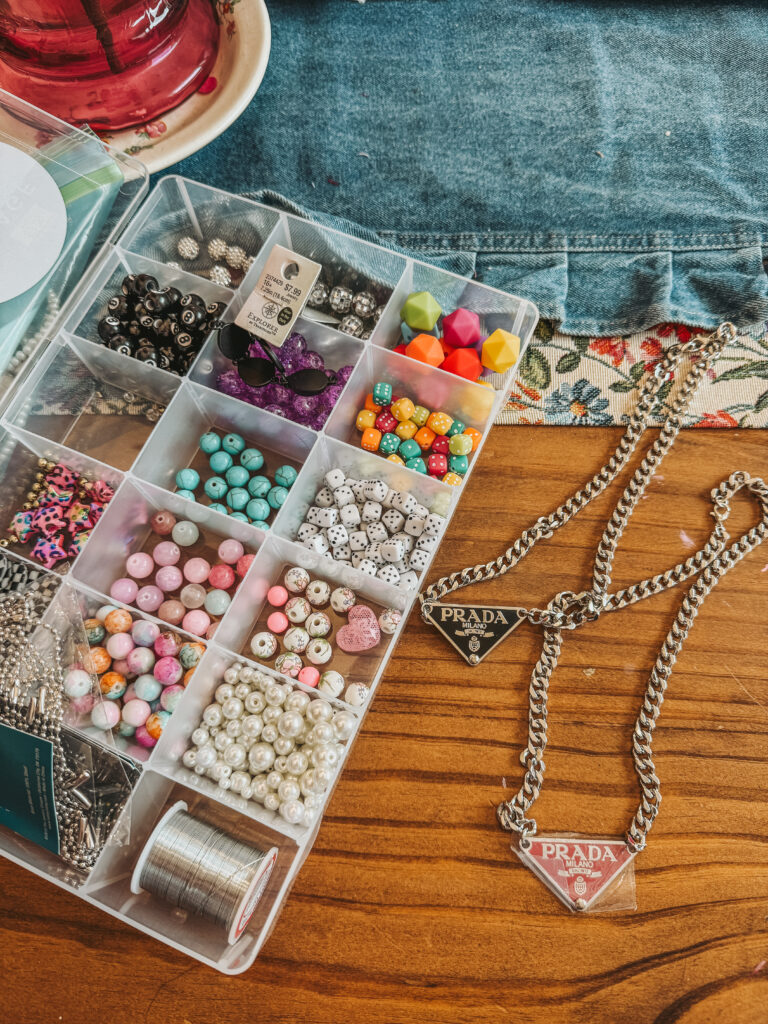
Let’s talk about the elephant in the room: the Prada logo. I am not out here chopping up authentic vintage bags for a craft project, and I highly doubt the boutiques selling these for $120 are either. The secret is DHgate. [LINKED MINE HERE] [ORDERED THIS BRAND TOO]
Order a few of them, because once you make one of these. You are going to be addicted. Now you can of course buy from the upsellers on eBay or Etsy that are selling the same charm for $60…HIGHWAY ROBBERY! But they purchased it from DH and are just up sellers.
Sourcing the Beads: The Hobby Lobby Haul
Once you have secured the bag (or rather, the tag). Its time to go to Hobby Lobby. Do not go in with a plan. A plan is the enemy of maximalism. You want to look for the most chaotic, dopamine-inducing beads in the aisles. Just pick all the beads you love and we will make it work.
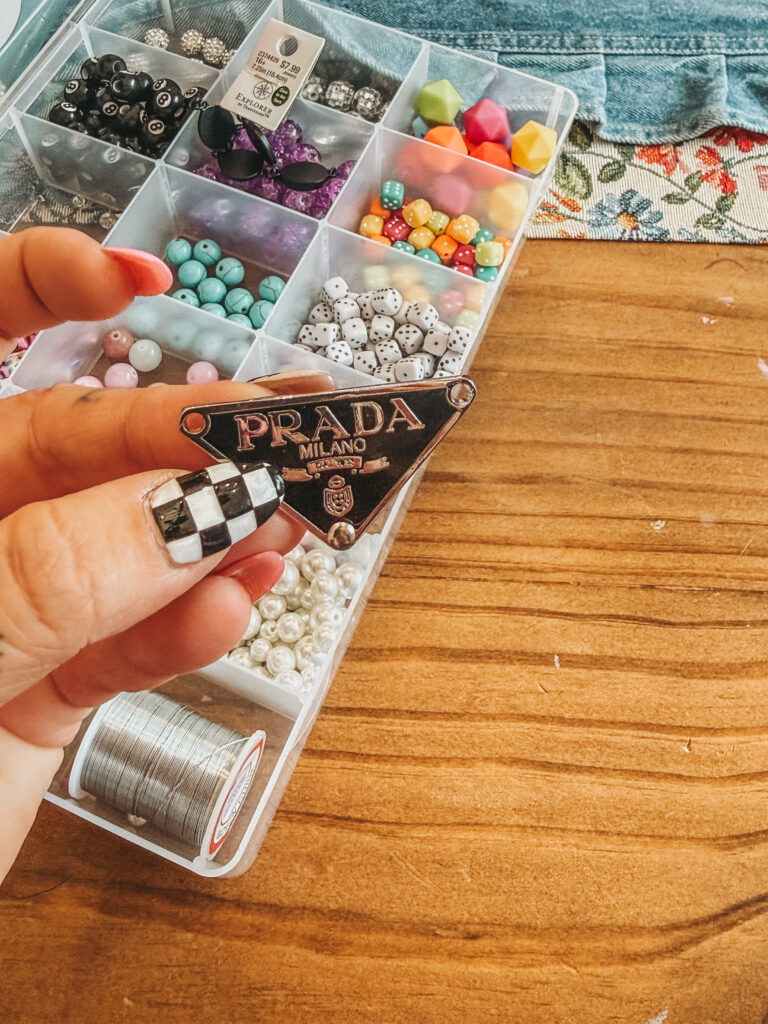
For my signature look, I always grab:
- Checkered Beads: Black and white checkers are my neutral. They ground the wild colors.
- Novelty Game Beads: Dice, 8-balls, playing cards. It adds that spunky, Y2K edge.
- Bright Faux Pearls: Hot pink, turquoise, lime green.
- Classic Faux Pearls: The traditional creamy white pearls provide that crucial “high-low” contrast against the plastic novelty beads.
- Rhinestone Spacers: Because my brain is festive, and festive requires sparkle.
The Essential Hardware List (Do Not Skip This)
Do not string these heavy beads and that metal charm onto a cheap piece of stretchy elastic cord. It will definitely snap, and your beautiful dice beads are going to roll under the refrigerator, only to be found by Wednesday the cat (she is a girl, by the way, and she loves batting at runaway beads). We need industrial-strength hardware for this.
- 26-Gauge Wire: This is the sweet spot. It is thin enough to thread through small beads . Its also strong enough to hold the weight of the chunky ones without stretching or snapping.
- Beaded Clamps/Crimps: These are tiny metal tubes that you crush with pliers. They are the only thing keeping your necklace from exploding.
- A Tiffany-Style Toggle Clasp: Forget those tiny lobster claws that take twenty minutes to hook behind your neck. A chunky metal toggle clasp looks intentional, industrial, and is a breeze to put on.
- Needle-Nose Pliers & Wire Cutters: Your standard household toolbox will do just fine.
The Step-by-Step Tutorial: Building the $20 Masterpiece
Alright, clear off your workspace. Get your checkered nails ready. It’s time to construct.
Step 1: The Extraction
Take your DHgate Prada necklace and look closely at how the chain connects to the two holes at the top of the triangle. Take your wire cutters or pliers and snip that existing chain right off. Don’t Throw the chain away… you could use that for a bag chain for something! You should now be holding a totally naked enamel logo with two empty holes.
Step 2: Wiring the Anchor
Cut a long piece of your 26-gauge wire…I usually do about 14 inches so I have plenty of room to work. Thread the wire through one of the holes on the Prada charm.
Now, grab one of your beaded clamps. Slide the clamp down the wire so it holds the short tail and the long working end together, snug right against the charm. Take your pliers and crush that clamp down hard. It should bite into the wire and lock it securely in place. Snip any tiny piece of the short tail that is sticking out. You now have a secure, anchored wire ready for beads.
Step 3: The Dopamine Stringing Process
This is where you just have to trust the process and let your spunky, sarcastic soul take the wheel. Start threading your beads onto the wire.
Do not create a recognizable pattern. If you put two pearls together, follow it with a giant 8-ball. If you use a hot pink rhinestone, slap a black and white checker right next to it. You want the eye to constantly be jumping around. Hold it up to your chest periodically to check the length and see how the colors are playing together.
Step 4: Clamping the Clasp
Once your right side is long enough to reach the back of your neck comfortably, it is time to tie it off. Slide a beaded clamp onto the wire, then thread the wire through the circular half of your toggle clasp. Loop the wire back down through the clamp, pull it tight so there are no awkward gaps in your beads, and crush the clamp with your pliers. Snip the excess wire.
Step 5: The Left Side
Repeat the exact same process for the left side of the charm. Try to make the bead length equal so the logo hangs dead center on your chest, but do not try to mirror the bead pattern. Asymmetrical beads look so much more expensive and custom. Add the bar half of your toggle clasp to the end, and you are done.
Integrating the “Junk” Aesthetic Into Your World
Now that you have saved $130 and built the coolest accessory in your closet, how do you style it? The great thing about this aesthetic is that it demands to be the center of attention. I throw this necklace on during my Sunday Reset routine with an oversized band tee and biker shorts. I immediately feel less like a swamp monster and more like a creative director.
But where this necklace really shines is when it is surrounded by equally loud, equally maximalist projects. If you are going to commit to the bit, you have to go all the way.
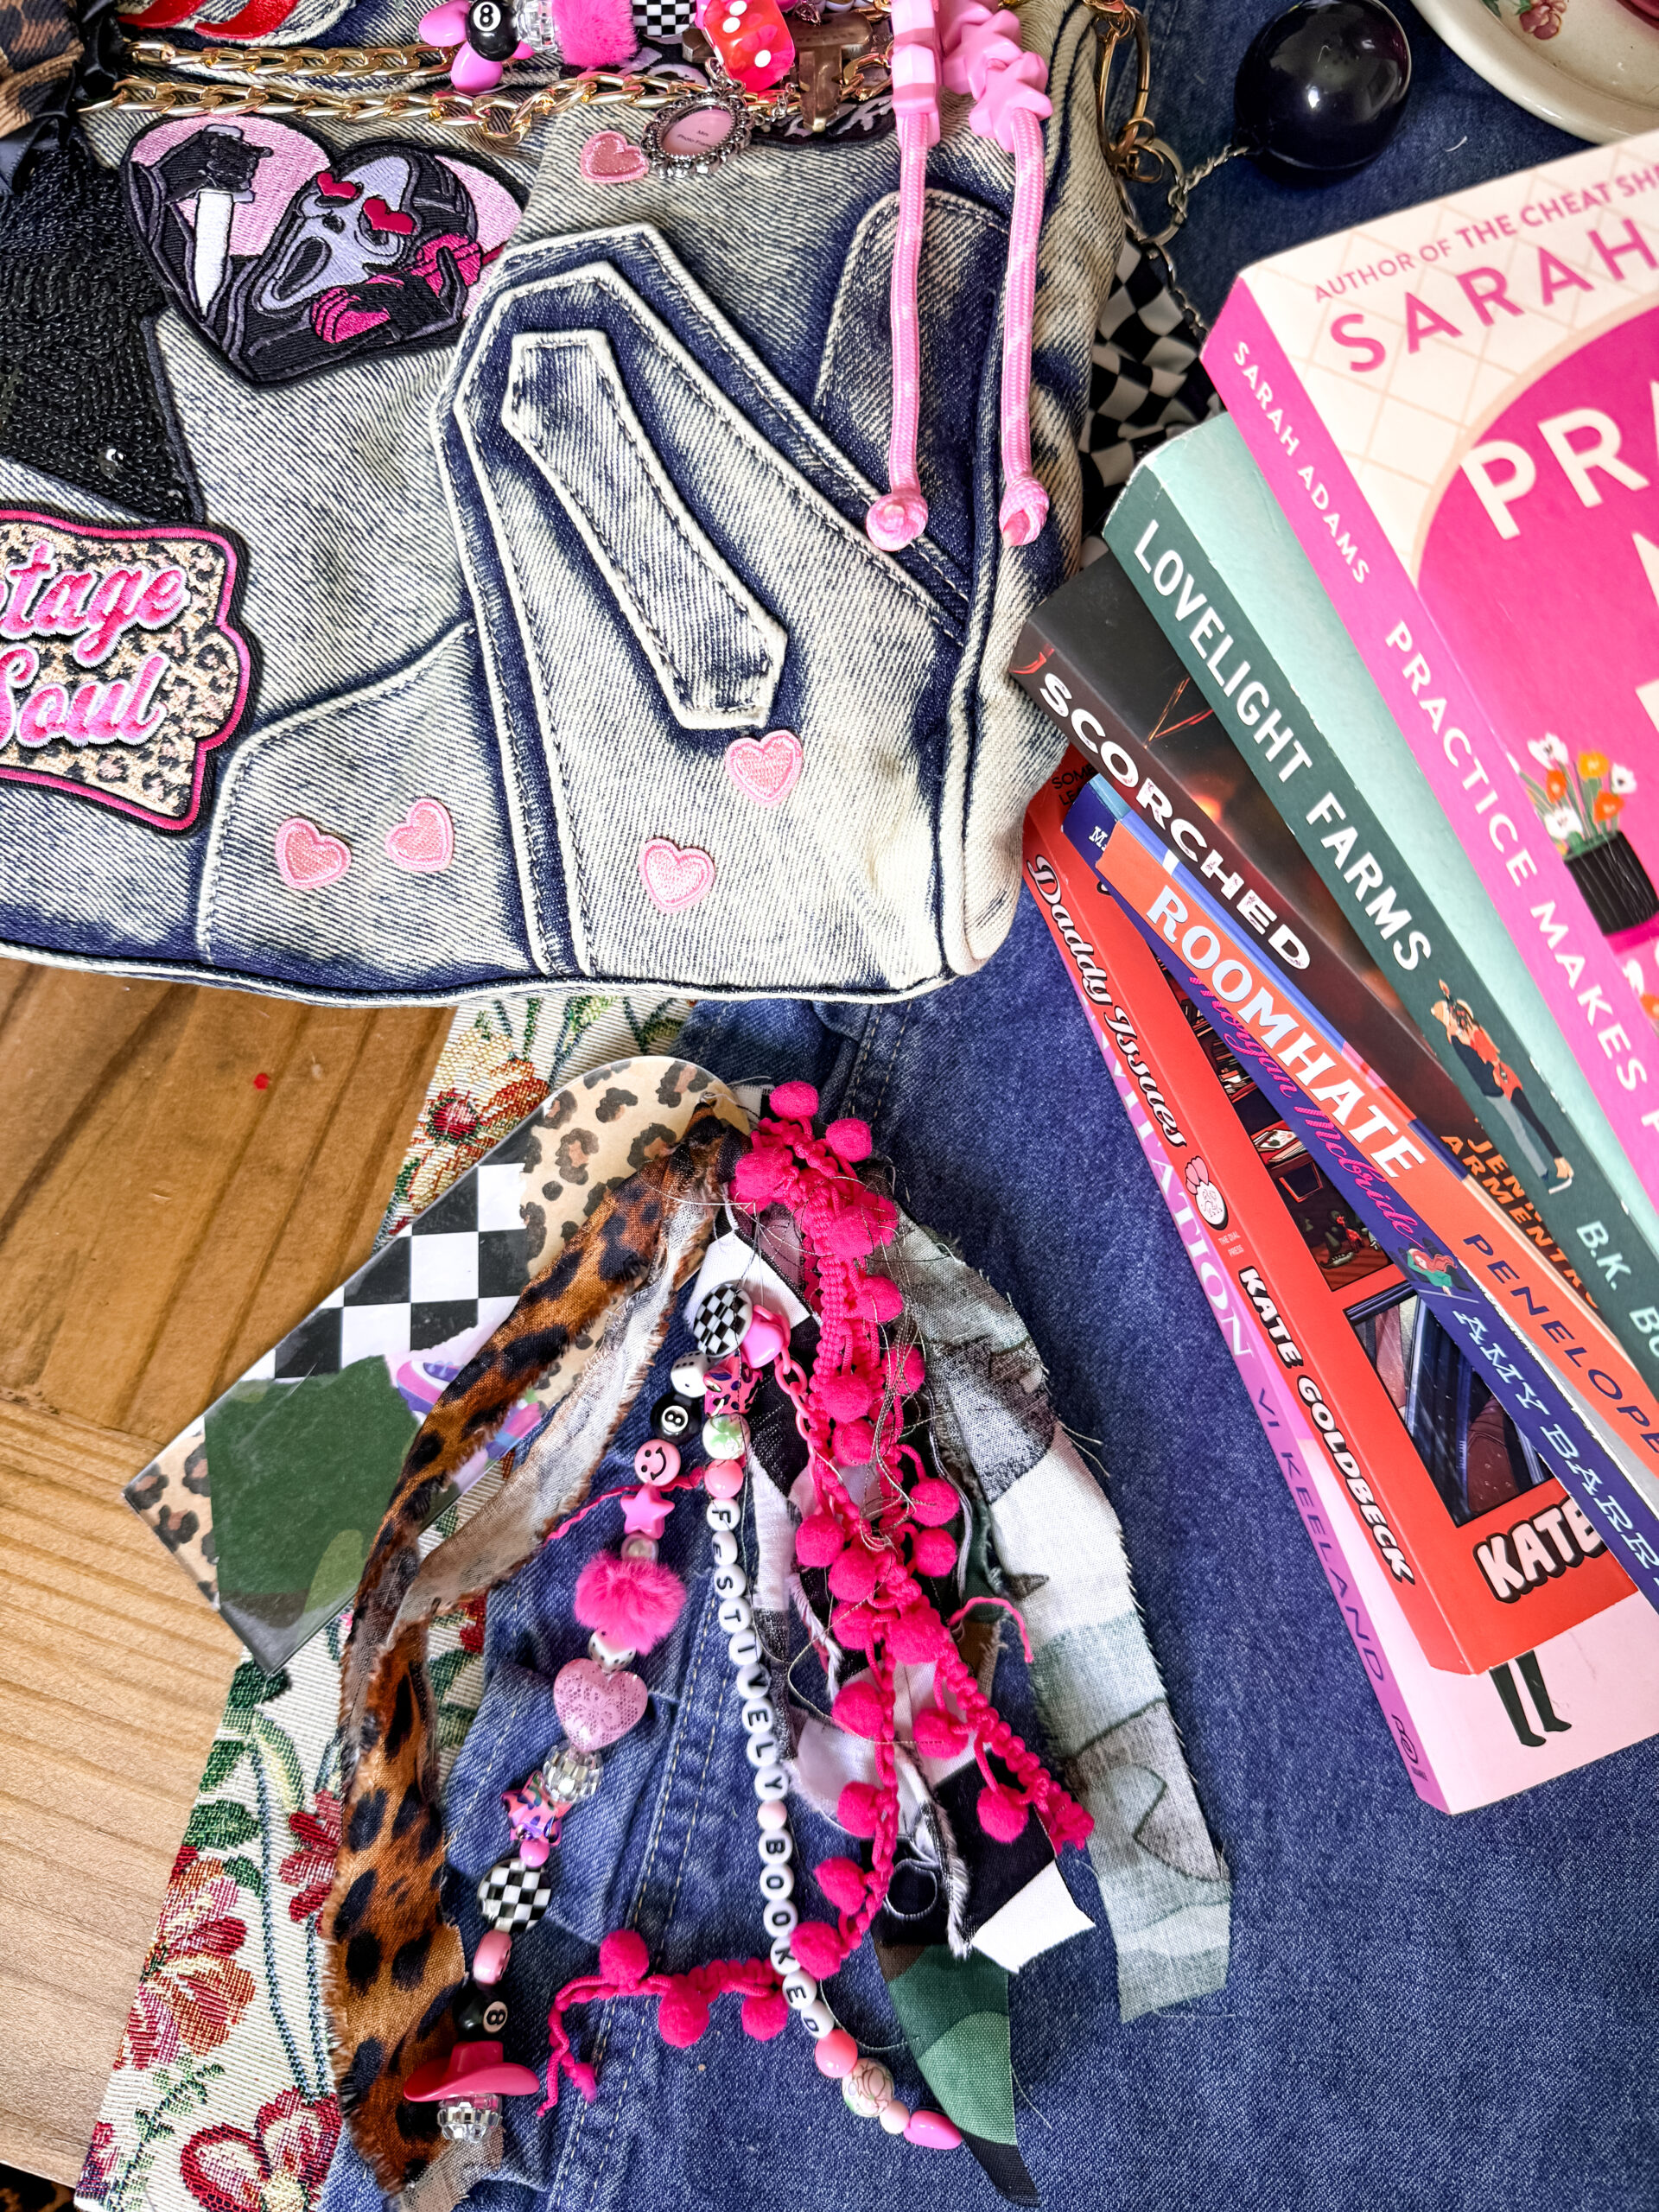
Look 1: Pairing with the DIY Junk Purse
If you haven’t read my [DIY Junk Purse Blog Post], you need to open that in a new tab right now. After all, the junk purse is the exact same concept as this necklace, just in bag form. For that project, we took an old denim bag and absolutely plastered it with leopard print bows, vintage patches, safety pins, and tamagotchis.
Together, when you carry the heavily distressed, patch-covered junk purse while wearing this chunky beaded Prada necklace, it creates a cohesive, modern maximalist uniform. Essentially, it says, “I thrifted this, I crafted this, and I am cooler than the minimalist beige influencers.” Furthermore, the clashing textures of the denim on the bag and the shiny enamel of the necklace are a match made in eclectic heaven.
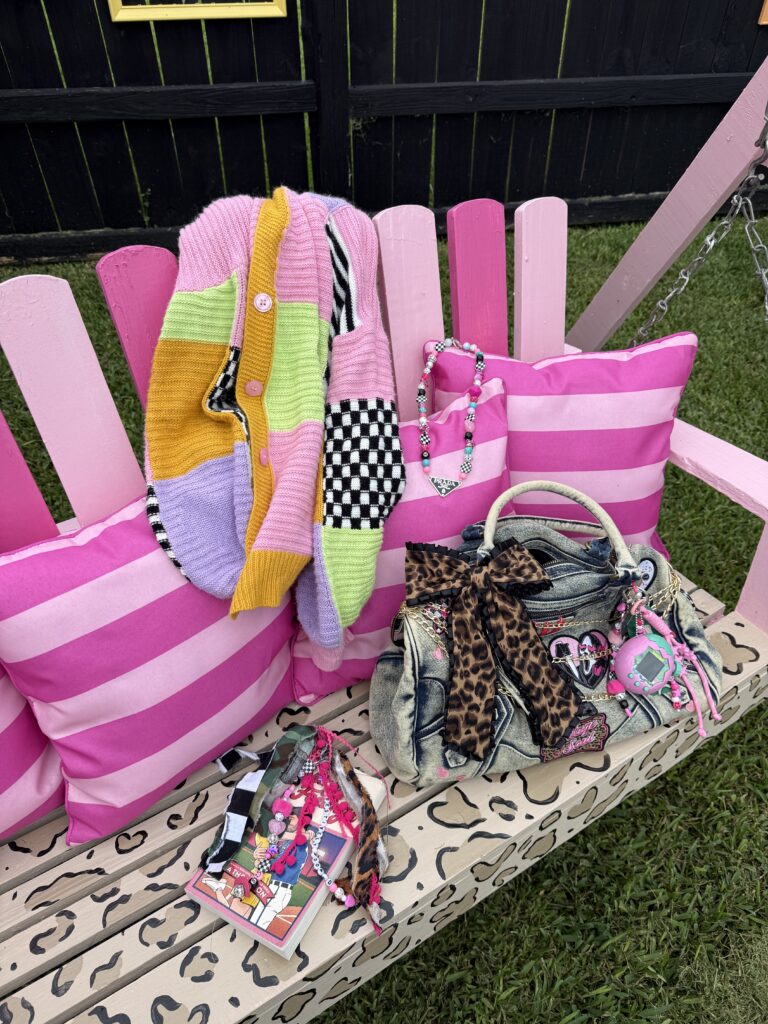
Look 2: Lounging on the Painted Back Porch Swing
I cannot look at this necklace without picturing it sitting on the swing we completely overhauled in the backyard. Check out the full breakdown on the [Funky & Fun Backyard Makeover].
We took a boring wooden swing and painted it bright pink, added bold black and white checkered accents, and hand-painted leopard print spots all over the seat. We surrounded it with floating colorful vintage frames I painted against a black fence. Wearing this bright, dopamine-inducing necklace while sitting on that heavily patterned swing surrounded by pink striped pillows is the ultimate aesthetic flex. It’s living inside a Pinterest board. The checkered beads on the necklace perfectly bounce off the painted checkers on the swing. It is loud, it is obnoxious, and I am obsessed with it.

Look 3: Using the Leftovers for a DIY Junk Bookmark
You are going to have leftover beads. Do not put them back in the box to gather dust! Take a look at my [DIY Junk Bookmark Blog Post] to see how we use the exact same wire, clamps, and bead remnants to create heavy, dangly bookmarks for our thriller novels.
When I am reading a slasher book on the back porch, having a chunky, bead-heavy bookmark hanging out of the pages that perfectly matches the necklace. I am wearing is peak maximalist coordination. It’s taking the “junk” concept and applying it to every aspect of your life. Why have a boring paper bookmark when you can have a heavy metal, pearl, and dice-covered chain marking your page?
The Community of Crafting
The best part of trends like this isn’t just sticking it to the overpriced boutiques…it’s the community aspect of crafting. If you didn’t know I own the brand Festive Fun and I host monthly crafting events. The reason I host these events is because I love getting a bunch of creative, loud, spunky women together to build things.
Next time you are planning a get-together, tell everyone to bring a $10 DHgate charm and a box of beads, and have a necklace-making party. It is so much fun to see how everyone interprets the “junk” aesthetic differently.
And if you are local, you better be coming to our next Festive Fun event at Granny Camp. I’ll be wearing my $20 Prada hack, Miss Nancy Jo will be wearing hers, and we can all talk about how we absolutely refuse to pay retail for anything we can make ourselves with a pair of pliers and a little bit of sarcasm.
Now go order your supplies, cancel your plans, and make something ridiculously colorful.
If you make this, tag me immediately! I want to see your chaotic bead combos.
xoxo,Ashton Sedita
Follow me on Instagram|Pinterest|TikTok | YouTube