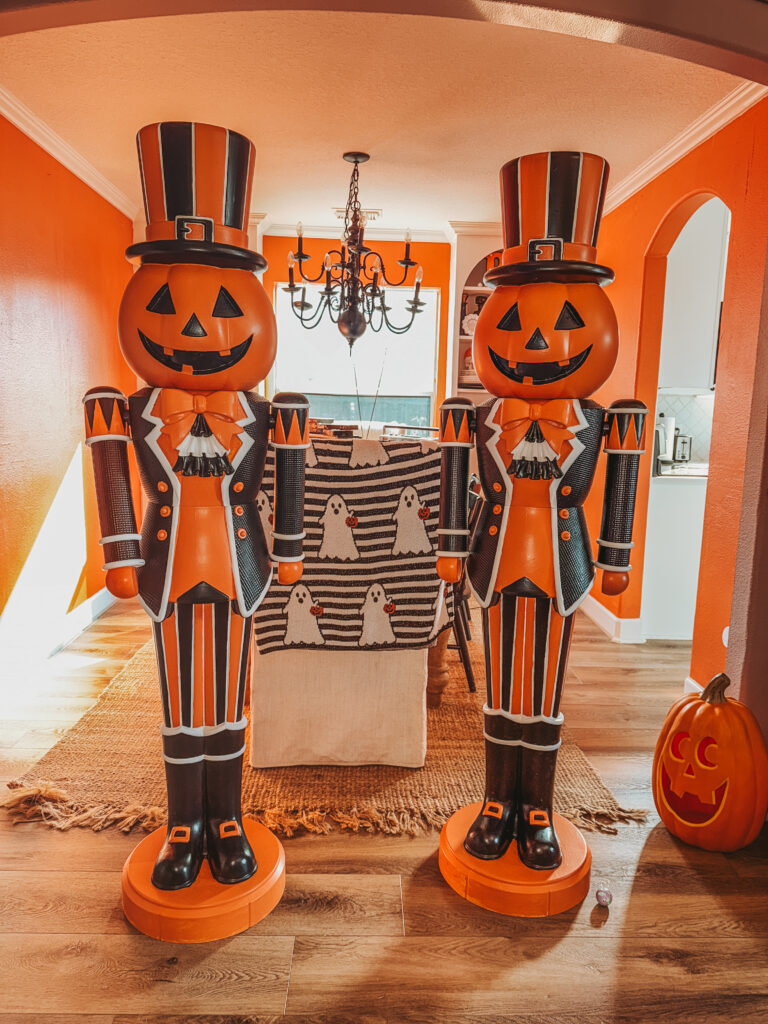
How I Painted the Most Nostalgic Halloween Nutcrackers🎃✨
Let’s set the scene: it’s September, my pumpkin spice latte is already lukewarm because I’ve been knee-deep in paint swatches, and I’ve got the most judgmental white nutcracker from Walmart staring at me like, “Well? Are you gonna make me fabulous, or what?”
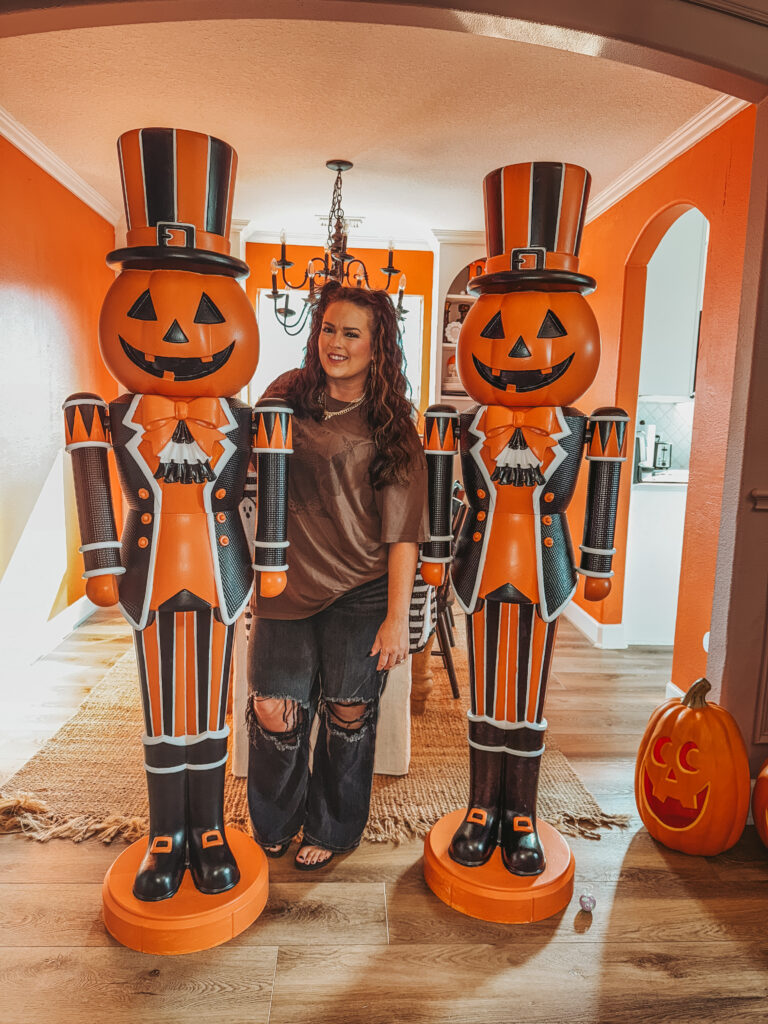
If you’re new here, hi — I’m Ashton, and a couple of years ago I accidentally became the girl who painted Christmas nutcrackers. It started as a cute DIY idea when Walmart first dropped those red and green and flipped them to the cutest red pin and gold nutcrackers.
But let me be the first to admit… my OG nutcrackers? They were a hot mess. Why?
Because I made the rookie mistake of using cheap craft paint.
It went on streaky, it took way too many coats, and it had all the staying power of a dollar store nail polish. Lesson learned. This year, I did things differently — and by differently, I mean I went with wall paint. Big girl moves. Thick, luxurious coverage. Color payoff that makes you want to cry happy tears. And yes, it’s still budget-friendly because Lowe’s and Home Depot will sell you paint samples for just a few bucks.
The Exact Paint Colors I Used
For the sake of keeping this classic and nostalgic, I went with the OG Halloween trio. If you want to copy my look exactly, here’s your shopping list:
• Orange: Sherwin-Williams Copper Harbor (SW 6634)
• White: Sherwin-Williams Pure White (SW 7005)
• Black: Sherwin-Williams Tricorn Black (SW 6258)
You can get these in sample sizes for around $4–$6 each, and trust me — a little goes a long way on these nutcrackers.
⸻
Supplies You’ll Need 🛠
Let’s keep it real: DIY projects are only fun when you’re not making last-minute runs to the store for “just one more brush.” Here’s what you actually need:
• Nutcrackers – Mine are from Walmart. [LINK]
• Paint Brushes – A mix of small detail brushes and medium flat brushes.
• Wall Paint – In the three colors listed above.
• OPTIONAL: Painter’s Tape – For those clean, crisp lines.
• Drop Cloth or Old Sheet – Trust me, paint travels.
• Sandpaper (optional) – For lightly scuffing the glossy factory finish.
• Sealer (optional) – If you plan to keep these outdoors.
Step-by-Step: Painting Your Halloween Nutcrackers
Step 1: Prep Like a Pro
If your nutcracker came with a shiny surface, give it a light sanding or wipe it down with a degreaser. This helps your paint stick instead of peeling off like a bad spray tan. (Full transparency- I am lazy and I didn’t do this)
Step 2: Plan Your Design
You can freestyle it, but I like to tape off sections so I know exactly which areas will be orange, white, and black. This not only keeps your design balanced but also makes you feel like a real artist (bonus).
Step 3: Base Coat
Lay down your main colors: orange for the head, black for the jacket, white for the stripes. Don’t panic if the first coat looks sad — the second coat is where the magic happens.
Step 4: Details Matter
Switch to your smaller brushes and add in the little things — buttons, belts, bow ties, mustaches (if your nutcracker has one)- This is where the personality comes out- the more character the better.
Step 5: Seal It (Optional)
If your nutcrackers will brave the outdoors, give them a coat of clear sealant. If they’re living inside, skip it.
⸻
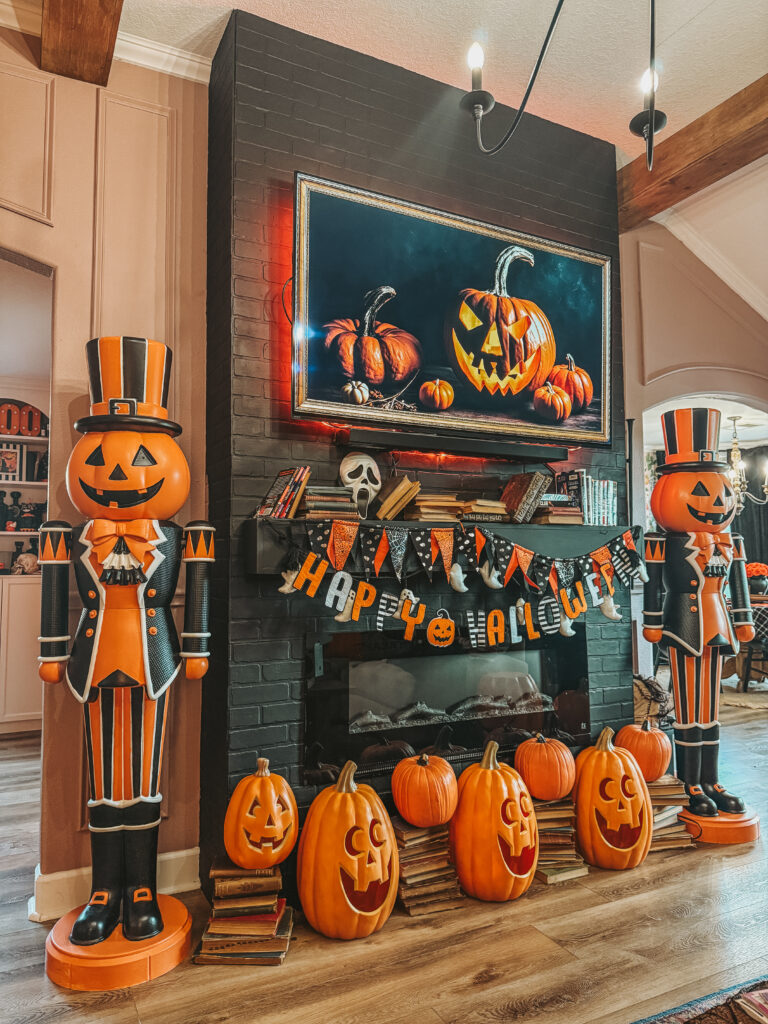
Why I Went Classic This Year
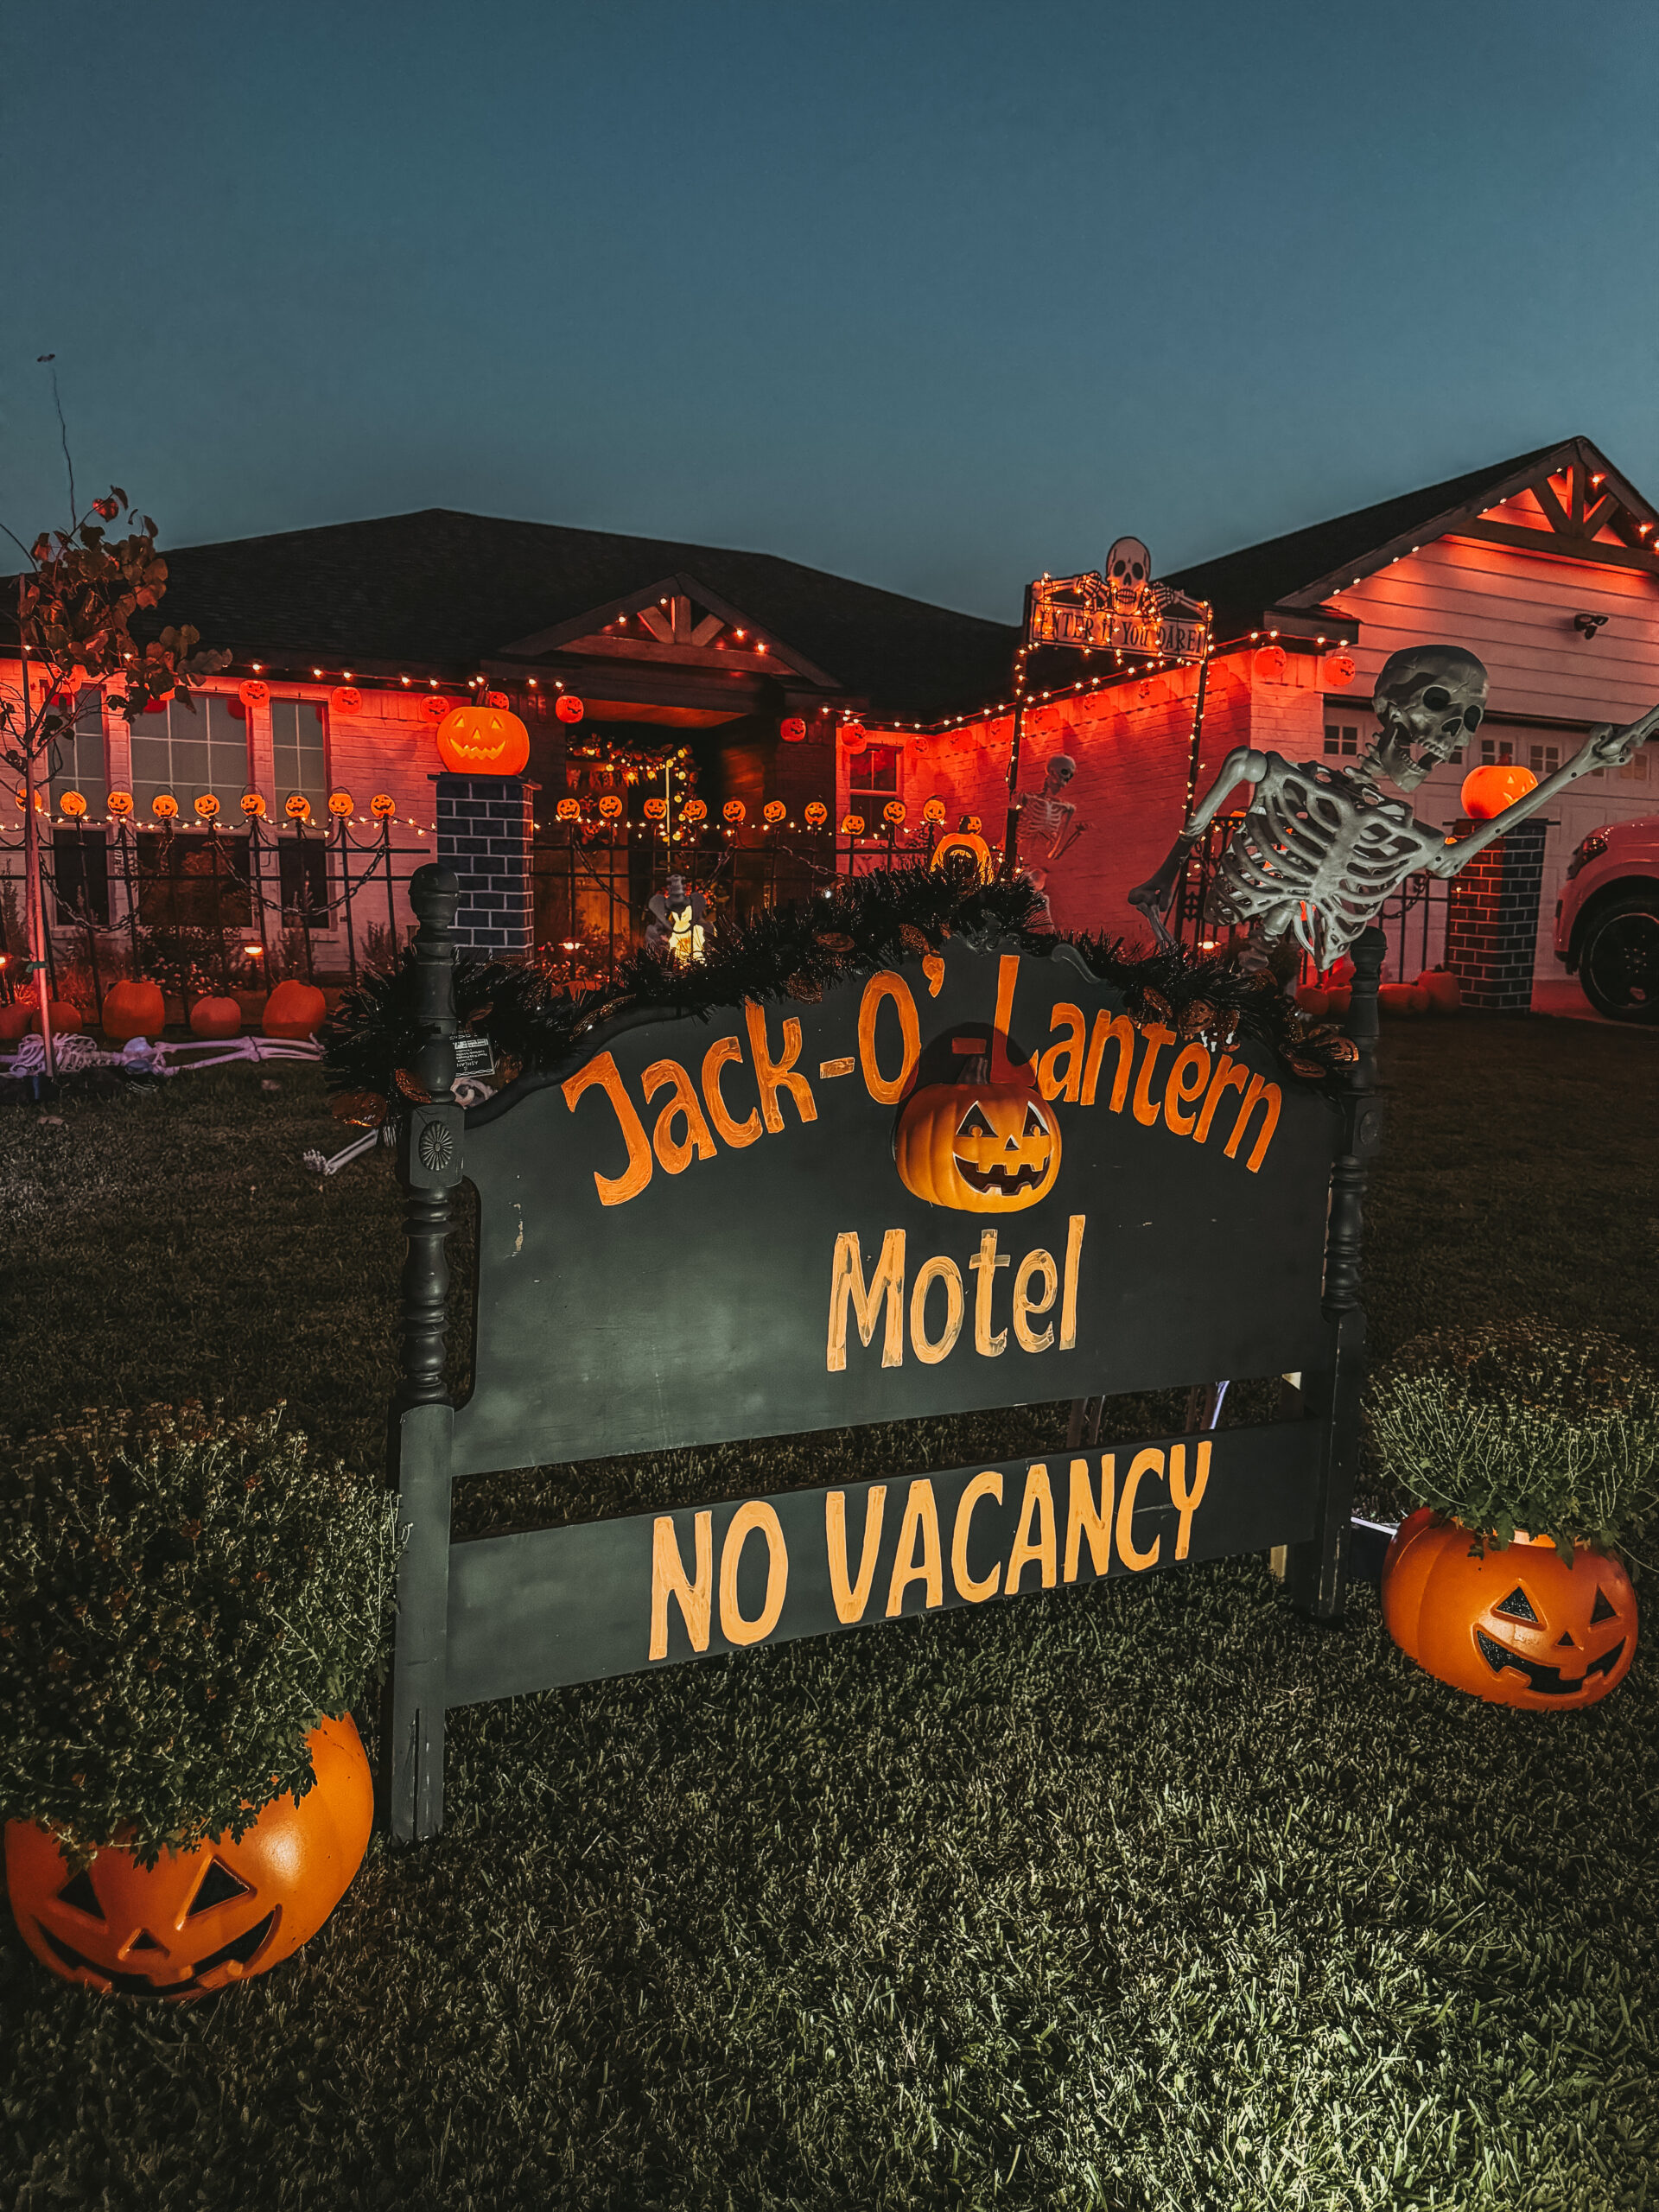
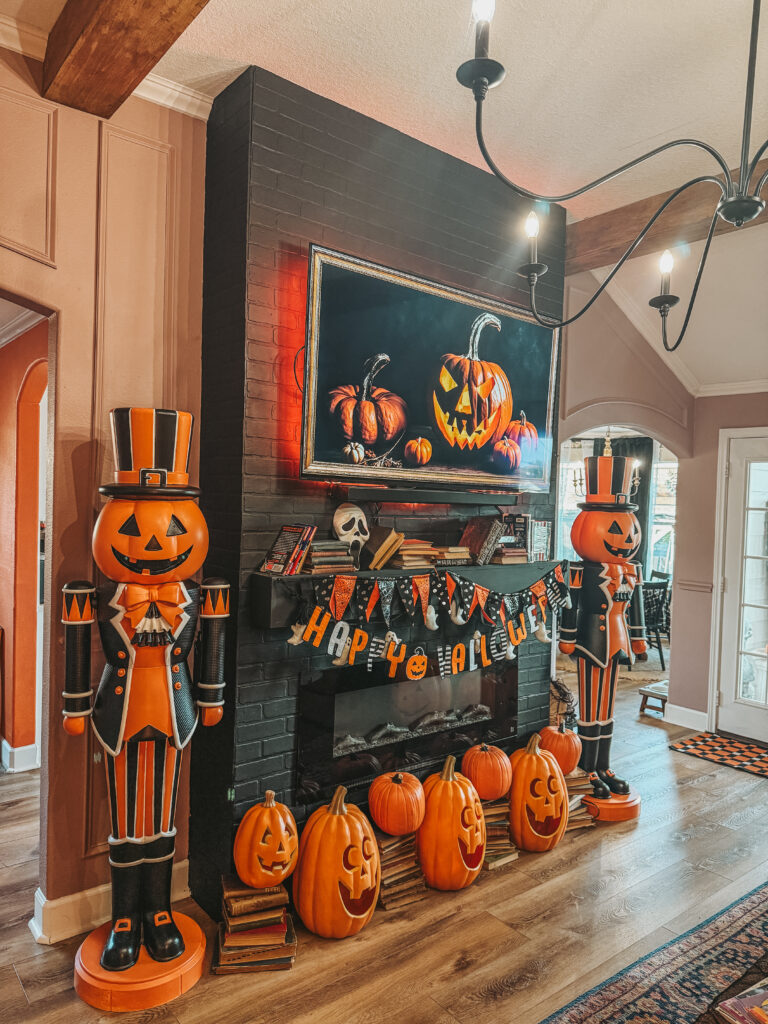
I know, I know — there are SO many incredible Halloween color schemes out there. But I kept it simple this year with orange, white, and black because it screams nostalgic. It reminds me of old-school Halloween cartoons, candy buckets from the ’80s, and those cheesy yet magical yard inflatables from my childhood.
Plus, classic colors mean these nutcrackers fit in with literally any Halloween setup — from spooky gothic vibes to family-friendly “Halloweentown” energy.
Feeling Adventurous? Try These Color Combos
• Candy Corn Ombré – Yellow head, orange body, white boots. Adorable.
• Gothic Luxe – Black base with gold detailing and deep purple accents.
• Pastel Spooky – Lavender, mint, and peach for a softer look.
• All-Black Everything – Matte black with glossy black details for texture.
How to Style Your Halloween Nutcrackers
Let’s be real — once you paint these, you’re going to want to put them everywhere. Here’s where they shine:
• Front Porch Guardians – Place a pair on either side of your door for maximum trick-or-treater wow factor.
• Mantel Showpiece – Layer with pumpkins, candles, and a garland.
• Dining Room Drama – Use one as a table centerpiece surrounded by candy bowls.
• Gallery Wall Companion – Speaking of…
Related DIYs to Try Next
• How to Create a Vintage Halloween Chandelier – Simple budget friendly DIY.
• How to Make Modern Prints Look Vintage – My trick for adding that old-soul magic to any artwork.
Care & Storage Tips (Because Yes, They’ll Last)
• Dust Before Storing – Keeps them looking fresh.
• Wrap in Bubble Wrap – Protects all your hard work.
• Store Upright – Avoid warping or paint chipping.
Reader Q&A
Q: Can I use spray paint instead of wall paint?
A: You can, but you’ll lose the hand-painted charm — and it won’t be as durable.
Q: How long does it take to paint one?
A: One weekend, start to finish, including dry time.
Q: Do I have to sand them first?
A: Only if they have a super glossy finish — otherwise, you’re good to go.
Final Thoughts
Painting Halloween nutcrackers isn’t just a DIY — it’s a full-blown moment. You start with something plain and mass-produced, and by the end, you’ve got a one-of-a-kind piece of decor that makes your whole space feel intentional and festive.
Whether you go classic like me or totally wild, this project is easy, affordable, and ridiculously fun. So grab some paint, cue up your Halloween playlist, and let’s make spooky season magic happen.
Make sure you are following me on socials so you don’t miss any of the Halloween DIYS. @AshtonSedita on all social platforms.
xoxo,
Ashton Sedita