
DIY Handmade Photo Ornament Using Embroidery Hoop(Step-by-Step Guide)
Looking for a meaningful handmade Christmas ornament? This DIY photo ornament made with an embroidery hoop is an easy holiday craft that turns your favorite memories into beautiful keepsake decorations. In this step-by-step tutorial, you’ll learn how to create a sentimental photo ornament that makes a perfect Christmas gift for family and friends.
🎄 Welcome to Thrift-Mas — Day 1!
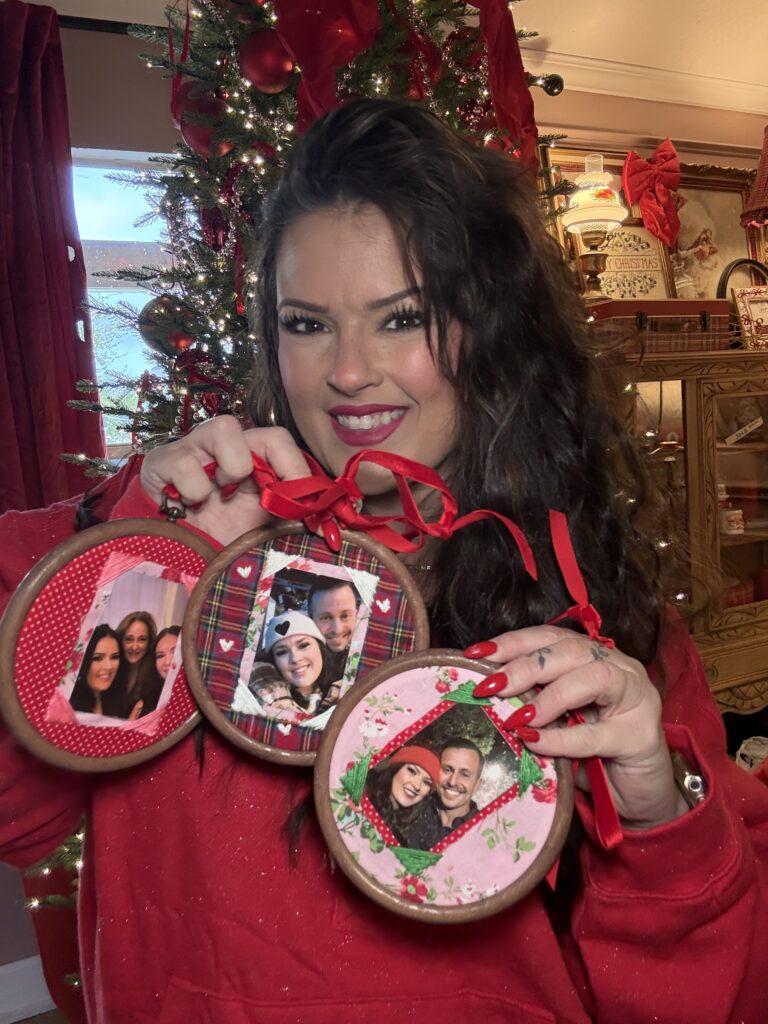
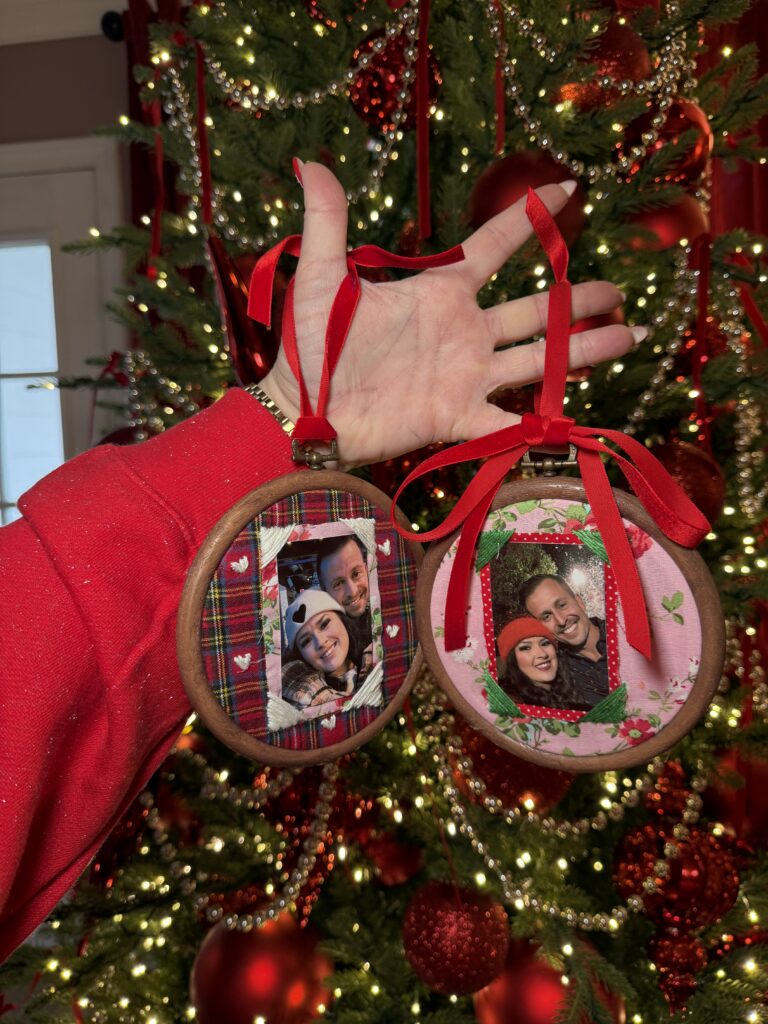
Today we’re kicking off 25 Days of Thrift-Mas, where I’m sharing handmade, meaningful, budget-friendly gifts you can’t buy in a store. I’m a serial hobbyist at heart, and this year I really wanted to slow down, get creative, and make gifts with my hands. Everyone already has everything… but no one has this. These one-of-a-kind photo frame ornaments are sentimental, cozy, and so much fun to make.
Make sure you’re following along on all my social media so you don’t miss any of the upcoming 24 projects…. and please tag me if you make these! I love seeing your creations. ❤️ @AshtonSedita on all social platforms.
FTC Disclaimer: Some links may be affiliate links, which means I may earn a small commission at no extra cost to you.
🎁 DIY Embroidery Hoop Picture Frame Ornaments
These are easy enough for total beginners, customizable for any aesthetic, and make the sweetest gifts for grandparents, spouses, best friends, or even for your own tree.
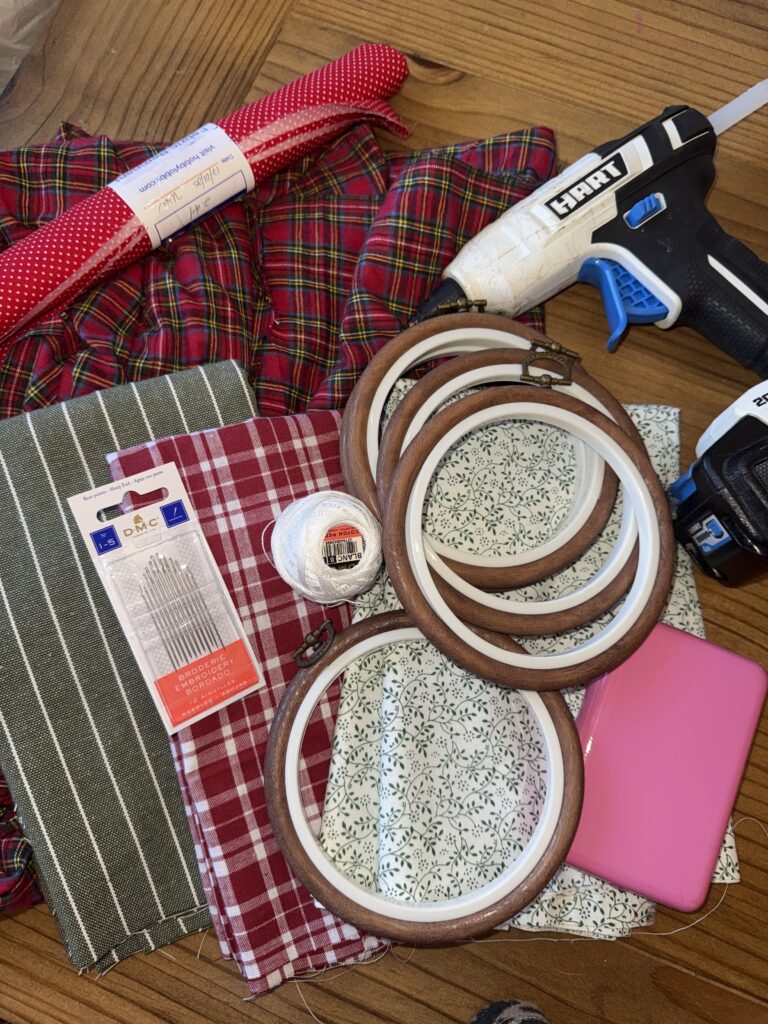
✂️ Supplies I Used
You absolutely do not need anything fancy … in fact, these hoops are perfect thrift-store finds!
🧵 From Amazon:
• Embroidery hoops (but thrift stores usually have tons!)
• Embroidery floss in various colors
• Embroidery needles
• Kodak zinc mini photo printer (prints straight from your phone)
🧶 From Hobby Lobby:
• Clearance-rack fabric scraps (I love mixing plaids + florals + dots)
🔧 From Walmart:
• HART cordless hot glue gun (I’m obsessed with this one… had it for years….cordless makes such a difference!)
🛍 Also thrifted:
• Several pieces of random fabric that I layered together
• Cute patterns I couldn’t resist in the fabric bin
🌟How to Make a DIY Photo Ornament with an Embroidery Hoop
1️⃣ Prepare your embroidery hoops
Loosen the hoop and place your chosen fabric inside the inner ring. Tighten and pull the fabric so it’s nice and smooth.
Trim around the edges, leaving about an inch of fabric overhang.
2️⃣ Print your photos
I used my Kodak zinc printer from Amazon … it prints straight from your phone and I originally bought it for junk journaling.
Choose which photos pair best with which fabrics.
3️⃣ Layer your fabrics (optional but adorable!)
You can layer:
• Plaid behind floral
• Dots behind plaid
• Anything that feels cozy and homemade
Lay your photo in the center and decide your layout before gluing or stitching.
4️⃣ Attach the photo
Use a tiny bit of hot glue on the back of the photo to secure it in place. Don’t worry …you only need a dot. (be careful too… if you use to much it might change color on the photo)
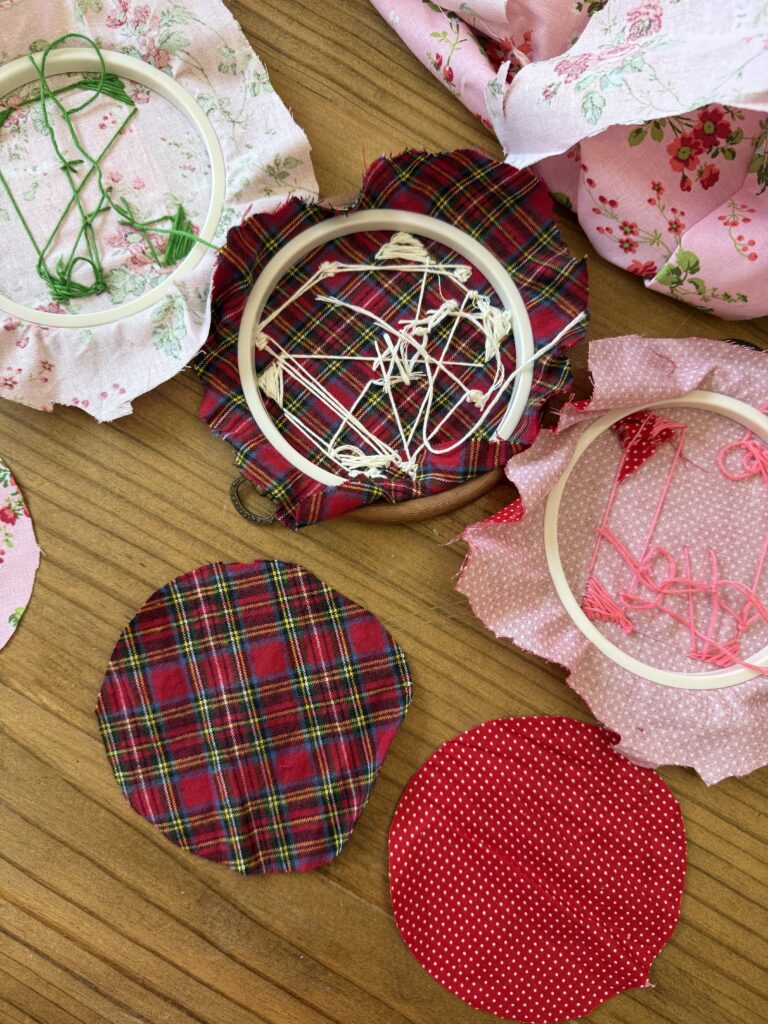
🪡 Hand Embroidery for Total Beginners
Don’t be intimidated! I learned embroidery at Granny Camp, and I promise the more you do it, the easier it gets. I am very much a rookie, and these projects are all about charm, not perfection.
How to Thread Your Needle
1. Cut a strand of embroidery floss.
2. Separate it….most floss has 6 threads… most people separate the thread to 3 threads… but I used all 6 for a chunky look.
3. Slide the floss through the needle and tie a small knot at the end.
How to Start Stitching
• Come up from the back of the fabric and pull the needle until the knot catches.
• Make small stitches along the edge of the photo to create a “framed” look.
Basic Straight Stitch (the one I used)
1. Bring needle up from the back.
2. Push needle down a short distance ahead.
3. Repeat ….. it will look like tiny dashed lines around the photo.
This adds dimension, detail, and a handmade feel.
Adding Little Embellishments
You can stitch:
• Tiny hearts (I did this for my husband’s photo ❤️)
• Stars
• Mini leaves
• Decorative corners
Just experiment ….the possibilities are endless. I will say the hearts took me some practice and I got on TIK-TOK for some tutorials and there were like 10+ different ways to do it. So do what you want… that’s the joy of this!
How to Finish Your Stitching
When you’re done:
1. Flip the hoop over.
2. Run the needle under a few stitches to secure the thread.
3. Tie a tiny knot and snip the excess.
🔙 How to Finish the Back of the Ornament
Because I am still learning, the backs of mine looked wild with all the stitching — so here’s how I cleaned them up:
1. Hot glue the excess fabric down toward the center.
2. Use your embroidery hoop as a stencil to trace a circle on a coordinating piece of fabric.
3. Cut the circle out.
4. Hot glue it on the back to cover everything.
This makes the ornament look clean and store-bought from the back!
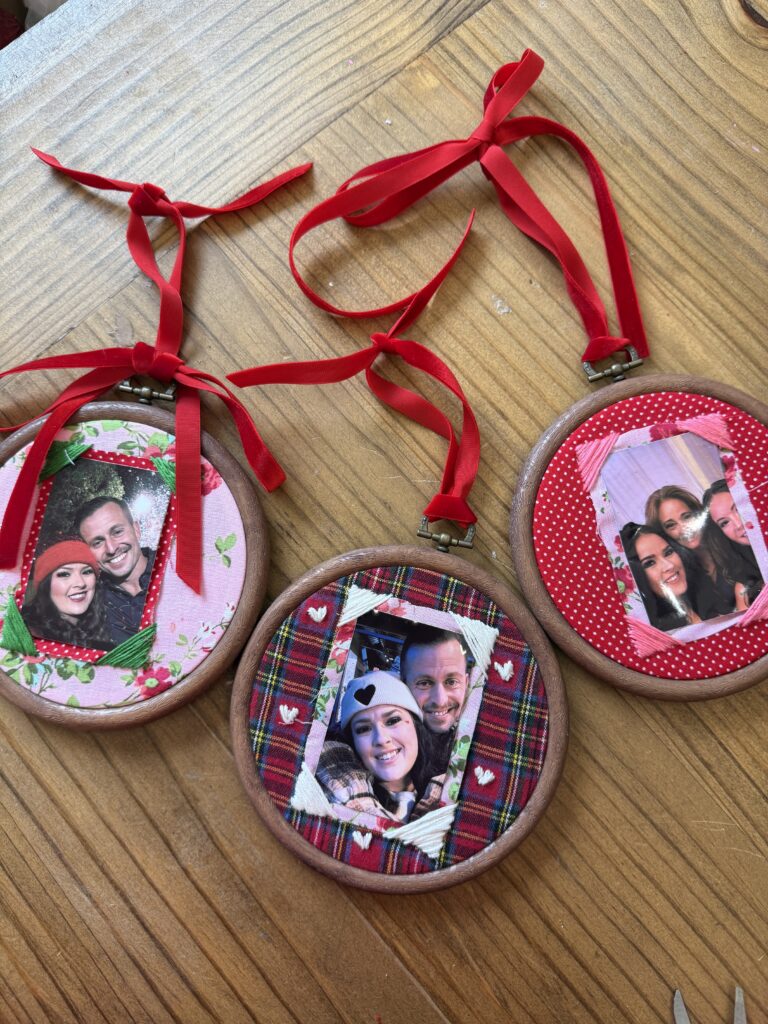
🎀 Add Ribbon + Hang!
Tie a cute bow, attach it to the top, and your ornament is officially ready to gift or hang.
❤️ Why I Love Thrift-Mas
There is something so meaningful about slowing down and making gifts instead of buying them.
These little ornaments:
• Feel personal
• Are budget friendly
• Use thrifted + leftover supplies
• Become keepsakes people treasure forever
And every single one is charmingly one-of-a-kind — truly something you cannot buy in a store.
🎄 Thanks for Celebrating Thrift-Mas Day 1 With Me!
Thank you so much for reading and for being here. Your support means the world to me, and I’m so grateful you choose to spend a little part of your holiday season creating with me. ❤️
If you try this DIY, please tag me on social media…. I love seeing your creations and how you put your own spin on these projects.
Make sure you’re following along on Instagram, TikTok, Pinterest, and the blog so you don’t miss the rest of 25 Days of Thrift-Mas. We’ve only just begun, and I have so many cozy, meaningful, budget-friendly ideas coming your way.
Here’s to a magical season filled with creativity, handmade gifts, and all the festive moments you can’t buy in a store. ✨
See you tomorrow for Thrift-Mas Day 2! 🎁💚
If you love handmade holiday crafts, you may also enjoy my DIY Blind Date with a Book gift idea.Blind Date with a Book DIY: The Perfect Gift


One Comment
Comments are closed.