
CREATING THE ULTIMATE HALLOWEEN MANTLE: STEP BY STEP GUIDE
Halloween is one of the most exciting seasons for DIY decorators like me! One of my favorite spaces to transform is the mantel because it’s the focal point of the room and can set the perfect spooky tone for the rest of your home. This year, I took a nostalgic, retro-inspired approach to my Halloween mantel, combining classic pumpkins, and pops of playful orange and black decor. In this blog post, I’ll walk you through my design, give you some tips on how to style your own mantel, and even share links to where you can find the items I used to make this vision come to life.
Before we jump in, I want to let you know that some of the products I’ll be linking are affiliate links. That means I make a small commission from any purchases made through these links, at no additional cost to you. This commission helps me continue to bring you fun, festive DIY ideas that you can enjoy year-round!
Step 1: Breaking Down My Halloween Mantel
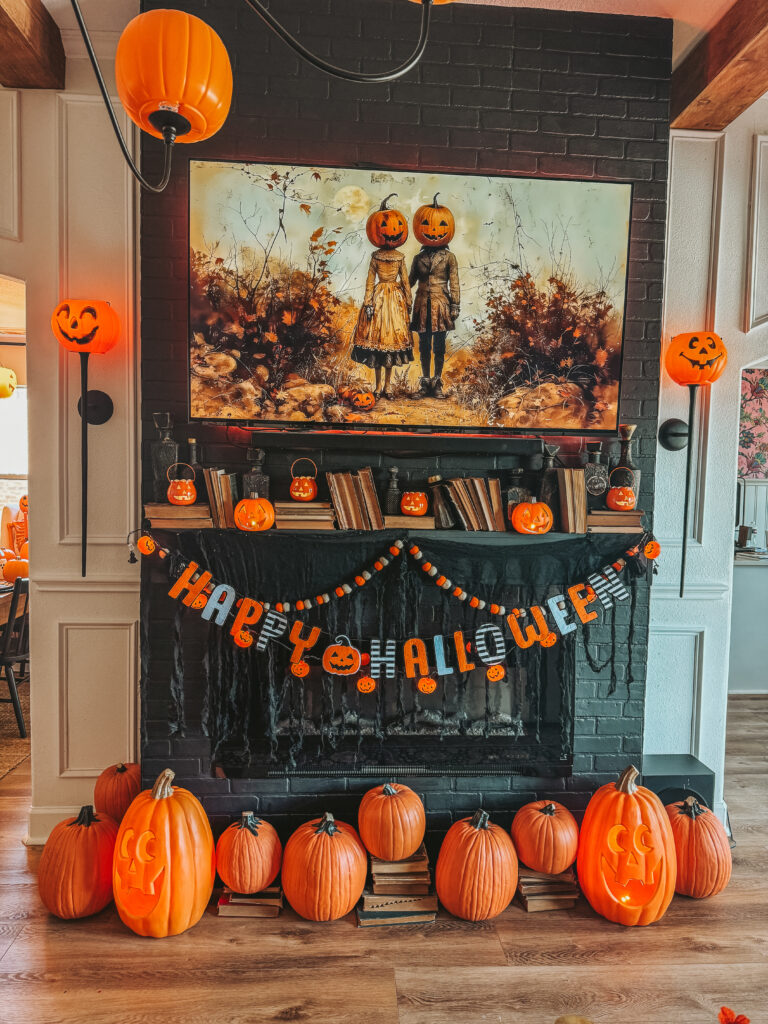
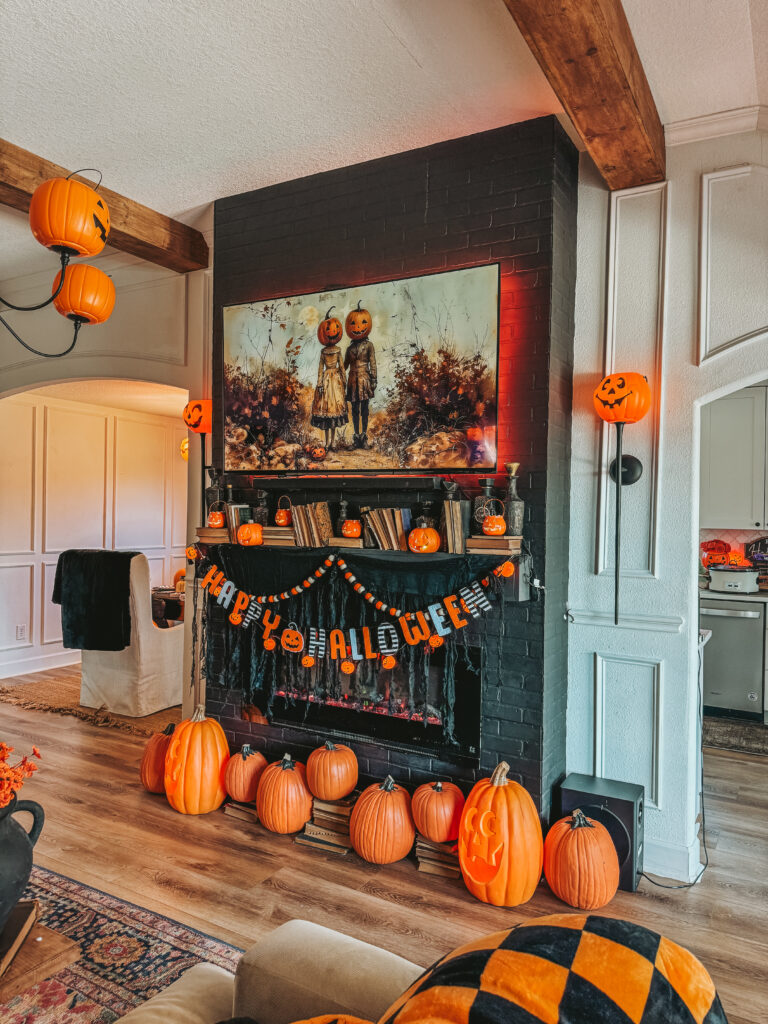
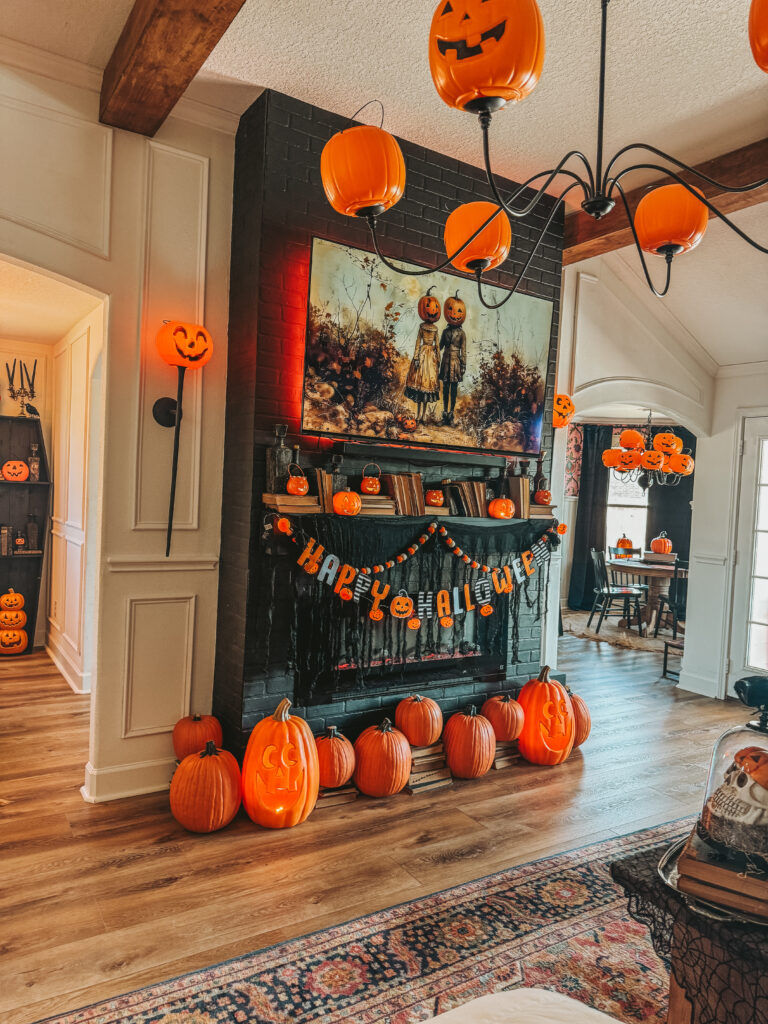
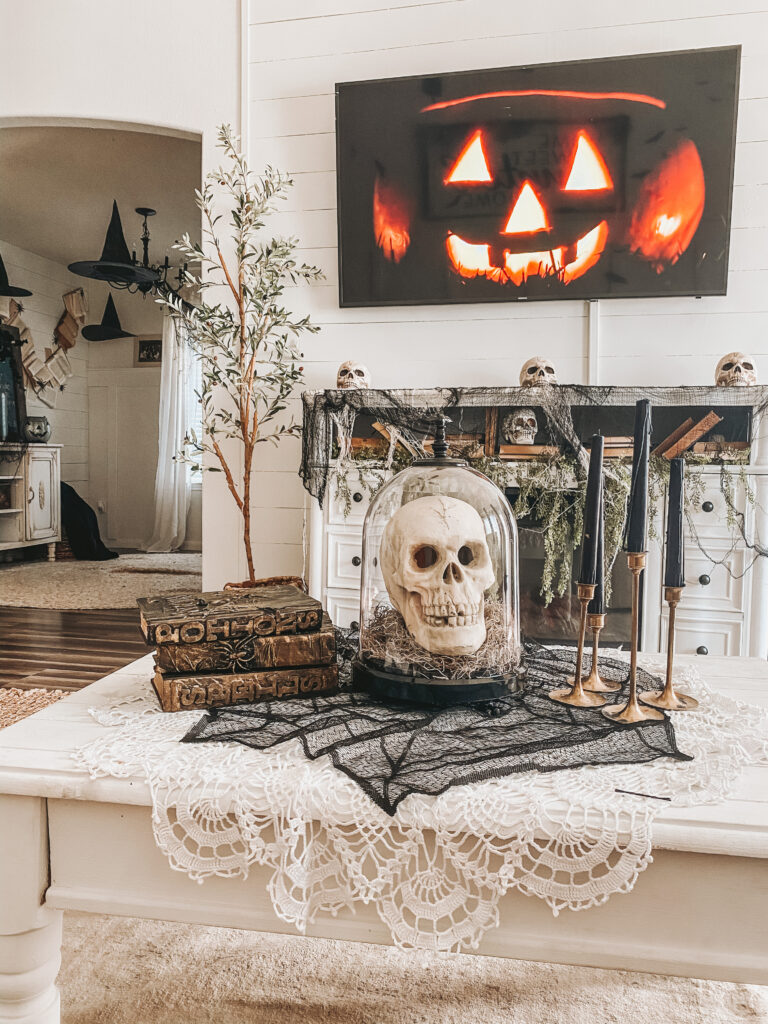
Let’s start with the centerpiece of this blog: my Halloween mantel! As you can see from the image above, I went for a mix of playful and nostalgic decor, bringing together elements that are both classic and festive. The combination of pumpkins, jack-o’-lantern faces, ghost lights, and vintage books created a fun yet cozy Halloween vibe. Here’s a closer look at each element I used and how you can achieve a similar look:
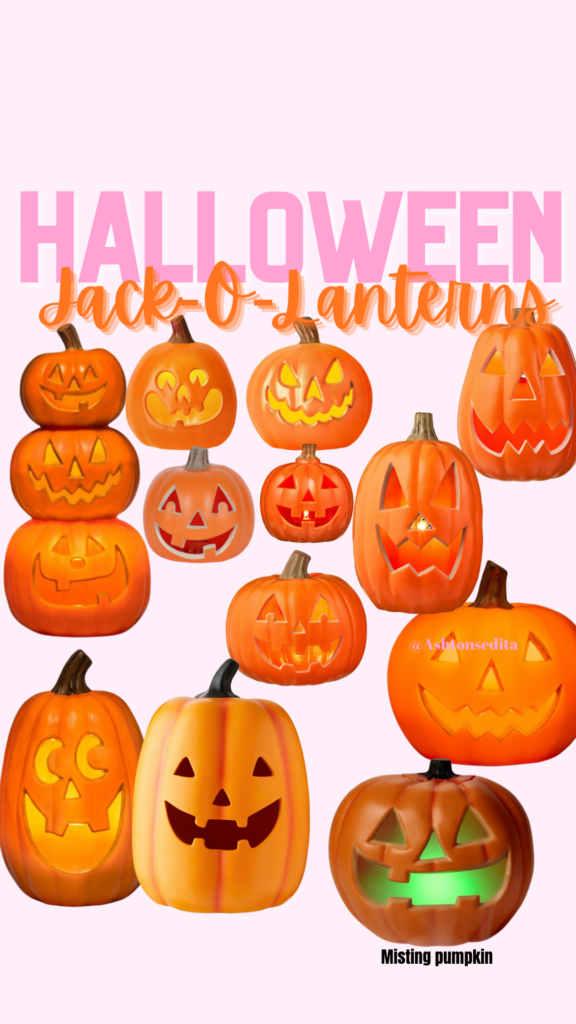
1. **Pumpkins Galore**
– I love the timeless look of pumpkins for Halloween, and they serve as a great foundation for any mantel decor. I used a mix of large and small pumpkins, stacking some on old books to create dimension.
– **Pro Tip:** If you want to add some personality to your pumpkins, try painting them or adding decals. In my case, I opted for classic orange pumpkins with jack-o’-lantern faces, which kept the retro theme alive.
– [Shop Similar Pumpkins Here]
2. **Pumpkin Garlands**
– The pumpkin and halloween garlands I used incorporated , giving the mantel more texture and adding a pop of color against the black backdrop of the fireplace. Garlands are such an easy way to add depth to your display, and they can be draped in many ways to change the look and feel of the space.
– [Shop Halloween Garlands Here]

3. **Books for Height and Texture**
– Old books were the perfect way to add height and create a layered effect for my mantel. By stacking the books under pumpkins, I was able to vary the heights of my decorations, making the display more dynamic and visually interesting. FUN FACT: these books I found in August 2020 on FB marketplace – it was a total of 304 books for $40- some books dated all the way back to the 1800s. [BLOG POST HERE]
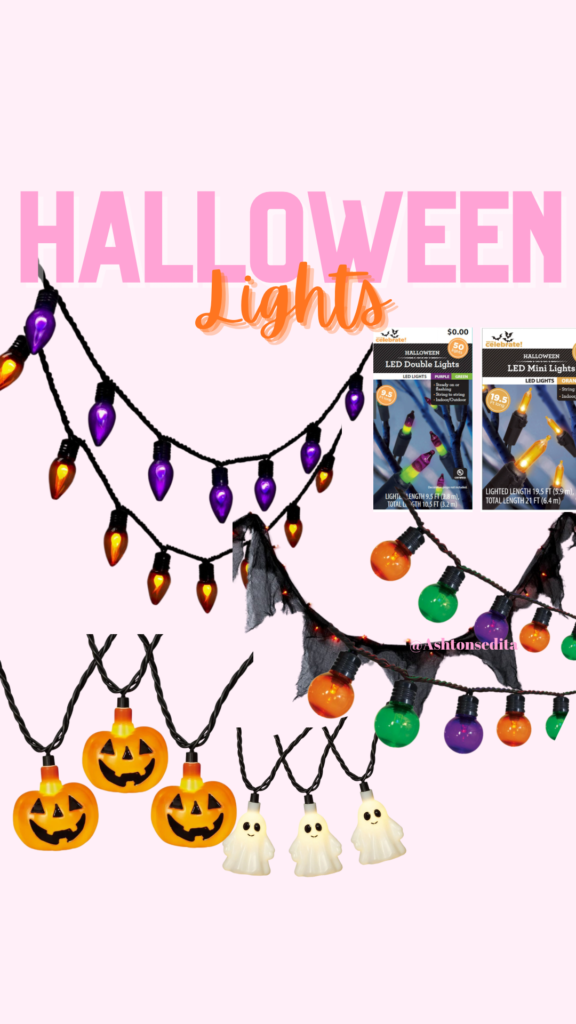
4. **Warm Lighting**
– Lighting is a crucial element when creating a Halloween mantel, and I incorporated both string lights and the warm glow of the jack-o’-lanterns to give the space a cozy, inviting feel. Don’t underestimate the power of lighting when it comes to setting the mood for Halloween!
– [Check Out Warm Halloween Lights Here]
Step 2: Teaching You How to Style a Mantel
Now that you’ve seen the breakdown of my mantel, I’m excited to share some of my tips for styling your own. Whether you’re going for a spooky vibe or something more subtle, the following steps will help you create a stunning Halloween mantel that’s sure to impress!
1. **Choose a Theme**
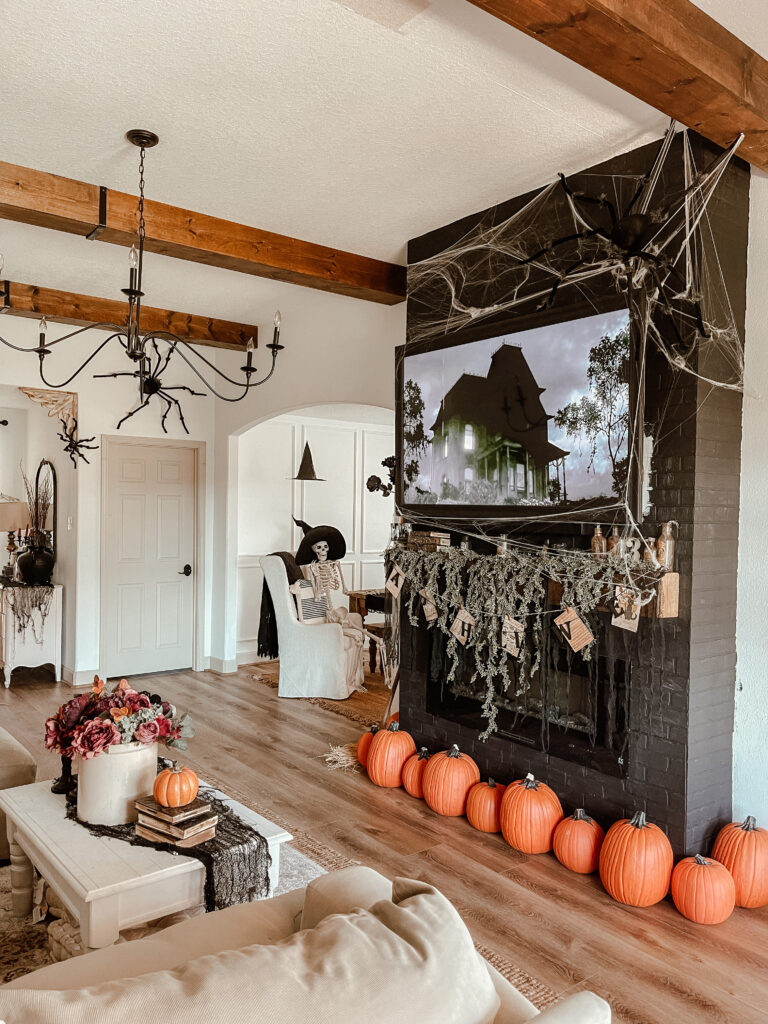
– Start by choosing a theme for your mantel. Do you want a playful, whimsical feel like mine, or are you looking for something darker and more eerie? Maybe you love the elegance of a black-and-white theme or prefer a rustic, farmhouse Halloween look. Once you know your theme, it will be easier to select items that fit your vision.
2. **Start with a Focal Point**
– Every mantel needs a focal point. This could be a large statement piece like a mirror, a framed Halloween print, or even your TV if you’re like me! Build the rest of your decor around this focal point to create a balanced look. Be mindful of size—your focal piece should draw the eye without overwhelming the space.
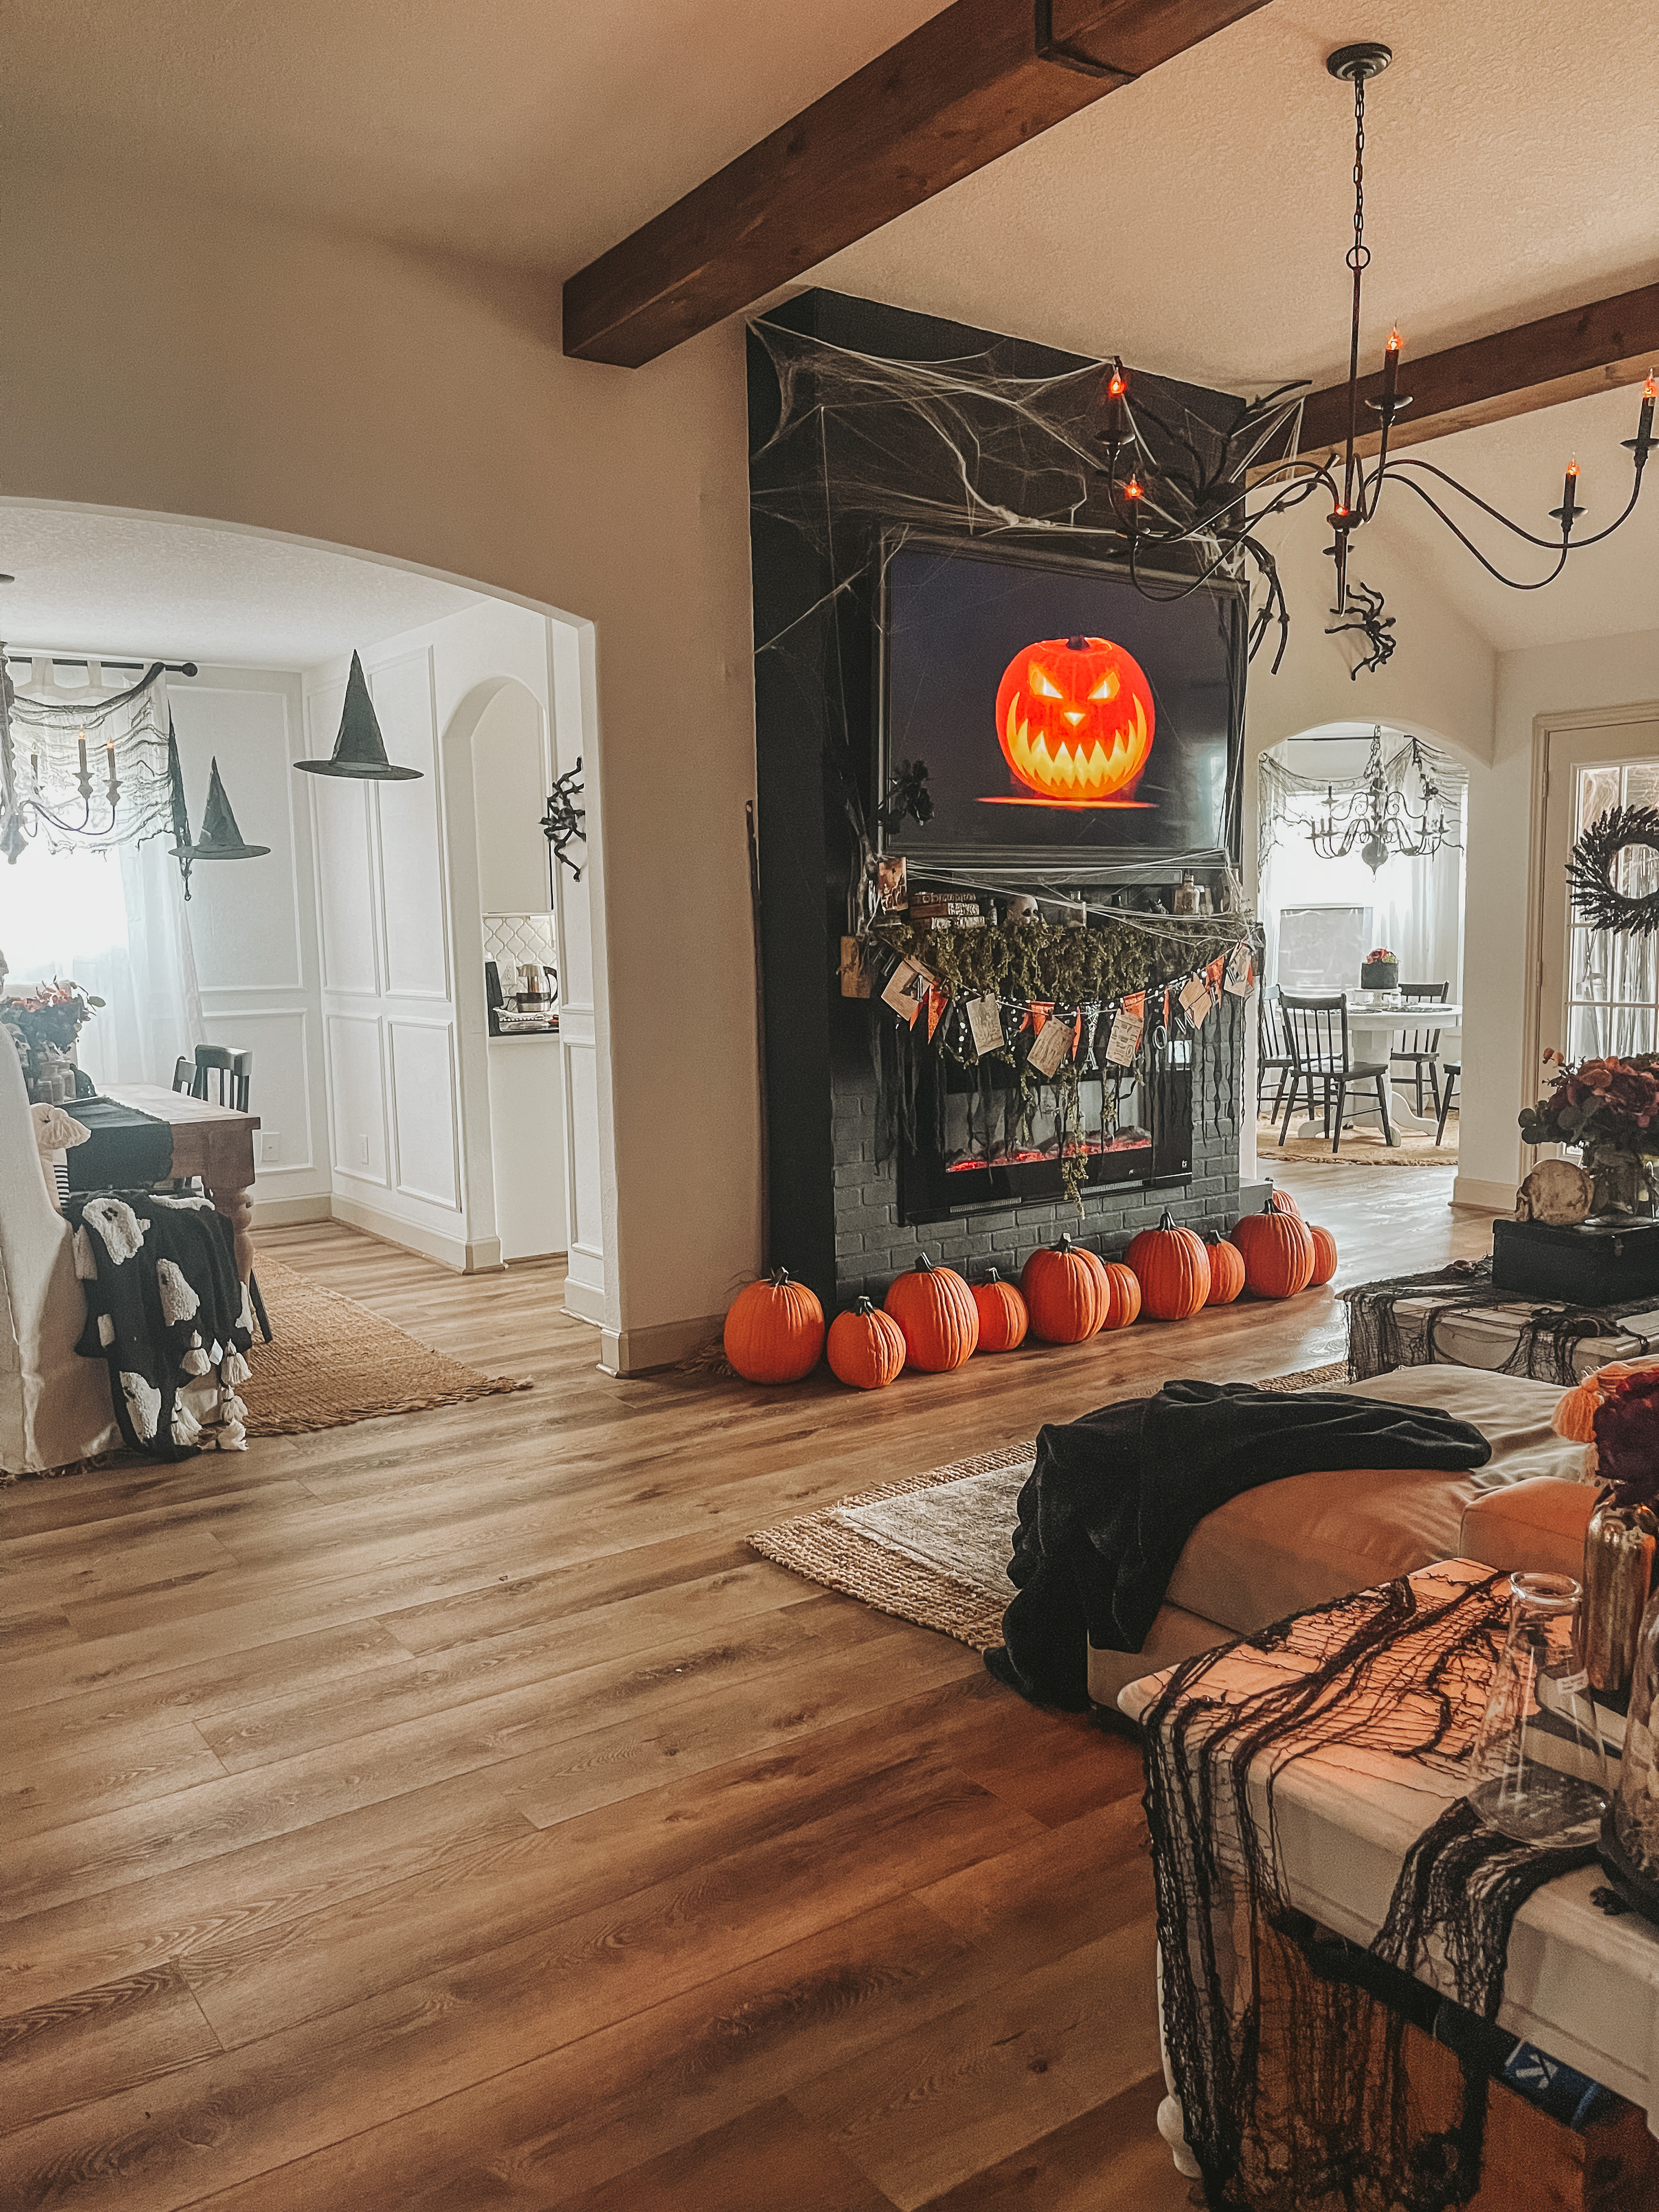
3. **Layer Your Decorations**
– One of the most important aspects of a well-styled mantel is layering. Begin with larger items like pumpkins or lanterns as your base, then gradually add smaller items to fill in the gaps. By playing with different heights and textures, you’ll create a more dynamic and interesting display. Stacking items like books or using varying sizes of pumpkins can help achieve this layered effect.
4. **Incorporate Lights**
– Lights can take your mantel from good to great. I love using string lights, lanterns, or even small battery-operated candles to create a warm and festive glow. Depending on the vibe you’re going for, you can choose more dramatic lighting or keep it soft and subtle. Either way, lighting is a crucial element that will enhance the mood of your mantel.
5. **Add Personal Touches**
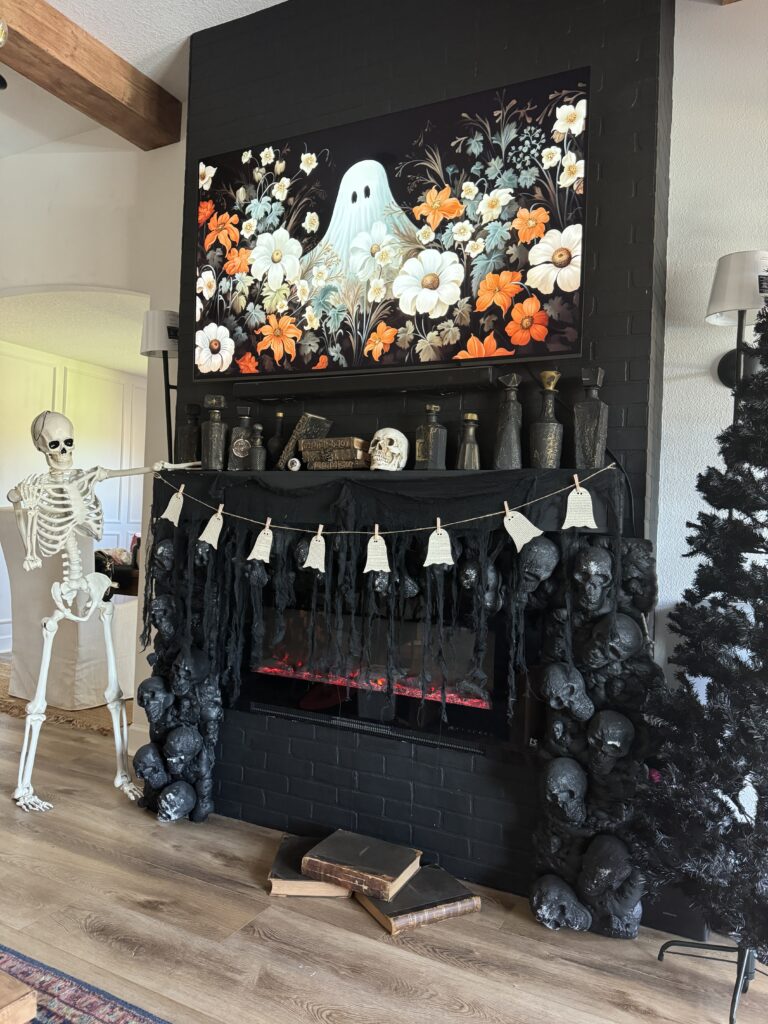
– Don’t forget to add personal touches that make the mantel feel uniquely yours! Whether it’s DIY elements like a custom garland or a piece of decor that’s special to your family, these little details can make all the difference. I love adding little DIY touches like my jack-o’-lantern faces or personalized books to give the display a one-of-a-kind feel.
6. **Play with Texture and Color**
– Halloween doesn’t always have to be black and orange. Feel free to experiment with other colors like gold, white, or even pastels to match your home’s aesthetic. Similarly, play with textures like velvet pumpkins, metal lanterns, or natural elements like pinecones and branches. The more variation in texture and color, the more visually appealing your mantel will be.
Step 3: DIY Halloween Mantel Ideas
If you’re the crafty type like me, you’ll love incorporating some DIY elements into your mantel decor. Here are a few easy and fun projects to try:
1. **DIY Painted Pumpkins**
– Skip the messy carving and opt for painted pumpkins instead! You can get creative with faces, patterns, or even spooky words. I’ve done this in the past, and it’s a great way to add a personal touch to your mantel.
2. **Make Your Own Garland**
– Garlands are so easy to make and can be fully customized to your theme. Whether you’re stringing together felt bats, glittery ghosts, or painted wood pumpkins, a handmade garland adds a special touch to your mantel.
3. **Halloween Quote Signs**
– Use a chalkboard or an old picture frame to create a Halloween-themed sign with a fun quote. Phrases like “Trick or Treat” or “Boo to You!” add a playful vibe to your display and can easily be swapped out as the season changes.
4. **Creepy Candles**
– Melt red wax onto white candles for a “bleeding candle” effect. These candles can be used as a spooky centerpiece on your mantel, adding just the right amount of creepy ambiance to your Halloween setup.
### Past Years’ Halloween Mantels
One of my favorite things about Halloween is how the decor changes year after year! I’ve experimented with different themes, colors, and vibes in the past, and it’s so fun to look back on how my mantels have evolved. I’ll be adding photos from previous years to this section soon, so you can get even more inspiration for your own Halloween mantel.

As mentioned earlier, this post contains affiliate links. This means that if you click on one of the product links and make a purchase, I may earn a small commission at no additional cost to you. This helps me continue to create these fun, festive DIY projects for you to enjoy!
Wrap-Up: Show Me Your Halloween Mantel!
I hope this guide has inspired you to create your own Halloween mantel masterpiece! Whether you’re recreating some of the ideas I’ve shared or coming up with something entirely unique, I’d love to see your creations. Make sure to tag me on social media (@AshtonSedita) so I can check out your fun, festive decor. And don’t forget to follow me for more DIY and seasonal inspiration!
Happy decorating, and XOXO,
Ashton Sedita


Every single mantle is awesome!