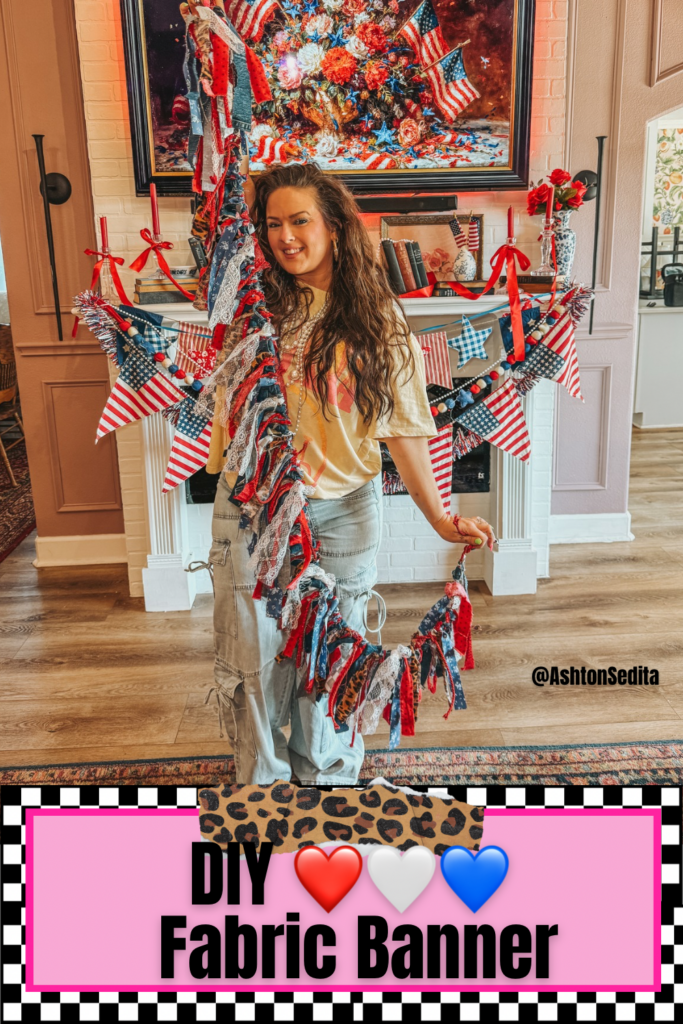
The Ultimate DIY Shag Fabric Garland: Eccentric Red, White, and Blue Decor

If you are on the hunt for unique red, white, and blue decor to elevate your home this season, you have officially found your next weekend project. It is time to step away from the standard store-bought plastic banners and create something with incredible texture, character, and a loud, celebratory personality!
Today, we are diving deep into how to make a DIY patriotic fabric shag garland. This heavily textured bunting is the perfect statement piece for Memorial Day, the 4th of July, Labor Day, or any summer gathering. The absolute best part about this project? It relies heavily on repurposed materials and scrap fabrics, meaning you can think completely outside the box when it comes to your design choices.
Whether you are draping it across a grand fireplace mantle or stringing it up for a backyard barbecue, this tutorial will walk you through exactly how to source, prep, and style a gorgeous, scrappy masterpiece. Let’s get festive!

The Design Philosophy: Red, White, Blue… and Leopard?
If you have been around here for a while, you know my approach to home decor is bright, bold, and entirely one-of-a-kind. I lean heavily into an “eccentric maximalist” aesthetic. I am not afraid of color, and I absolutely love mixing wild patterns.
When it comes to patriotic decor, people often feel locked into using only solid reds, pristine whites, and navy blues. But traditional and subdued just isn’t the goal here! To give this garland that signature eccentric twist, you have to break the rules a little bit.
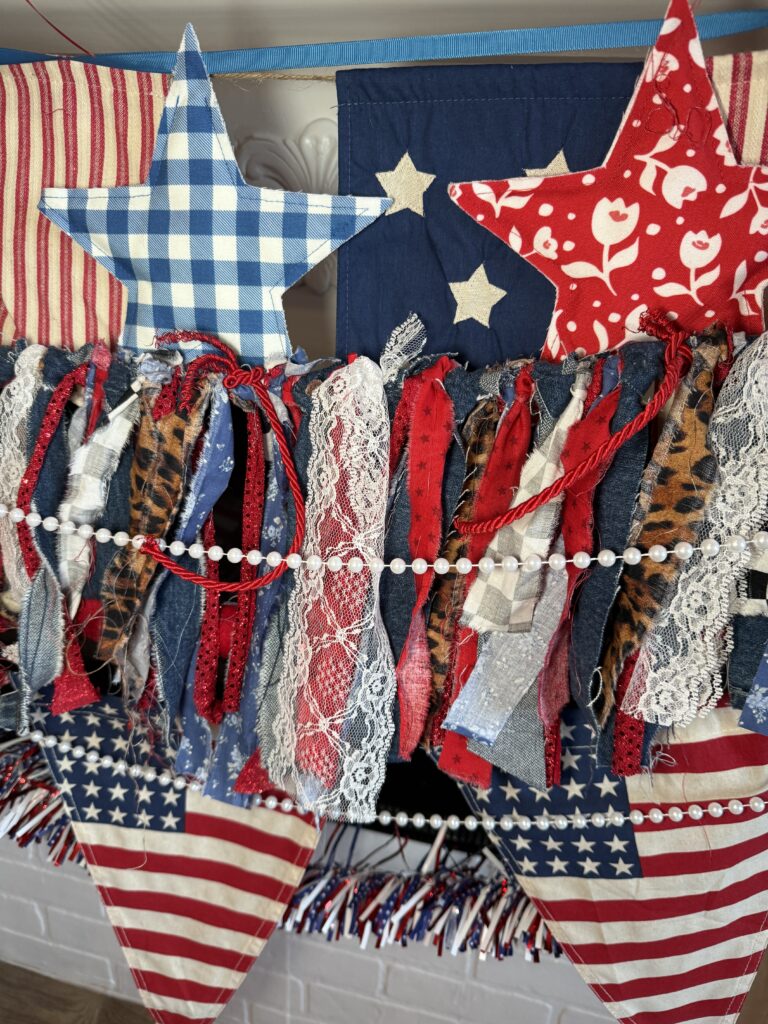
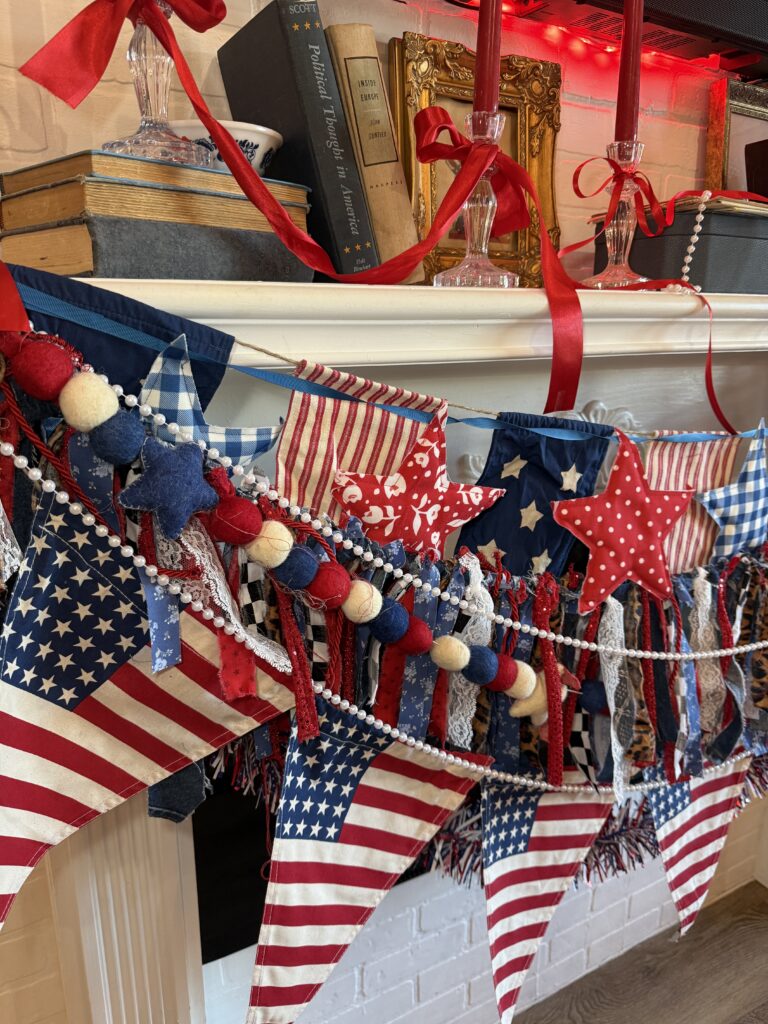
In this garland, alongside the classic stars and stripes, I incorporated black-and-white checkered fabric and a bold leopard print. Adding these unexpected patterns elevates the piece from a basic craft store project to a custom, high-end-looking decor item. The leopard acts as a surprisingly versatile neutral that grounds the bright reds, while the checkers add a modern, punchy graphic element. Never be afraid to mix your favorite everyday patterns into your seasonal decor!
Sourcing Materials: The Thrifter’s Survival Guide
You do not need to spend a fortune at the fabric store to make a stunning, voluminous garland. In fact, the most interesting garlands are made from upcycled textiles with a history.
The Magic of the Thrift Store
While I do source some of my basic cotton prints from Hobby Lobby, my absolute favorite secret for crafting on a budget is hunting at thrift stores year-round. The Goodwill outlet bins are a goldmine for this specific project.
Whether its a Thrifting Thursday haul or the Goodwill bins Im always hunting for:
- Worn-in Denim Jeans: Old jeans are the MVP of this project. The thicker the denim, the better it frays.
- Vintage Linens and Lace: Look for old table runners, crocheted doilies, or lace curtains. They add a soft, romantic texture that contrasts beautifully with the rugged denim.
- Patterned Blouses and Skirts: Don’t just look at the craft aisle. A torn, outdated leopard print maxi skirt can be cut up and given a brand-new life in your garland.
How to Prep and Sanitize Thrifted Fabrics
Before bringing thrifted textiles into your craft room, it is crucial to wash them properly. I wash all my thrifted denim and linens on a hot water cycle with a heavy-duty detergent and a splash of laundry sanitizer. For delicate lace, a gentle hand wash in warm water with a mild soap will do the trick. Ensure everything is completely dry before you start cutting, as damp fabric will not fray properly.
✂️ The Master Supply List
Having the right tools will take this DIY from a frustrating chore to a fun, relaxing afternoon project. Here is everything you need to gather:
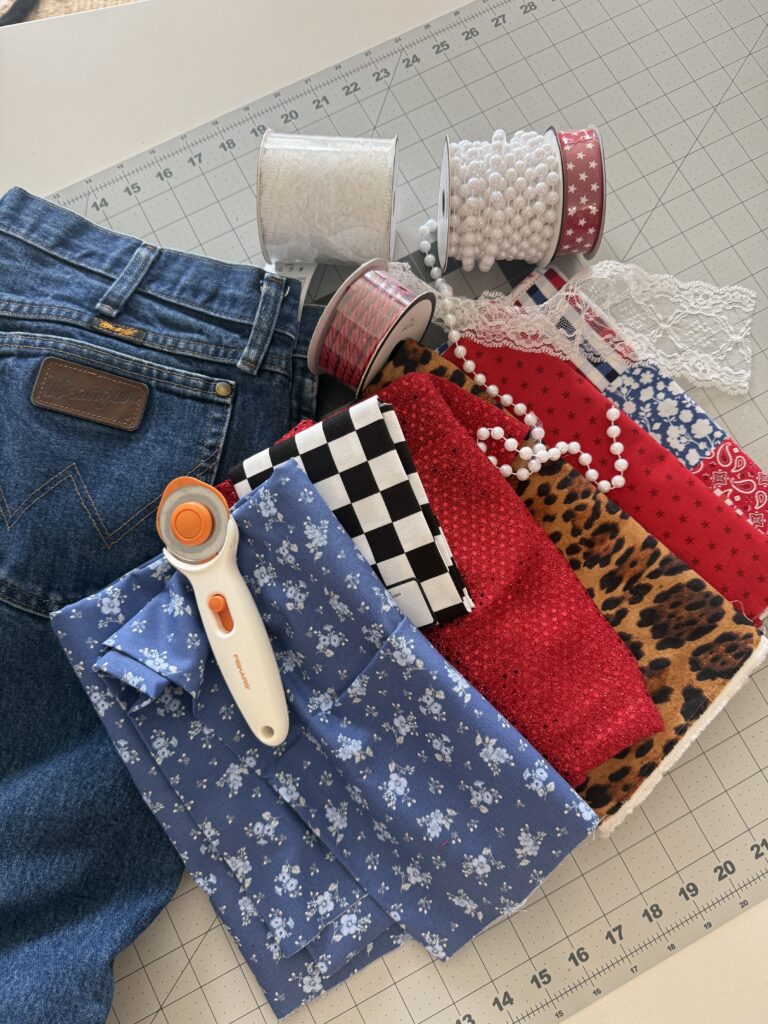
The Base and The Scraps:
- A Sturdy Base Rope: A thick red braided rope works perfectly as the anchor. I also used some leftover pieces of this rope to tie right into the garland for extra texture.
- Thrifted Denim Jeans: Washed and ready to be deconstructed.
- Assorted Fabric Scraps: Gather an array of reds, whites, blues, and your “wildcard” patterns (like my beloved checkers and leopard!). Note: If those fabrics look familiar, it’s because I save all my scraps! I used these exact leftover pieces when making my DIY Junk Bookmarks and my upcycled Junk Cookbook.
- Lace and Ribbons: For varied texture and width.
The Essential Tools:
- Rotary Cutter: A high-quality rotary cutter is an absolute non-negotiable for this project. It will save your hands and cut your prep time in half.
- Self-Healing Cutting Mat: A large grid cutting mat protects your tables and helps you measure quickly.
- Fabric Scissors: Keep a sharp pair of heavy-duty fabric scissors on hand for cutting through the thick seams of denim jeans.
🧵 Step-by-Step Tutorial: Crafting the Shag Garland
Now that your supplies are ready (and you have successfully shooed your cat off your cutting mat—my female black cat, Wednesday, always insists on “helping” right in the middle of the fabric pile!), it is time to assemble.
Step 1: Deconstruct the Denim
Start by taking your thrifted jeans and cutting away the thick hems, waistbands, and zippers using your fabric scissors. You want to isolate the large panels of denim on the legs.
Step 2: Measure and Prep Your Strips
Lay your fabrics and denim flat on your cutting mat. The magic of this garland is in the volume, so you want generous strips. Using your rotary cutter, prepare to make strips that are roughly 12 inches long and about 1 to 1.5 inches wide. Don’t stress about making them perfectly uniform; the beauty of a junk garland is in its imperfection.
Step 3: Ripping vs. Cutting (The Secret to the “Shag”)
If you want that highly sought-after, frayed “shag” look, do not cut your strips all the way down with scissors!
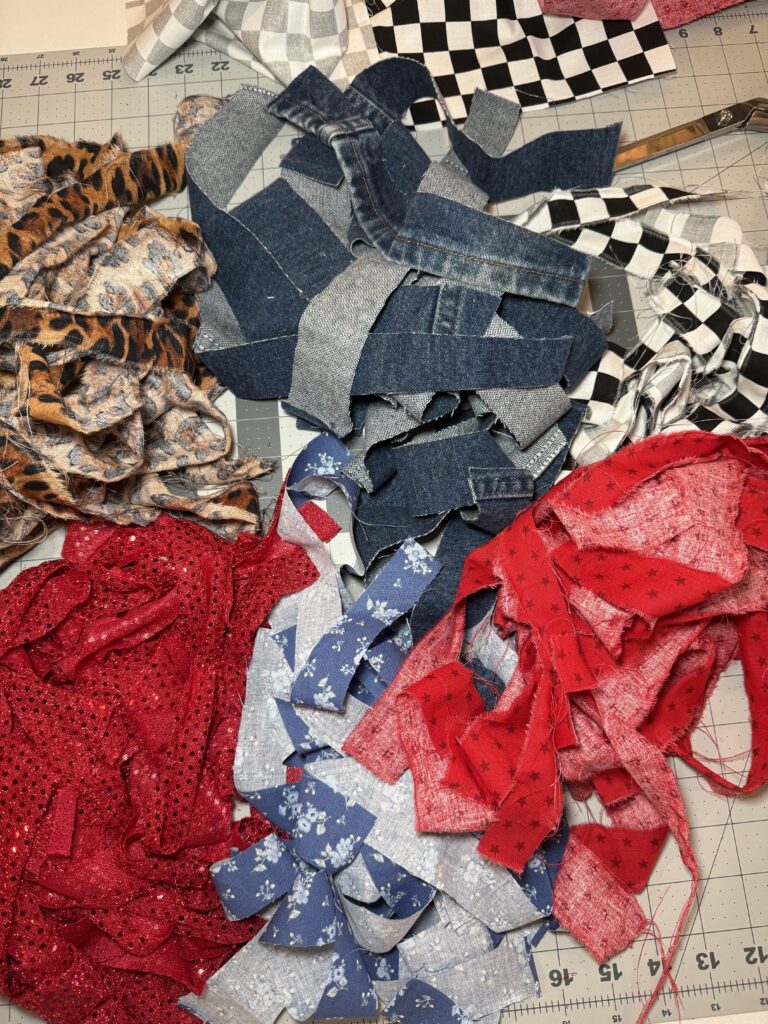
The Pro Technique: Use your scissors to make a small, one-inch slit at the top edge of your fabric. Then, grab both sides of the slit and rip the fabric by hand the rest of the way down. This naturally pulls the threads and severely frays the edges of the fabric, giving it that perfectly distressed, junky, vintage aesthetic. This works incredibly well on cotton prints and denim. (For lace and wired ribbons, you will still need to use scissors).
Step 4: The Tying Process
Stretch out your base rope. You can secure the ends to two chairs or tape them to your mantle to keep the rope taut while you work. I hung mine on the nails on my mantle.
Take a fabric strip, loop it over the top of the rope, and tie a standard single knot.
- The Tying Hack: Once the knot is tied, push the knot firmly from the bottom up toward the rope. This ensures the knot sits tightly against the base and leaves less excess fabric sticking up at the very top, creating a cleaner line.
Step 5: Establishing a Pattern (Or Not!)
If you want a more structured look, create a repeating pattern (e.g., Red, White, Blue, Denim, Pattern, Lace). If you prefer the junky, eclectic look, completely randomize it! I personally love alternating my bold patterns…putting a checkered strip next to a solid red, and a leopard strip next to a piece of denim. Keep pushing the knots tightly together as you go; the denser the knots, the fuller and more luxurious the garland will look.

🏡 Styling Your Mantle and Beyond
Once your garland is fluffed and finished, it is time for the best part: styling!
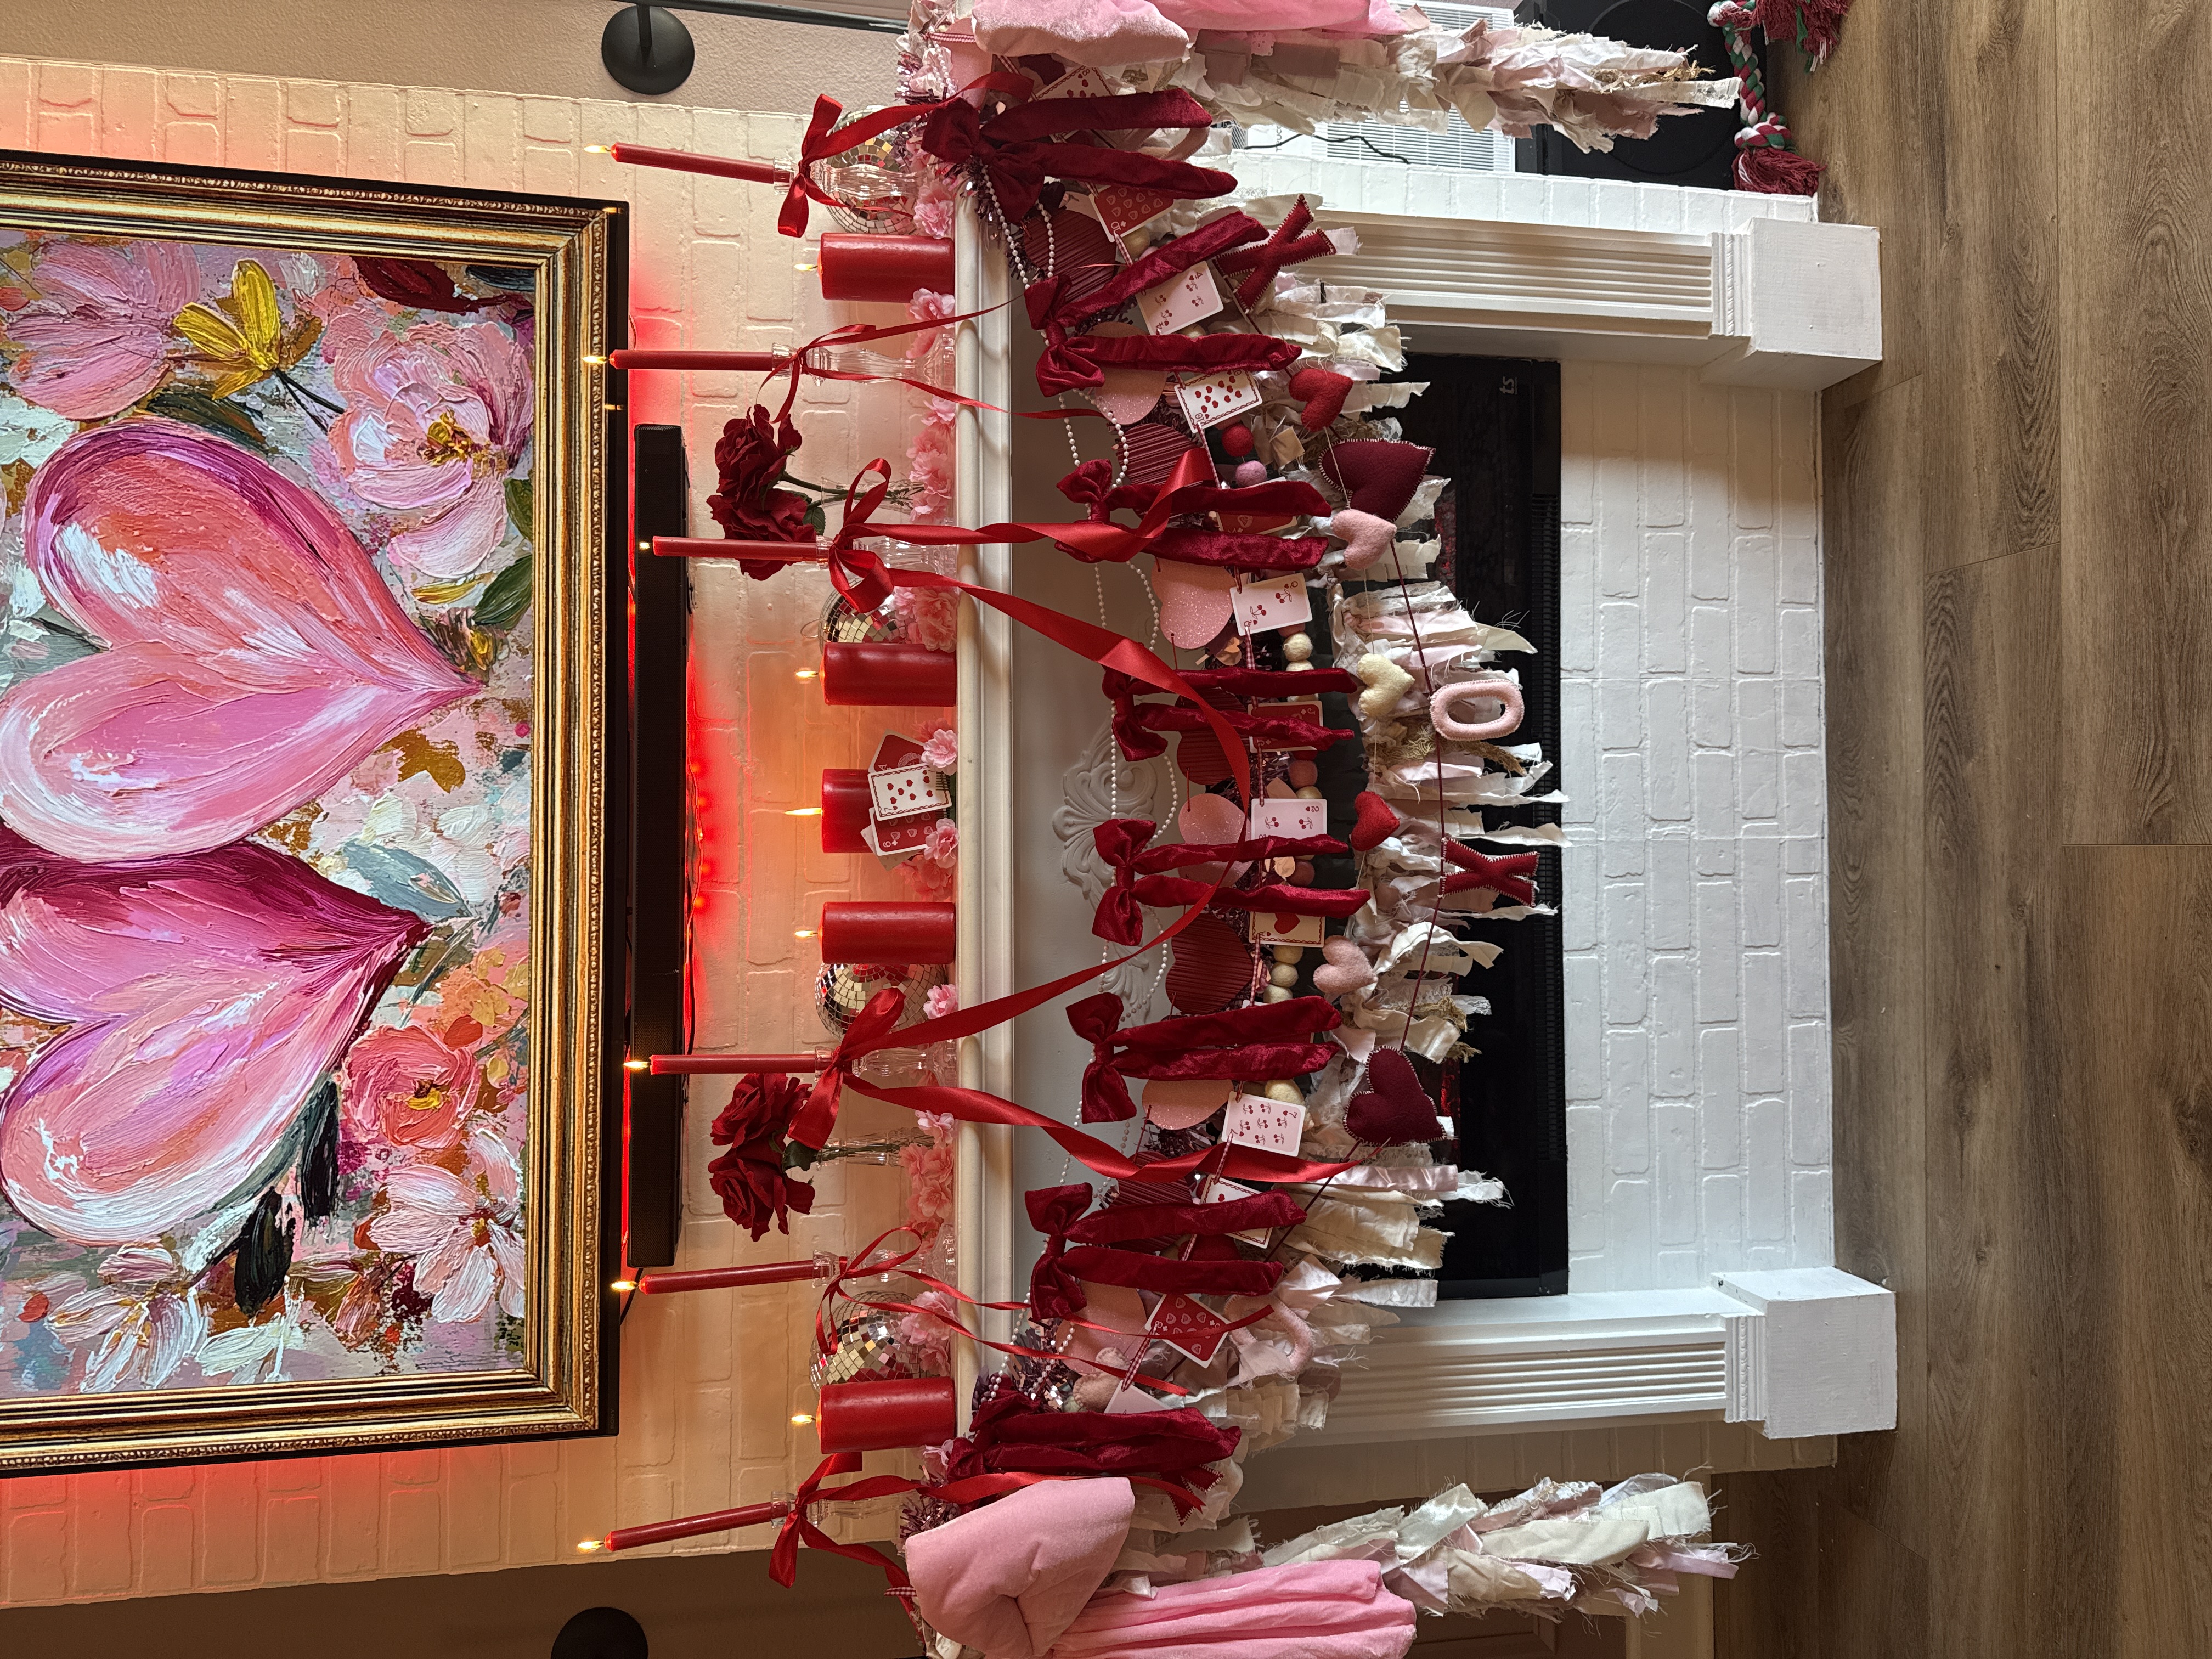
The Fireplace Mantle Display
This garland completely transformed my living room mantle. Because the garland is so heavy and visually striking, you want to balance it with the rest of your decor. I draped it asymmetrically across the fireplace, letting the 12-inch shaggy tails hang down freely.
To complete the look, I paired it with tall, bold red taper candles and some vintage thrifted books to give it height. The absolute centerpiece, though, is the digital artwork displayed above it. If you have ever wondered how I get my TV to look like framed vintage art, you have to check out my detailed Frame TV Hack onmy Patriotic mantle blog! It completely changes the vibe of the room and allows you to swap out seasonal art in seconds. You can also read the full breakdown of how I layer these spaces in my Patriotic Mantle Styling DIY Guide.
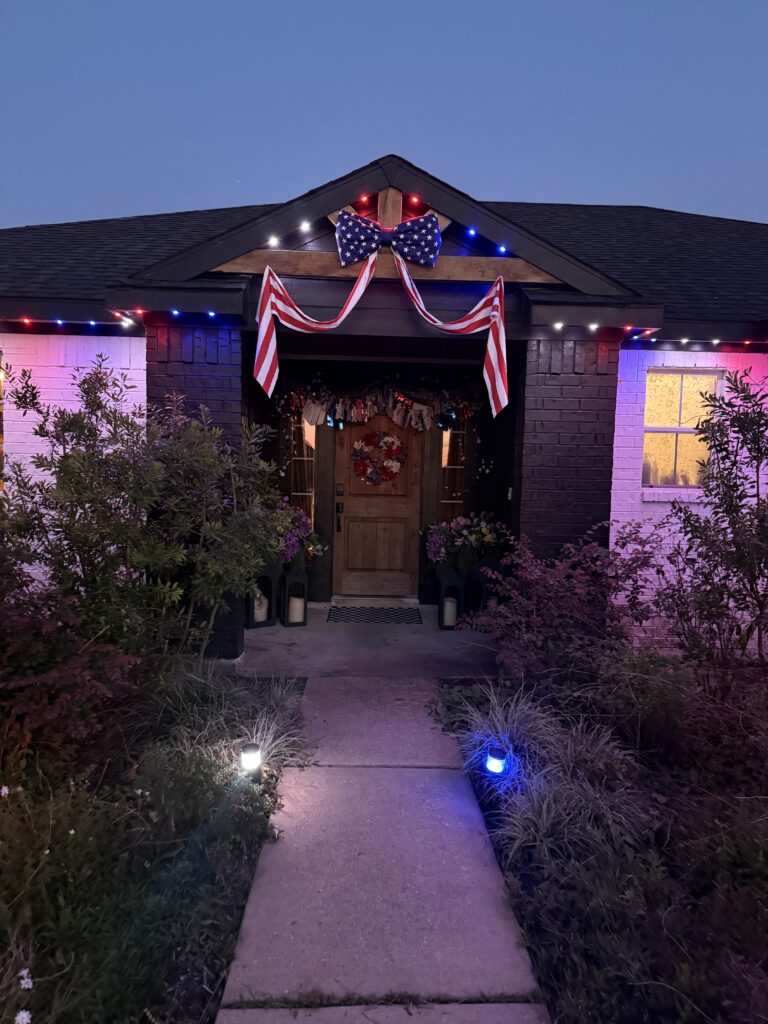
Taking the Decor Outside
While a fireplace mantle is a classic choice, this garland is incredibly versatile. Because we used durable materials like denim and cotton, it can absolutely hold its own outside for a summer party!
- The Backyard BBQ: Drape it along your deck railing, fence, or across the front of your outdoor serving table. (Speaking of entertaining, if you are hosting a crowd this summer, you must try my Red, White, and Blue Watermelon Pizza Recipe…it is the ultimate refreshing, themed dessert!).
- Porch Welcome: Hang it above your front door or wrap it around your porch columns to give guests a festive, patriotic welcome before they even step inside. Speaking of porch… I found this 7′ bow for only $16!
🍂 Adapting the Garland for Every Season
The beauty of learning this simple DIY technique is that you can adapt it for literally any season or holiday just by changing your fabric sourcing!
- Fall & Thanksgiving: Swap the bright reds and blues for deep mustard yellows, burnt oranges, rich browns, and upcycled plaid flannel shirts.
- Christmas: Lean into the festive spirit with emerald greens, velvet ribbons, gold sequins, and classic tartan plaids.
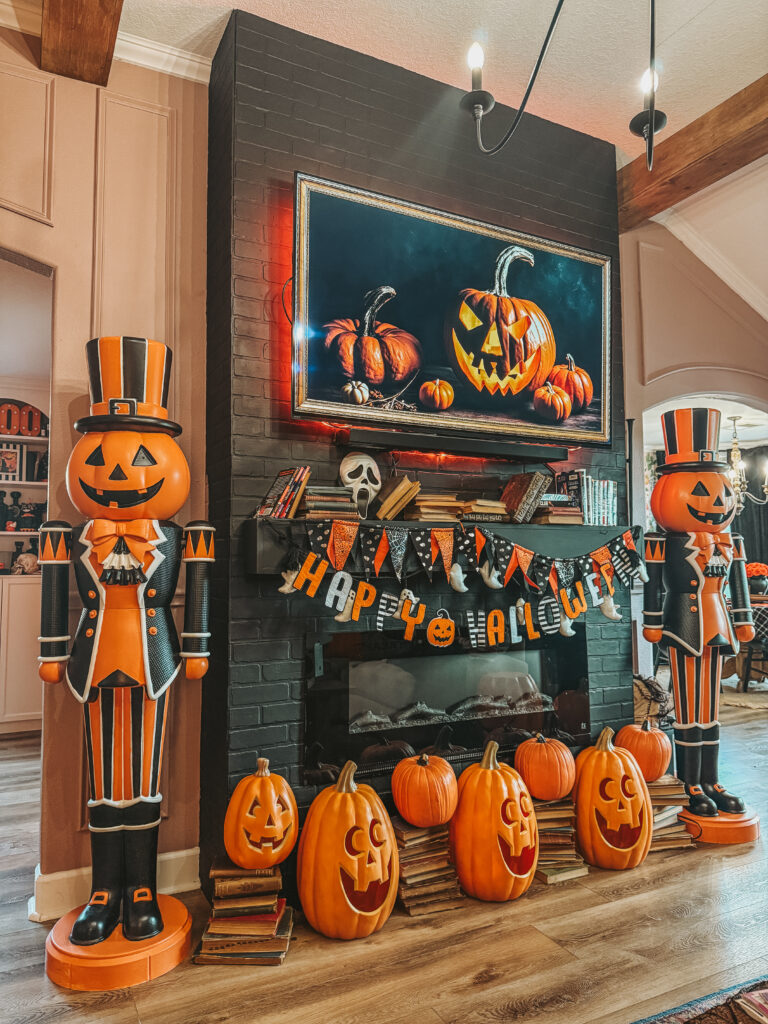
- Summerween: If you are planning a fun “Summerween” event in June, mix bright summer colors with spooky blacks, oranges, and vintage Halloween prints.
The possibilities are truly endless when you embrace the power of repurposing and look at old clothes and scrap fabrics through a creative lens.
💡 Frequently Asked Questions (FAQ)
Can I wash a fabric shag garland? Because of the deliberately frayed, raw edges, I do not recommend putting the finished garland in a washing machine, as it will likely tangle and unravel excessively. If it gets dusty, simply take it outside and give it a good shake. For spot cleaning, dab gently with a damp cloth.
How much fabric do I need to make a 6-foot garland? It depends on how densely you pack your knots! On average, a 6-foot garland requires about 150 to 200 strips of fabric (12 inches long by 1.5 inches wide). It is always better to over-prep your fabric strips so you don’t run out halfway through tying.
My fabric is fraying too much and making a mess. How do I stop it? A little mess is part of the fun! However, if a specific fabric is completely disintegrating when you rip it, you can lightly run a line of clear anti-fray liquid block along the very edges, or simply choose to cut that specific fabric with a rotary cutter rather than ripping it by hand.
Can I use hot glue instead of tying knots? While you can hot glue fabric strips to a ribbon base, I highly advise against it. Tying knots provides that necessary, bulky texture at the top of the garland that gives it its signature “shag” appearance. Plus, tying knots requires no heat, no drying time, and no burned fingertips!
Creating this DIY fabric shag garland is such a fun, therapeutic way to use up scraps and breathe new life into thrifted finds. It proves that you don’t have to stick to the boring basics to celebrate the season.
I would love to see how you make this project your own! What unconventional patterns or thrifted fabrics are you planning to tie into yours? Tag me in your fun creations!!!
Follow me on all my socials for more maximalist decor, DIYs, thrifting hauls, and Festive Fun updates: Instagram|Pinterest|TikTok | YouTube |Facebook
xoxoxo,Ashton Sedita “The Festive Queen”