
DIY Tartan Plaid Lampshade | Thrifted Lamp Christmas Makeover
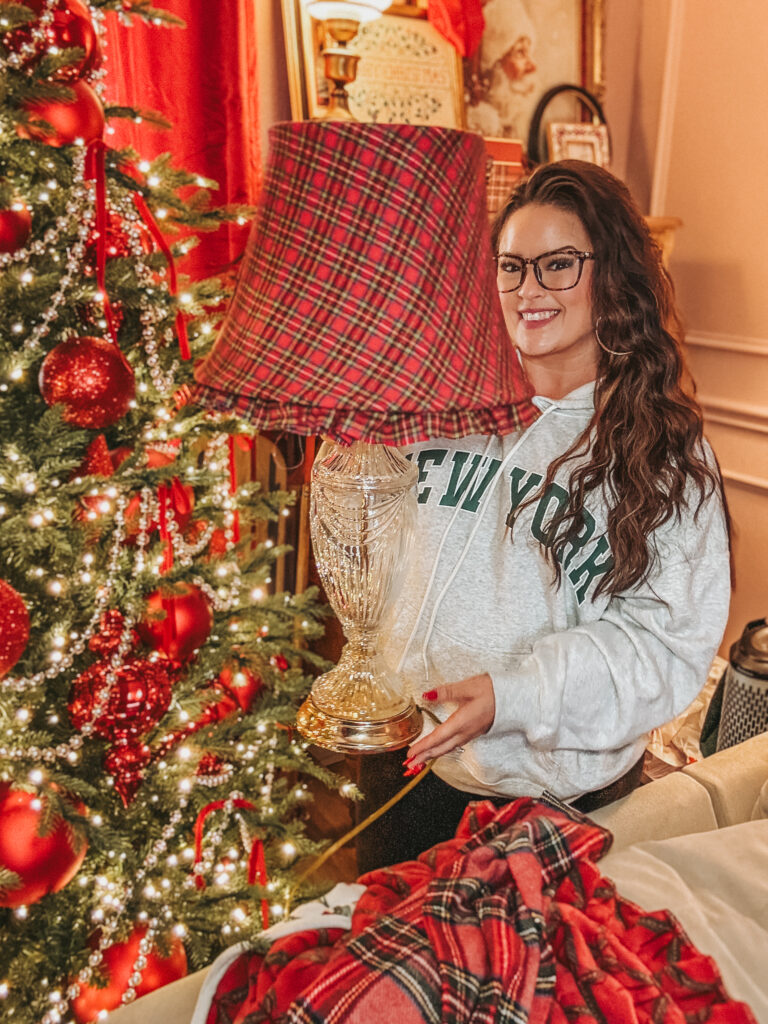
If there’s one thing about me, it’s that no lamp in my house is safe once the holiday season hits. I had fun creating some fun Halloween lampshades and now that Christmas is here I want to do all of the things! Honestly… I will figure out a way festive-ize anything when the holidays hit. This thrifted crystal lamp might be my favorite lamp flip yet.
In this post I’m walking you through how to turn a lamp and a plain lampshade into a cozy tartan plaid Christmas statement piece using fabric, upholstery spray adhesive, and a DIY no-sew ruffle made with hot glue. It’s budget-friendly, beginner-friendly, and looks like something that walked straight out of a nostalgic Christmas movie. Now… remember… if you are reading this in April and don’t want a “Christmas Lamp”… you can use these same techniques with any fabric of your choice. I actually think I might leave this up all year… we shall see.. ha… ask me again in May.
There will be a full video tutorial at the end of this blog post, but I also wanted everything written out step-by-step so you can follow along at your own pace, pin it for later, and shop all the supplies.
The Thrifted Lamp That Started It All
You know I live for a good thrift flip. I originally found this pretty crystal lamp at the thrift store for $2 and immediately pictured it sitting on top of my $20 thrifted cabinet that I recently transformed from dark cherry to a raw-wood beauty. That was fun- and you HAVE to see the before and after.
The shape of the lamp was perfect, the crystal base was perfect, but the lamp shade…Not so much. The lampshade I thrifted with it was a basic neutral and just felt a little… blah especially for Christmas. Soooo… in true Ashton fashion… I had to add my festive flare.
I wanted something that:
• Pulled in all the classic red Christmas decor I already have- I love a nostalgic Christmas theme.
• Tied in with the tartan accents on my ornament frames and decor
• Felt cozy, vintage, and a tiny bit over the top (in the best way)
Why a DIY Tartan Lampshade Is Perfect for Christmas
If you’re decorating on a budget (hi, same) or just love adding personal touches, a DIY fabric lampshade is such a good project. Here’s why I’m obsessed:
• Instant holiday impact: A large lampshade covered in bold plaid stands out in photos and in real life. It looks like a designer piece, but you know the secret.
• Thrift-store friendly: Lamps are one of the easiest things to find secondhand. Don’t worry about the shade or finish – we’re covering it anyway.
• Custom to your decor: You can choose tartan, gingham, solid velvet, or whatever fabric works with your Christmas color palette.
• Beginner friendly: No sewing machine required. If you can use scissors and a hot glue gun, you can do this.
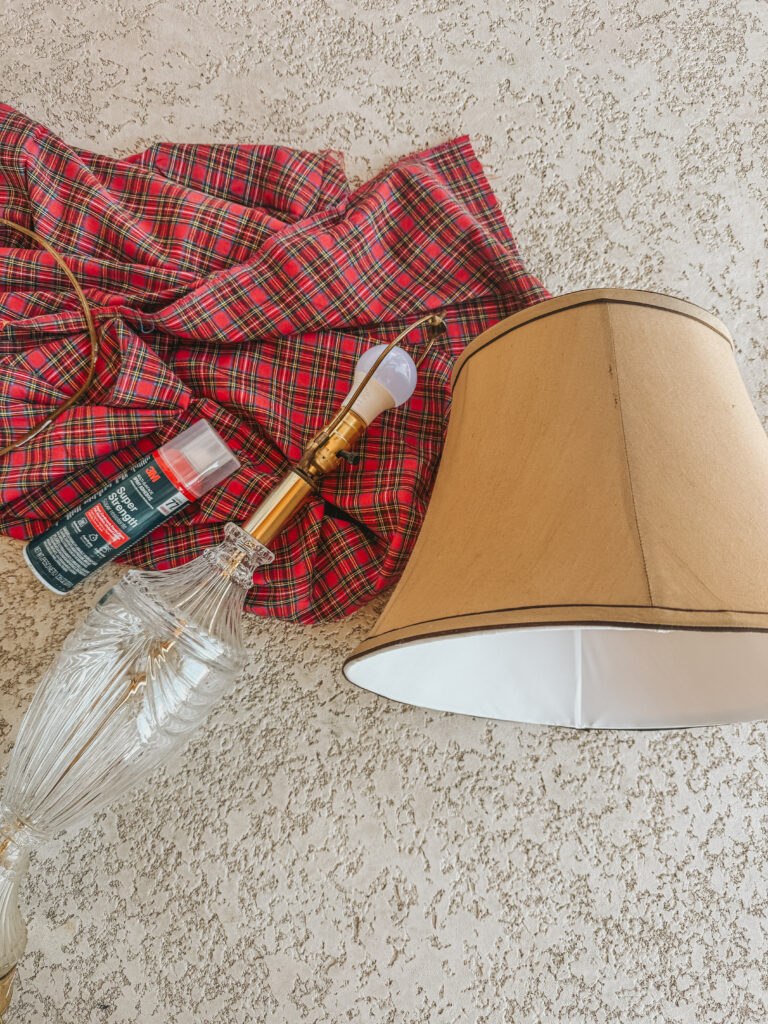
Supplies for a DIY Tartan Plaid Lampshade
Here’s everything I used to create my DIY Christmas tartan lampshade. I’ll link what I can so you can easily recreate the look:
• Thrifted lamp- here is one VERRYY similiar!
• Thrifted lampshade- Any basic shade with a smooth surface works. Mine originally had a neutral fabric.
• Tartan plaid fabric– I grabbed mine at Hobby Lobby, but I’ll link similar tartan fabric options online in case your store is out.
• Upholstery spray adhesive / fabric spray adhesive – I used a strong spray adhesive (think upholstery strength) so the fabric really grips the shade.
• Hot glue gun & glue sticks– Mine’s from Walmart – I’ll link my exact hot glue gun because I use it for almost every DIY.
• Measuring tape or soft ruler
• Clips or clothespins (optional but helpful for holding the fabric while glue dries)
• Drop cloth or old sheet to protect your workspace
Safety note: Always unplug the lamp before working on it, follow the directions on your spray adhesive, and work in a well-ventilated area.

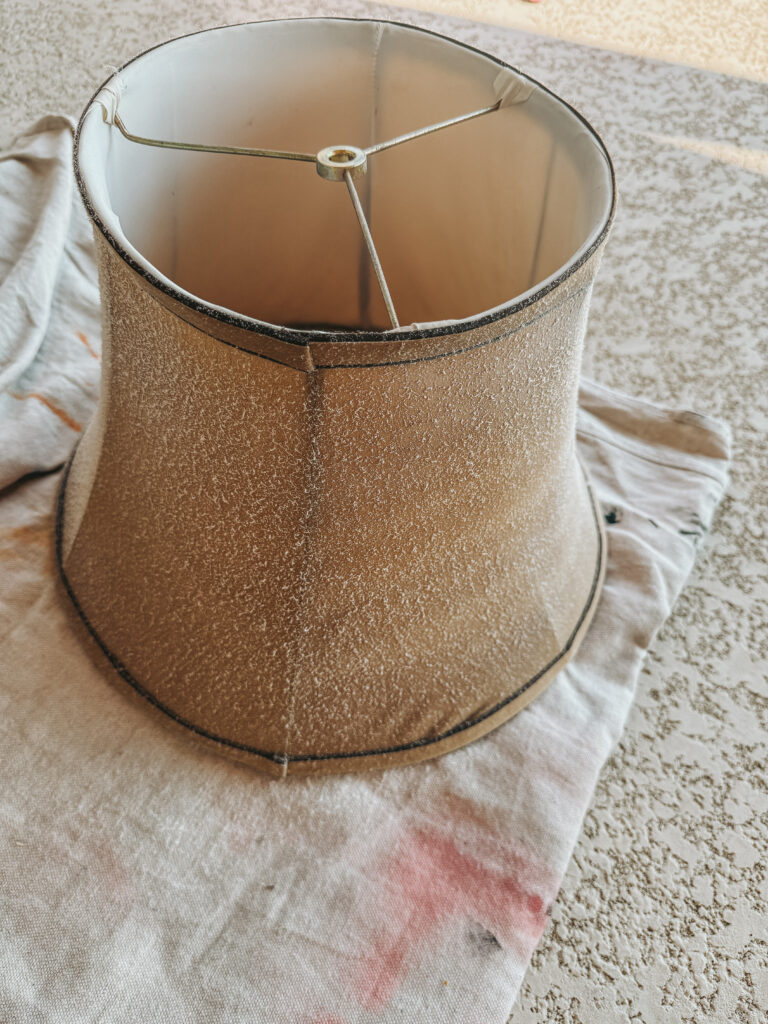
Step One: Prep Your Thrifted Lamp and Shade
Before we jump into covering the shade, you want everything cleaned and ready.
1. Unplug the lamp and remove the shade.
2. Dust and wipe down the lamp base. A damp cloth is usually enough for crystal or glass.
3. Wipe the lampshade with a dry cloth or lint roller to remove dust and loose threads.
4. Cover your workspace with a drop cloth or old sheet, especially if you’re spraying adhesive indoors or on a patio.
If your lampshade has any loose trim, dangling fringe, or embellishments that you don’t love, go ahead and remove those now. A plain base makes it easier to wrap with fabric.
Step Two: Measure and Cut Your Tartan Fabric
To get that clean, snug “store-bought” look, measuring is important—but we’re not going for perfection; we’re going for festive.– my favorite is Perfectly Imperfect
1. Measure the height of your lampshade from top edge to bottom edge.
2. Add about 2 inches to that height. This gives you extra fabric to fold over the top and bottom for a finished edge. (learn from my mistakes the first time)
3. Measure around the largest circumference of your lampshade (usually the bottom). If your shade is tapered, measure both top and bottom – you’ll need a little wiggle room.
4. Add 2–3 inches to your width measurement so the fabric can overlap slightly in the back.
Lay your tartan fabric flat, paying attention to the direction of the pattern. Plaid can be bossy, so decide if you want the lines running straight up-and-down or angled.
Use your measurements to mark out a rectangle and cut it with fabric scissors. Don’t stress if your cut isn’t perfectly straight; the spray adhesive and trim will hide a lot.
Step Three: Attach the Fabric with Upholstery Spray Adhesive
This is the magic step where your old lampshade turns into a cozy tartan moment.
1. Place the lampshade on its side on your protected surface.
2. Shake your upholstery spray adhesive well, following the instructions on the can.
3. Working in sections, spray a light, even coat of adhesive on the lampshade. I like to start at the seam in the back so my fabric overlap lands there.
4. Carefully press the fabric onto the shade, smoothing it as you go.
• Keep the fabric straight so the tartan lines don’t go wild.
• Gently pull the fabric tight, but not so tight that it distorts the plaid.
5. Roll the shade along the fabric, continuing to spray a section of adhesive and then smoothing the fabric down.
6. When you get back to where you started, overlap the fabric slightly at the back seam and press firmly.
Let the adhesive set for a few minutes. Use your hands to smooth out any bubbles or wrinkles while it’s still tacky.
Step Four: Deal with the Top and Bottom Edges
Right now, your lampshade probably has extra fabric hanging off the top and bottom. We’re going to tuck and glue those for a neat finish.
1. Starting at the top, cut little slits in the excess fabric every couple of inches.
• Don’t cut all the way to the lampshade edge stop about ¼ inch before.
• These tiny “tabs” help the fabric curve around the circular edge without bunching.
2. Use your hot glue gun to run a thin line of glue along the inside edge of the shade.
3. One by one, fold each fabric tab over the edge and press it into the glue inside the shade.
4. Repeat the process along the bottom edge.
At this point you technically have a finished tartan lampshade and if you want a simple, clean look, you can totally stop here. I tried that at first, and on lower surfaces it looked fine.
But once I placed the lamp up high on my thrifted cabinet, the white underlayer of the shade and the inside edge peeked through in photos. It just wasn’t giving “cozy vintage Christmas” like I wanted.
So naturally, I took it one step further.
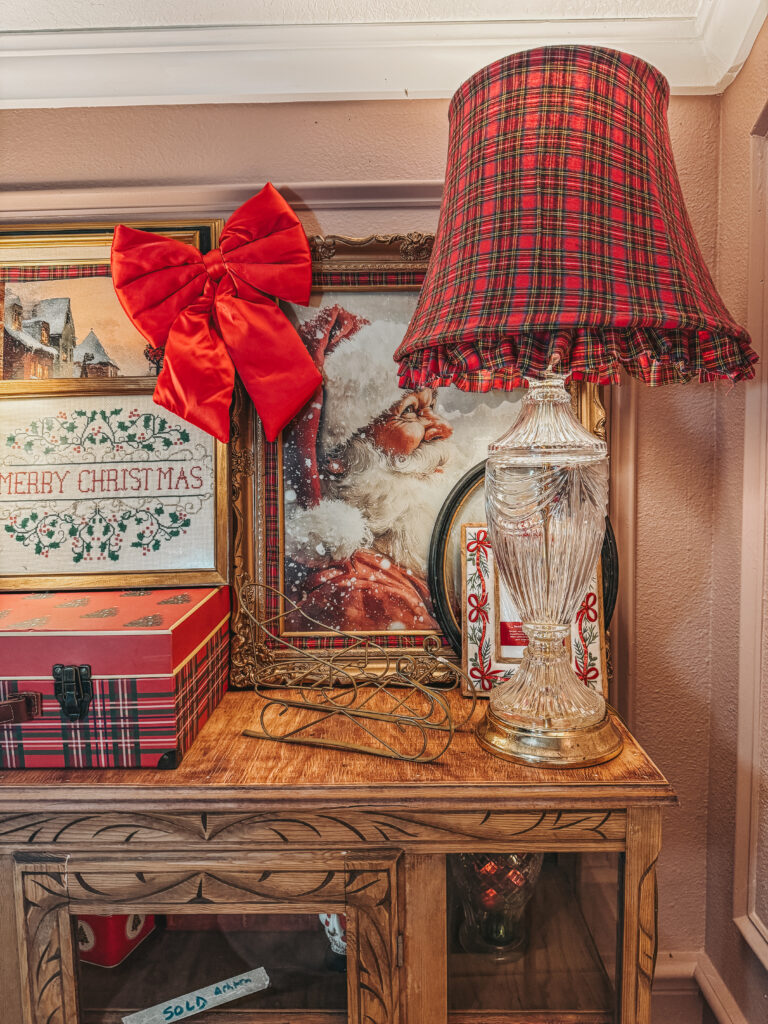
Step Five: Add a DIY No-Sew Ruffle with Hot Glue
The fix? A flirty little tartan ruffle around the bottom edge. It solved the “white showing” problem and added the cutest nostalgic detail.
Here’s how I made a no-sew ruffle using the same fabric and hot glue:
1. Cut a long strip of tartan fabric
• Mine was about 3–4 inches wide and long enough to wrap around the bottom of the shade with extra for gathering.
• If you need to piece strips together, just hot glue the ends with a little overlap.
2. Fold the top edge under about ½ inch and glue it down so you have a clean top edge.
3. Working in small sections, create pleats or gathers by folding the strip back and forth with your fingers.
• Think “ruffle” not “perfect uniform pleats.”
• Every inch or so, place a tiny dot of hot glue and press the fold down to hold the shape.
4. Once you’ve gathered the full length of the strip, it should look like a wavy ribbon of ruffles.
5. Starting at the back seam of the lampshade, hot glue the ruffle along the bottom outside edge, working your way around.
6. When you reach the back again, trim any extra fabric and secure the end with glue.
Now the bottom of the shade has a playful tartan ruffle that completely hides any white showing and adds that extra layer of “this is definitely thrifted but make it fabulous.”
Styling the Thrifted Tartan Lamp for Christmas
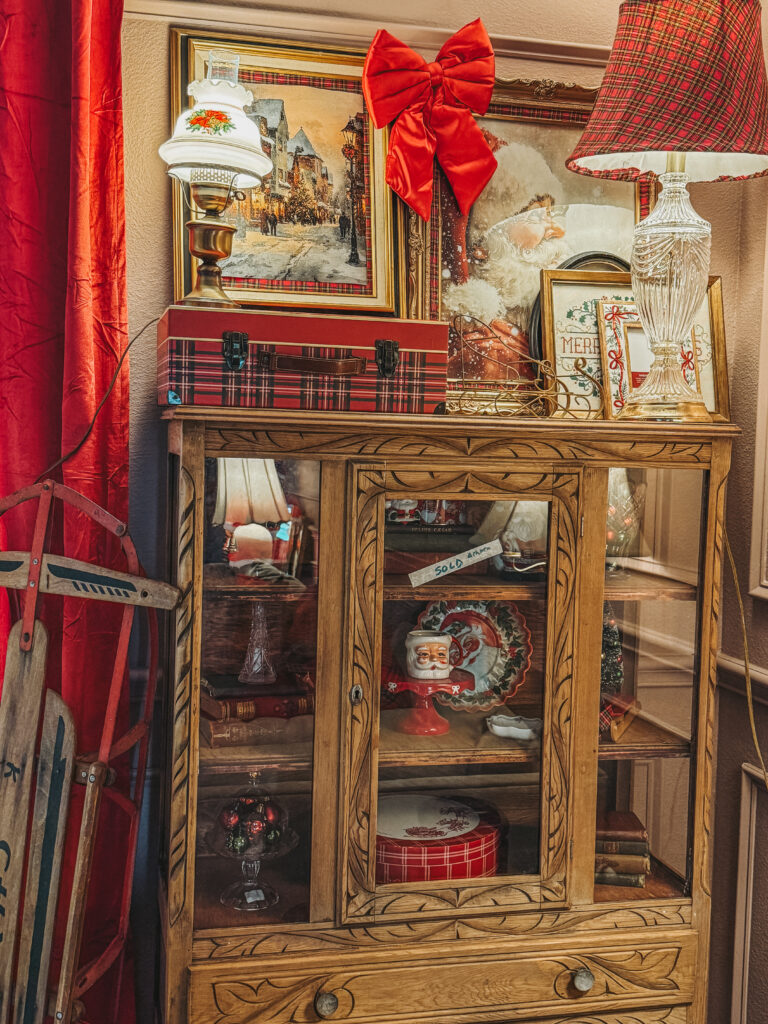
Once the lampshade was finished, I popped it back on the crystal base and set the whole lamp on top of my raw-wood thrifted cabinet.
Instant magic.
Here are a few ways to style your DIY Christmas plaid lamp:
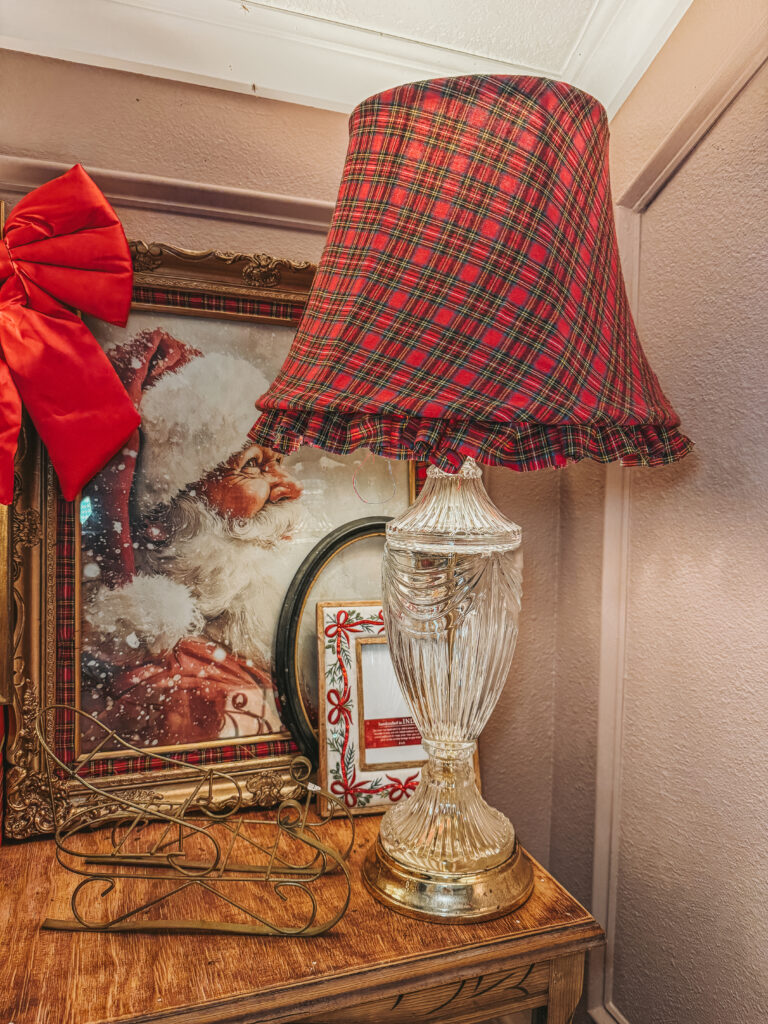
• On a cabinet or console table
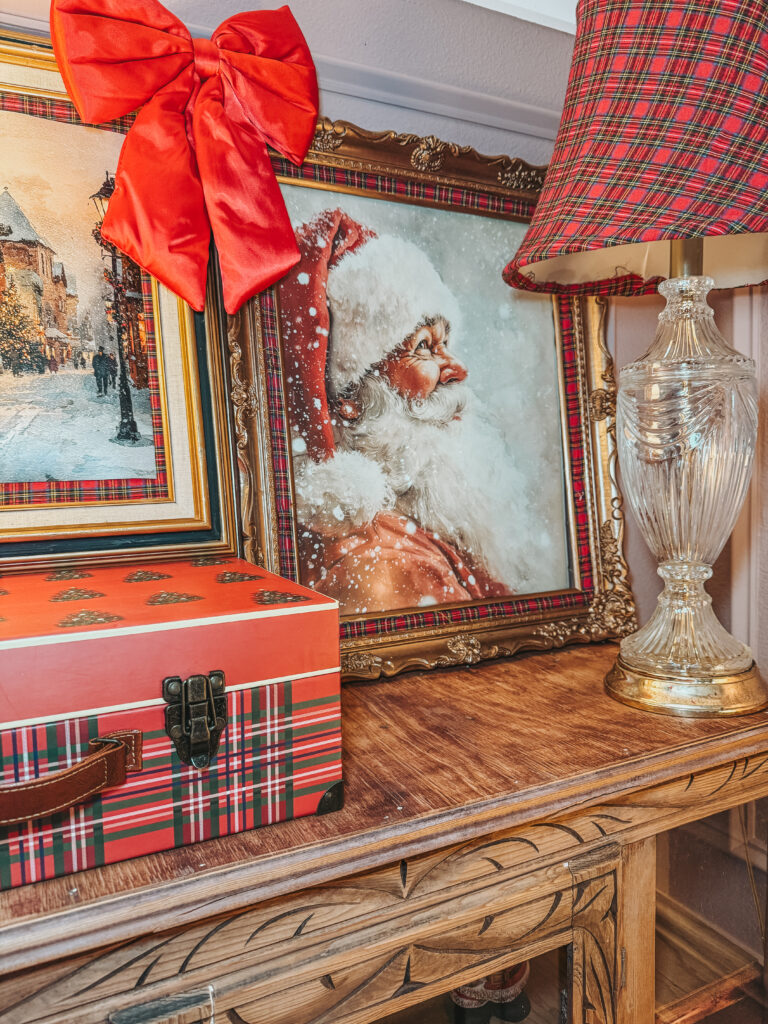
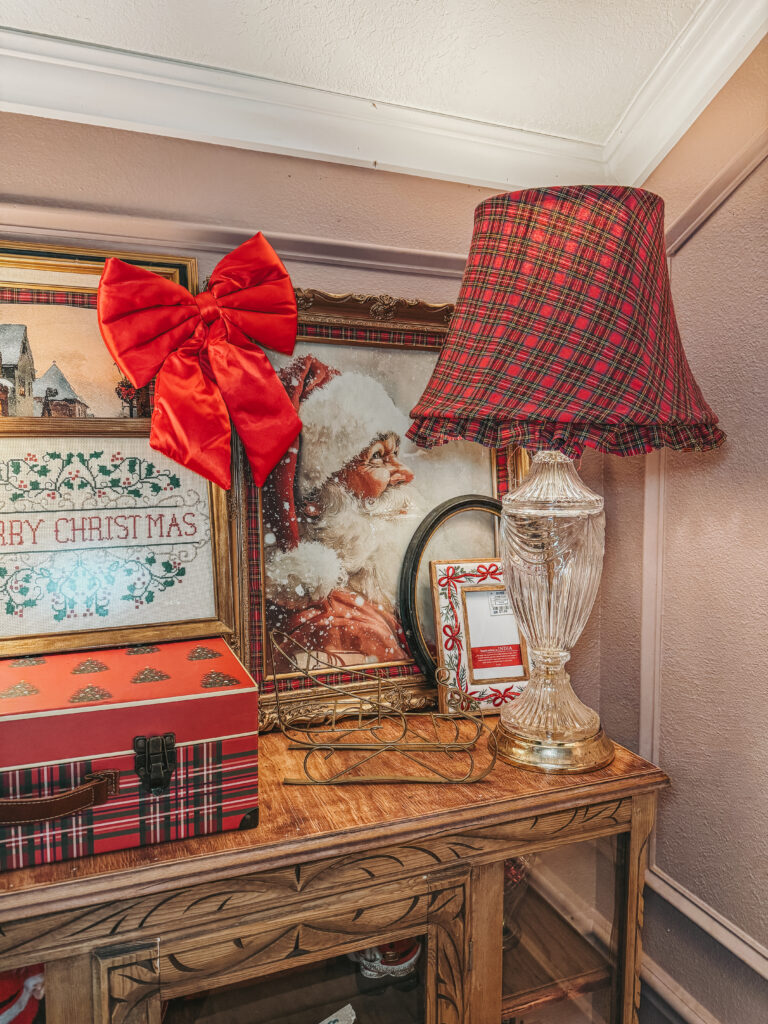
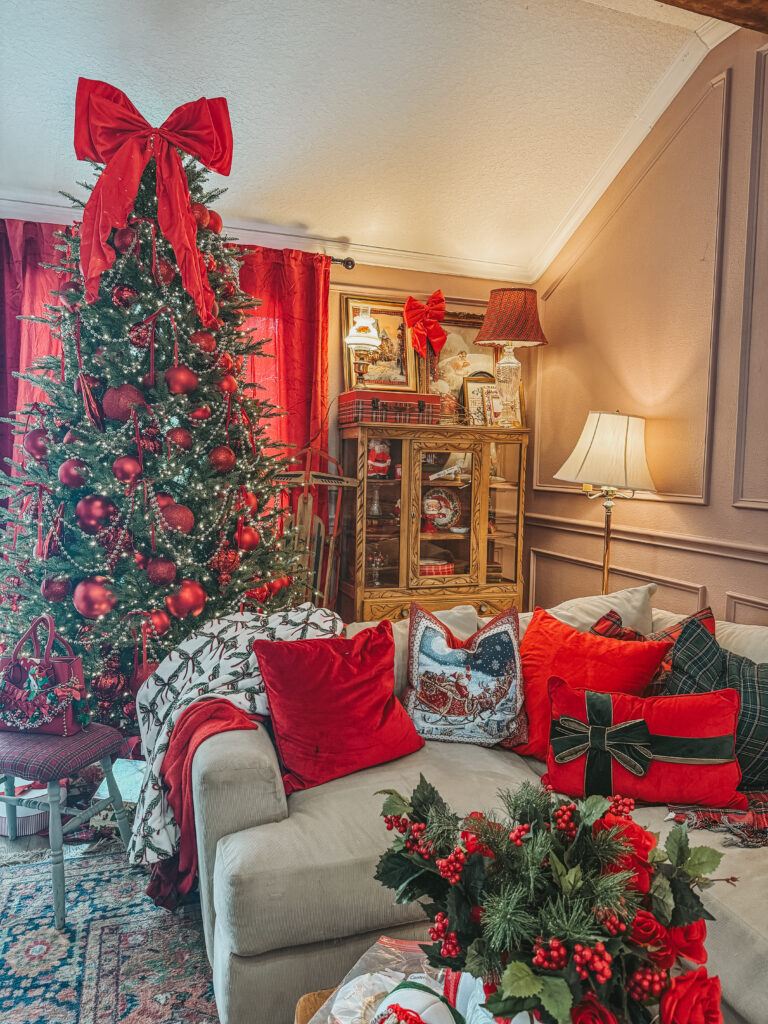
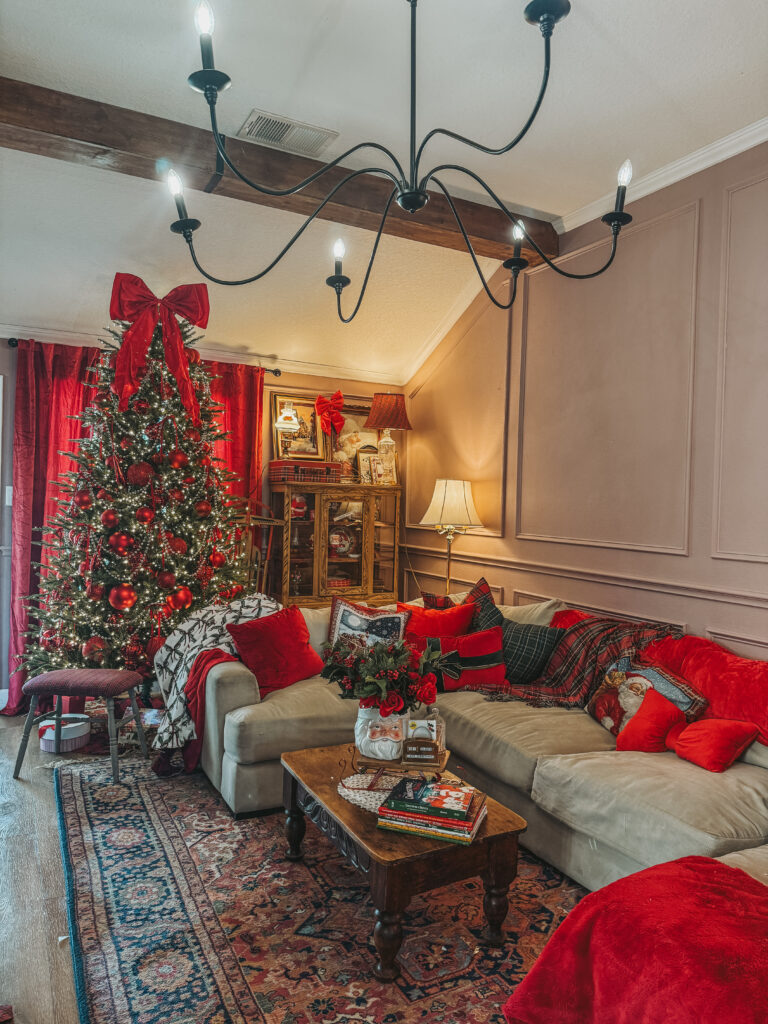
• Pair it with vintage Santa art, stacked books, and a big red bow for a cozy vignette.
• Next to the Christmas tree
• The glow from the lamp plus twinkle lights from the tree makes the room feel like a nostalgic Christmas movie scene.
• On a nightstand or dresser
• Use softer bulbs for a warm bedtime glow and style with a small wreath or bowl of ornaments.
• In an entryway
• Welcome guests with a festive lamp, a plaid box or basket, and a simple “Merry Christmas” sign.
The tartan ties in so nicely with ornament frames I made using the same fabric as a border, plus all the red ornaments and ribbon around the room. If you’re a pattern-lover like me, mixing little pops of the same plaid throughout your space really pulls everything together.
More Tartan & Thrifted Christmas DIYs to Try
If you’re in the mood for a full-on tartan takeover, here are a couple of related projects I’ll be linking in this post:
1. The $20 Thrifted Cabinet Flip
This lamp actually lives on top of my $20 thrifted cabinet that I rescued from the dark-cherry, 90s-furniture life and turned into a beautiful raw-wood piece.
In that tutorial I share:
• How I used oven cleaner to strip off the old stain
• Why it helps to work in a cool, shady area so the product can do its thing
• How I finished the wood so it still looks vintage but updated
If you’re curious how the cabinet under this lamp was transformed, you can read the full cabinet makeover tutorial and see the before-and-after photos there.
2. DIY Tartan Ornament Frames
To keep the look cohesive, I also made ornament frames using printed photos and the exact same tartan fabric. I added a fabric border to the frames so they coordinate with the lampshade and pull in the red from my tree and garlands.
I’ll link that ornament frame tutorial here so you can create a whole matching tartan moment across your shelves and walls.
Tips for Thrifting Lamps for Holiday Decor
If you’re ready to hunt for your own lamp to flip, here are a few things I look for at the thrift store:
• Interesting base shapes
• Crystal, ceramic, brass, or glass bases with good lines usually look amazing once you pair them with a new shade.
• Sturdy shades
• Even if the fabric is dated, look for shades without dents or tears. We’re covering them anyway, but we still want a good structure.
• Working wiring
• Plug lamps in at the store if you can. While rewiring is possible, it’s easier when the lamp already works.
• Pairs of lamps
• If you find two, grab them! Matching tartan lamps on each side of a sofa or bed would be GORRRGEOUSSS!!!!
Remember, you’re shopping for shape and structure, not color or pattern. Fabric and spray paint will do the rest.
FAQ: DIY Fabric Lampshades & Tartan Christmas Decor
Can I use this same method for other seasons?
Absolutely. Swap the tartan for floral, ticking stripe, gingham, or a solid neutral and you’ve got a totally different vibe. Once you do one lampshade, you’ll be eyeing every lamp in your house.
Do I have to use spray adhesive and hot glue?
I like to use upholstery spray adhesive for the large, flat areas so the fabric grabs smoothly, then hot glue along the edges, seam, and ruffle. You could technically do the whole thing with hot glue, but spray adhesive gives a more professional, even finish.
What kind of light bulb should I use with a fabric-covered shade?
I personally prefer LED bulbs because they stay much cooler than traditional bulbs and are more energy-efficient. Always follow the wattage guidelines on your lamp and shade.
Can I wash the lampshade later?
Because we’re using spray adhesive and hot glue, I wouldn’t submerge it. You can dust it with a lint roller or a vacuum attachment on low. If something spills on it, spot clean gently with a damp cloth and mild soap.
A Note on Affiliate Links & FTC Guidelines
You’ll see links throughout this post for things like tartan fabric, spray adhesive, my favorite hot glue gun from Walmart, and similar crystal lamps. Some of these are affiliate links, which means I earn a small commission if you purchase through them…at no extra cost to you.
Per FTC guidelines, I always want to be upfront about that. Those tiny commissions help me keep creating free DIY tutorials, trying new projects, and doing more festive things for y’all all year long. Thank you so much for supporting this little corner of the internet…it truly means the world.
Ready to Make Your Own DIY Tartan Lamp?
If you’ve got a random lamp sitting around (or you’re heading to the thrift store this weekend), consider this your sign: cover that shade in tartan and give it a Christmas glow-up.
To recap, here’s what we did:
1. Thrifted a crystal lamp base and simple lampshade
2. Wrapped the shade in tartan plaid fabric using upholstery spray adhesive
3. Folded and glued the edges for a clean finish
4. Added a DIY no-sew ruffle to hide any white and amp up the charm
5. Styled it on top of my $20 raw-wood thrifted cabinet with Santa art, tartan accents, and a Christmas tree sparkling beside it
Now every time I walk by that corner of my living room, it feels like a little vintage Christmas vignette and it all started with a thrift store lamp.
Share Your Festive Lamp Flips With Me
If you make your own DIY tartan lampshade or flip a thrifted lamp for Christmas, please tag me in your photos and videos so I can see:
• Show me your fabric choices- I LOVEEEE me some vintage fabric!
• How you style your lamp with your tree or cabinet
• Any fun twists you put on the ruffle or trim
You can find me hanging out over on Instagram, TikTok, Facebook, and my email list sharing thrift flips, DIYs, and all the nostalgic festive chaos. @AshtonSedita on all platforms.
Truly, there is no lamp safe in my house and I hope after this tutorial, no lamp in your house is safe either. 😉 We love having a home with character and personalty! Embrace your unique side- and remember it’s your house… you pay the bills… do what you want to your home.
Make sure you’re:
• Following me on social media for daily festive finds and DIY ideas
• Subscribed to my blog so you never miss a new project, recipe, or thrift flip
• Watching the video tutorial at the end of this post for a full step-by-step visual of this tartan lamp makeover
XOXO,
Ashton Sedita


One Comment
Comments are closed.