
How to Strip Furniture with Easy-Off Oven Cleaner (Thrift Store Cabinet Flip)

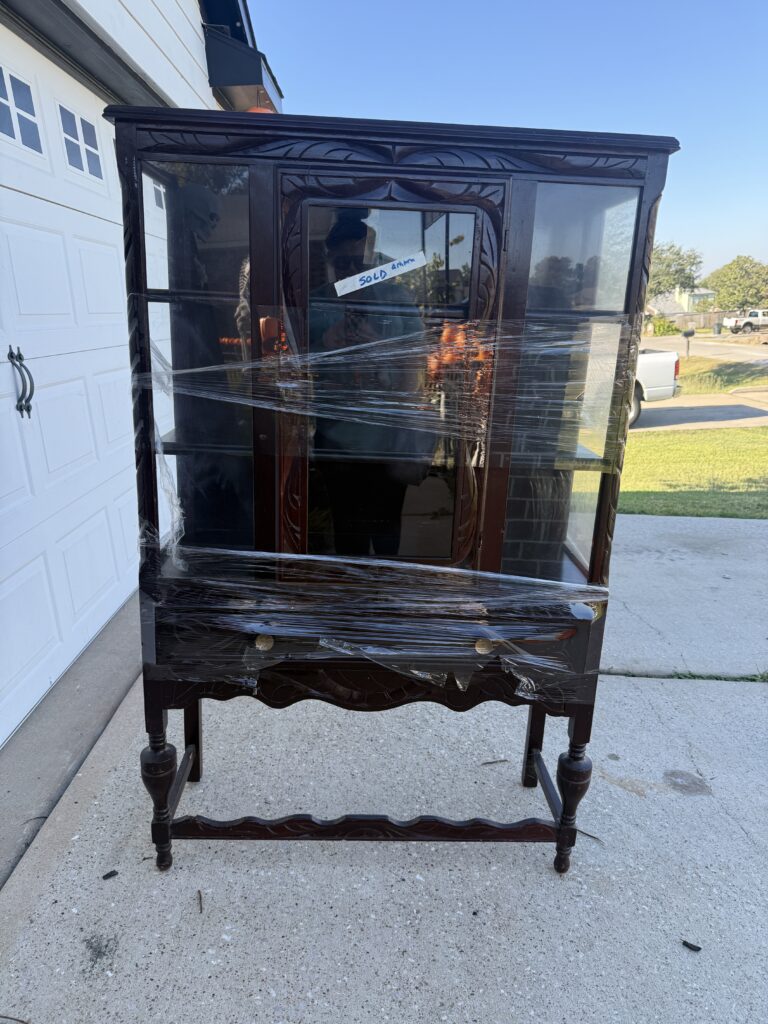
If you can believe it, I almost didn’t buy her. I spotted this beautiful cabinet sitting at our local thrift store, snapped a picture, and kept driving. But as I headed down the road to my Walmart pick up, I could not stop thinking about her. You know that feeling when something just keeps tugging at you? FOMO GOT ME! So, naturally, I turned the car around, marched right back in, and brought her home.. and I am so glad I did. I would have had serious regrets with this one.
She was dark cherry wood when I found her, a little too shiny and dated, but I could tell she had beautiful bones under all that stain. All she really needed was a little tender love and care… and a few cans of Easy-Off oven cleaner.
🎄 Christmas DIY Season Is in Full Swing
Before we dive into this project, I have to say — Christmas DIYs are officially in full swing around here! If you HAVEN’T already… make sure you are subscribed to my blog- so you never miss a DIY. Also…I actually finished my Christmas Bag Bead Charms yesterday (you can read that post here), and it put me in the biggest festive mood. Actually.. I feel like this cabinet got me in the mood.. I bought this cabinet back in September and I knew exactly where I wanted her to go and what I would do with her. And she is everything I imagined and more and has inspired so many DIYs since. Buckle up because I have a lot of Christmas GOODNESS COMING!

🛠️ Supplies You’ll Need
This whole makeover only took a few basic supplies — all things you can easily grab on your next Walmart run.
(Note: some links may be affiliate links; I’m following FTC guidelines, and as always, thank you for supporting my blog!)
• Easy-Off Fume Free Oven Cleaner – LINK
• Dawn Heavy Duty Dish Soap – LINK
• Multipurpose Scrub Brush – LINK
• Medium Sanding Sponge – LINK
• Bucket of warm water
• Lint-free cloth or towel
Optional:
• Drop cloth or plastic sheeting (the oven cleaner can stain concrete — ask me how I know 😅)
• Gloves and a mask for extra protection
• A sunny spot for drying ohhhh… AND YOU NEED A WATER HOSE!
🪄 Step-by-Step: How I Stripped and Refreshed the Wood
Step 1: Prep Your Area
Pick a shaded, well-ventilated area — this is key. You don’t want to work in full sun because the Easy-Off needs time to do its magic, and direct sunlight can dry it out too fast. I worked on mine in the driveway, and although it’s convenient, just know that the spray can stain your surface (my driveway has the proof).
If your cabinet has removable shelves or glass, take those out first — it makes the cleaning process so much easier.
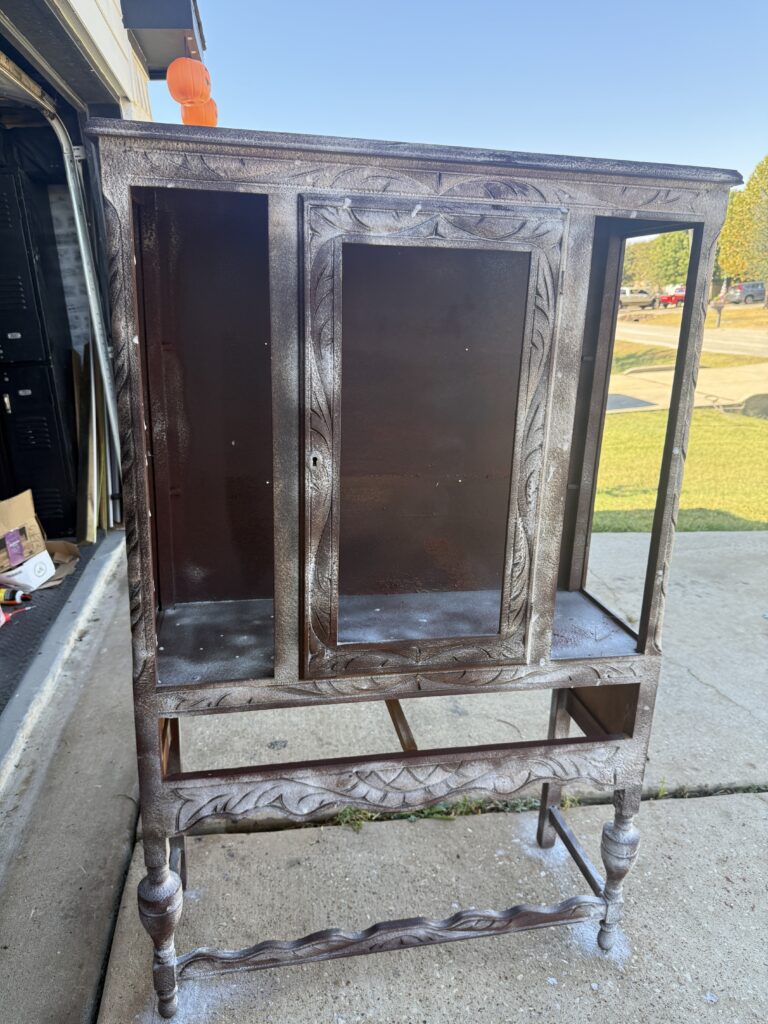
Step 2: Spray a Generous Coat of Easy-Off
Give the wood a good, even coat of Easy-Off Fume Free Oven Cleaner. Don’t hold back… I ended up using about 10 cans total for the whole project.
Let it sit for at least 30 minutes (or even longer if your piece has a thick, glossy finish). The cleaner starts to loosen up that heavy stain and grime, pulling the color right out of the wood grain.
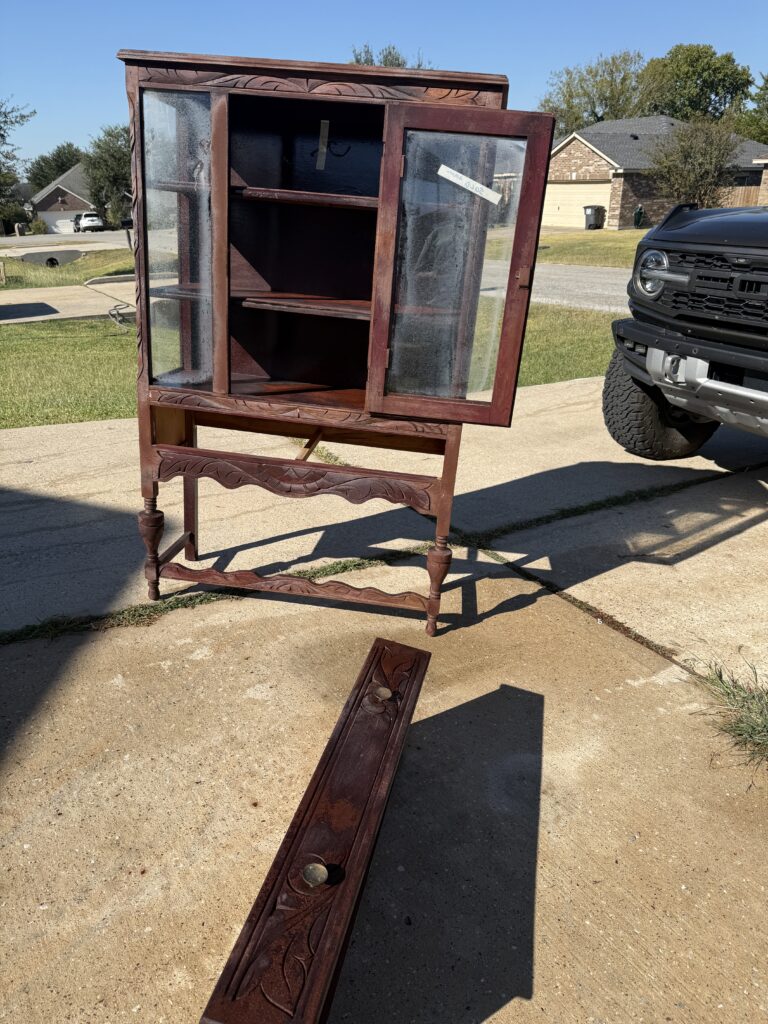
Step 3: Scrub, Rinse, Repeat
Now it’s time to work some elbow grease. Fill your bucket with warm water and a few pumps of Dawn dish soap, grab your scrub brush, and start scrubbing.
You’ll see the old finish begin to lift away …it’s oddly satisfying! Dip your brush often and keep the surface damp so you’re really getting into the grain. The more you scrub, the more that dark cherry stain comes off, revealing the natural wood underneath. Lastly you want to spray off all the scrubbed off stain with the water hose.
I like to think of it as giving the piece a little “spa day.”

Step 4: Rinse and Wipe Clean
Once the wood feels smooth and free of residue, go over it with a lint-free towel to remove any leftover cleaner.
You can tell right away if your piece is real wood — when it’s wet, it has that raw, matte texture that just looks alive. If your piece feels slick and shiny underneath, it may have a veneer, and you’ll want to be a little gentler.
Step 5: Dry Completely
This step is crucial! You don’t want to move on until your furniture is completely dry. I set mine out in the Texas sun for the afternoon …. it didn’t take long at all.
You’ll notice the tone of the wood changes slightly as it dries, settling into the most beautiful raw finish.
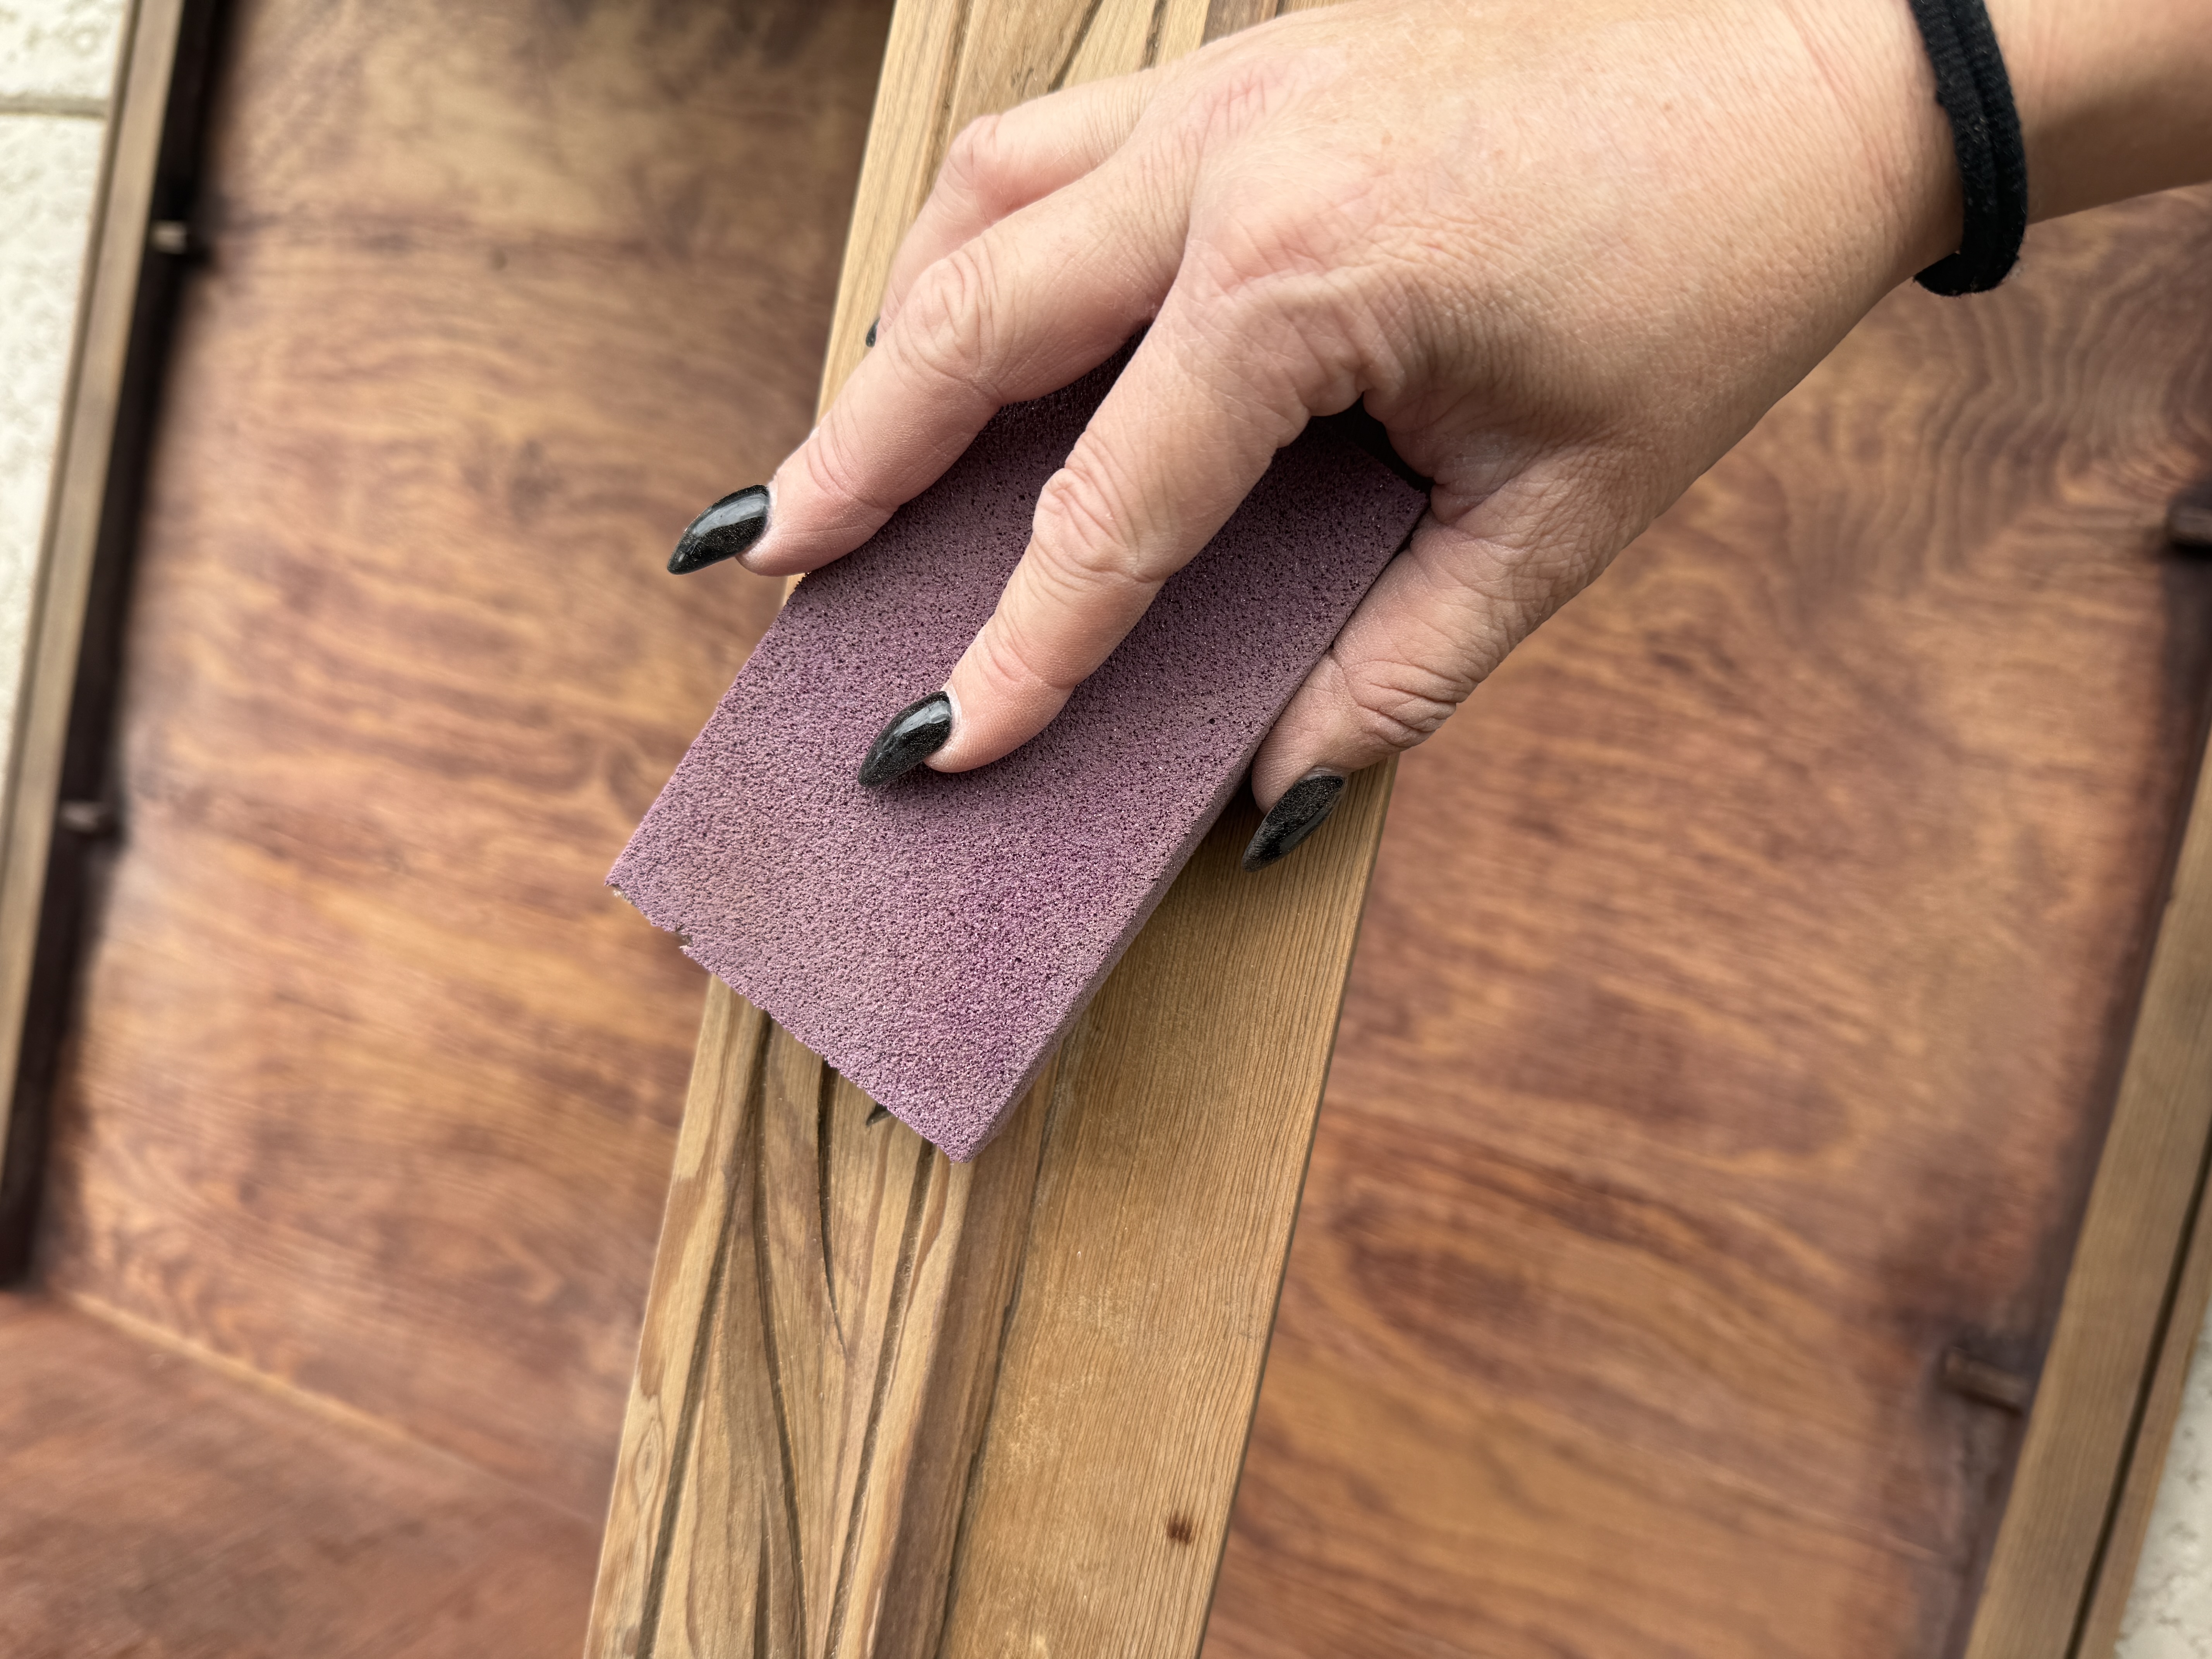
Step 6: Lightly Sand for Smoothness
DO NOT- start this step until you have your piece stripped. So I repeated Steps 1-5 – 3 times before sanding. Once you have your desired tone for piece you want to make sure everything was dry, I took a Gator Medium Sanding Sponge and lightly buffed the entire surface. This isn’t to remove more color — just to smooth out the grain and edges.
The sanding sponge is flexible, so it gets into those carved details and corners perfectly. After sanding, I wiped the whole piece down again with a clean towel to remove dust.
Also.. once you get to the raw wood you can stain it a different color if you would like- I personally LOVEDDDD this color AND I loved the darkness in all the groves… I just feel like it tells a story.
Step 7: Style & Enjoy
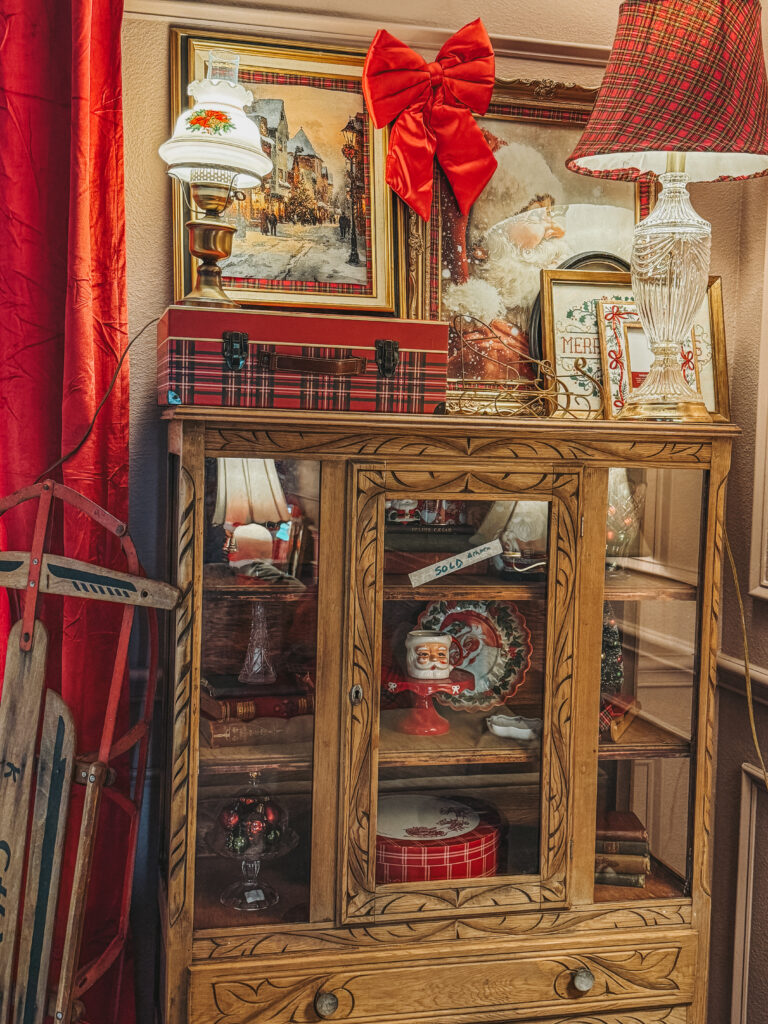
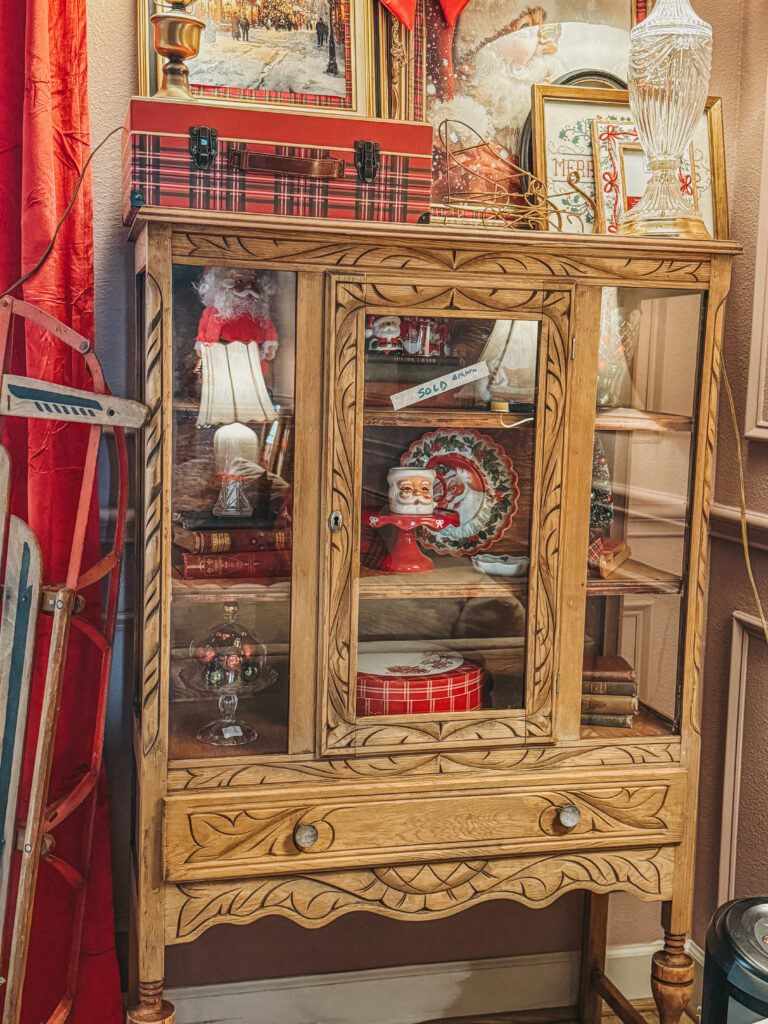
I decided not to seal or stain mine (at least for now) because I absolutely love the look of the raw wood. It has that perfectly imperfect, vintage European feel — almost like it’s straight from an antique shop in the English countryside.
And with Christmas coming, I couldn’t resist styling her up with all my festive favorites… plaid boxes, Santa mugs, vintage prints, and a big red velvet bow right on top. She’s definitely the statement piece of the season!
💡 Optional Touches
If you want to take it one step further, here are a few ideas for customizing your thrifted cabinet:
• Wallpaper the Back Panel: Add a pop of pattern behind the shelves (I’m thinking I might try this in the new year).
• Replace Hardware: Swap out knobs or pulls for brass or glass for a vintage touch.
• Add Lighting: A tiny battery puck light inside the cabinet gives that warm glow that makes collectibles shine.

🪴 Why I Chose the Easy-Off Method
I’ve stripped furniture the traditional way before, and honestly…I found the Easy-Off method so much easier. It might not be the most cost-efficient if you’re doing a large piece (I did go through about 10 cans!), but it’s simple, clean, and effective.
There’s no sticky residue, no harsh fumes, and no endless scraping. Plus, it’s oddly therapeutic watching years of stain lift away with just a brush and some soap.
🏡 Styling My “New” Cabinet
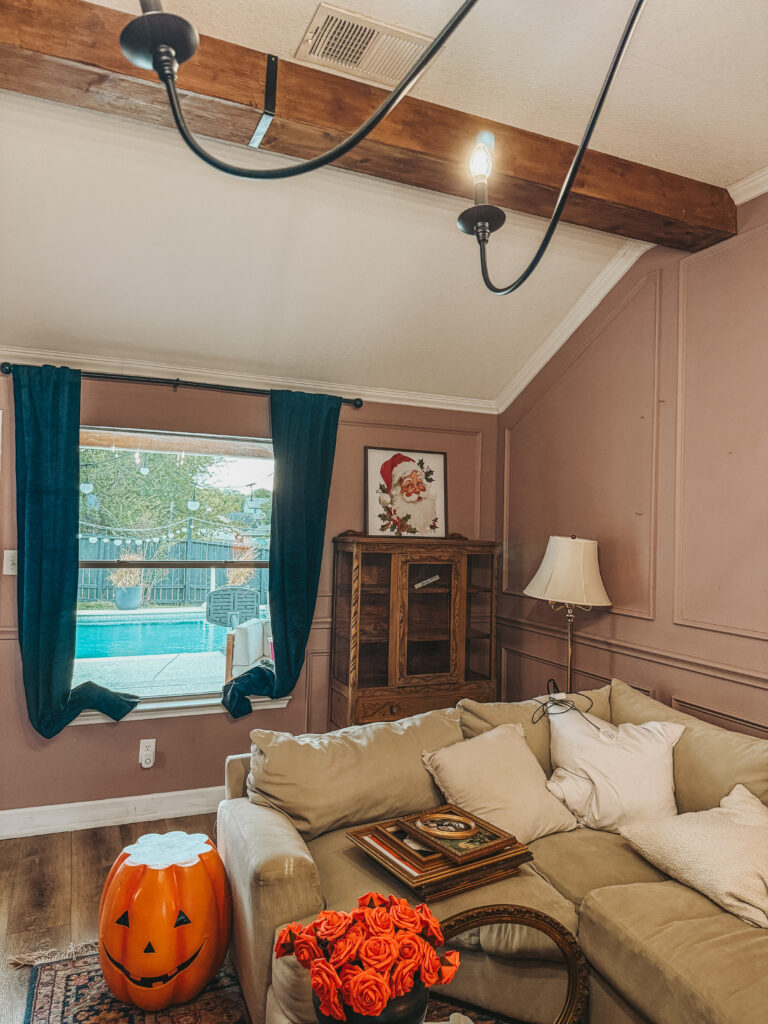
Once it was clean, dry, and sanded smooth, I brought her inside and immediately started decorating. She fits perfectly in the corner of my living room beside the Christmas tree.
Inside the glass doors, I added a mix of vintage Santa mugs, plaid boxes, and thrifted décor that ties everything together. On top, I layered artwork with a nostalgic winter village scene, a red plaid suitcase, and a big red bow — the cherry (or should I say not-so-cherry-wood) on top!
Between the layered lamps, the warm glow of the Christmas lights, and the cozy plaid pillows, it feels like a Hallmark movie set in real life.

🧵 Lessons Learned
• Always check that your piece is real wood before soaking it…Veneer can bubble if it gets too wet.
• Work in cooler weather or shade to let the Easy-Off really work its magic.
• Keep extra towels handy…it gets messy, but that’s part of the fun!
• Don’t rush the drying step ….it makes all the difference in your final finish.
• And most importantly, trust your gut at the thrift store. If you can’t stop thinking about it, go back and grab it.
🎁 Final Thoughts
This cabinet might have started as a dark, dated thrift store find, but now she’s a show-stopping Christmas statement piece …all for just $20 and a few simple supplies.
I love how this project proves that sometimes the best home pieces are the ones that have a story. With a little patience, a few Walmart finds, and a lot of scrubbing, you can turn something old into something you absolutely adore.
If you try this Easy-Off wood-stripping method, tag me on Instagram @ashtonsedita — I love seeing your projects! And make sure you are subscribed to my blog and following me on socials so you never miss a fun festive DIY. Here’s to breathing new life into forgotten pieces and filling our homes with things that make us happy.
HAPPY THRIFTING THURSDAY!
Now… onto my next project (spoiler: it involves even more Christmas sparkle 😉).
xoxo,
Ashton Sedita


2 Comments
Comments are closed.